7
$\begingroup$

So I tried one of the Blender Guru tutorials, which ends with depth of field settings.

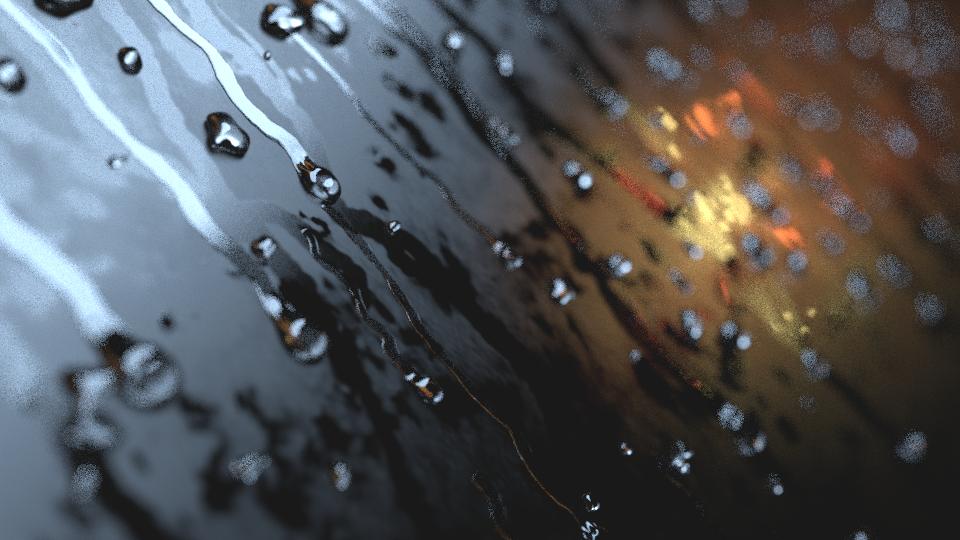
The blurred lights are however too noisy:

Render with DOF, 500 samples

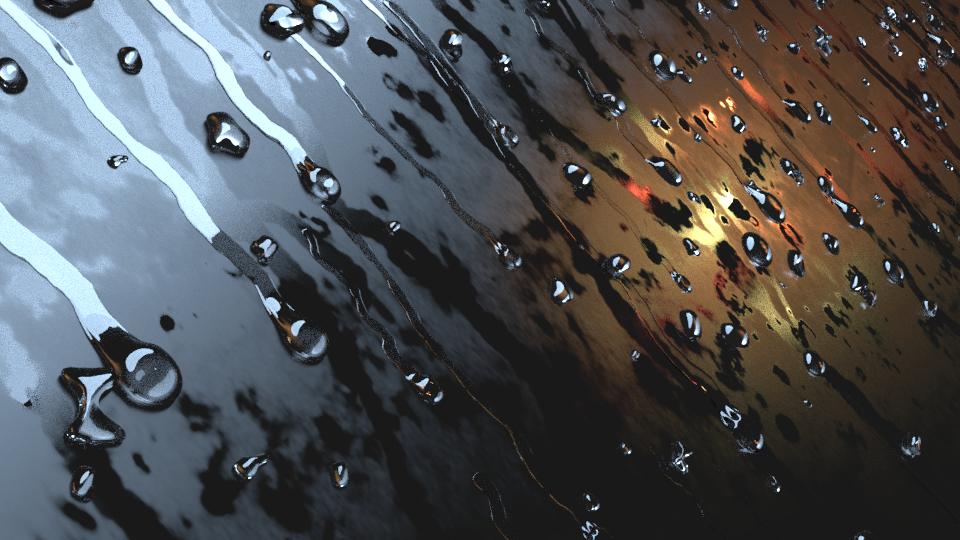
Which is strange, because when I turn DOF off, the distant droplets look all right

Render without DOF, 500 samples

Any idea what might have caused this? (Rendered at 500 samples. Droplets use simple glass shader.)

$\endgroup$
1
  • $\begingroup$ Could you upload the blend file? $\endgroup$
    – Pythogen
    Commented Nov 17, 2016 at 20:46

3 Answers 3

11
$\begingroup$

DOF raytracing requires more render samples, because the same pixel requires more rays to be calculated.

Imagine simple pin-hole camera with no DOF - rays are shot from camera pixels and each lands on specific point in the scene. After that they scatter (that's why you need many samples per pixel).

Now with DOF the aperture is open so every ray from each pixel has more ways to exit the camera (infinitely more) and can land on different points in the scene. So the bigger the aperture the more samples you need to get clear image.

$\endgroup$
1
  • $\begingroup$ Thanks, increasing number of samples worked... Although it is pretty sad that I have to wait 8 times as long to get a good result. $\endgroup$ Commented Nov 17, 2016 at 19:47
4
$\begingroup$

I am not sure what causes this, but I know a way around it!

First, I would just like to say, very nice render with good lighting!

To fix the problem I would "cheat" the depth of field using the compositor,

Option 1, Use the Defocus Node

Here is a tutorial on how to use the defocus node

Option 2, Use the Mist Pass combined with the Guasian Blur

  1. Open the Scene Tab (The scene tab is one right of the camera icon): enter image description here
  2. Enable mist pass
  3. Select the camera, and under the camera tab enable mist pass limits
  4. In the world tap mess with the start and end to tweak the "Depth" of the mist.
  5. Hit render
  6. Open the compositor
  7. Add in the following nodes: color ramp, blur, mix.
  8. Connect the mist output to the color ramp and the color ramp output to the fac input on the mix
  9. Connect the image output to the blur input and the blur output to the one of the mix input.
  10. Connect another image output to the other mix input.
  11. Mess with the blur values to increase defocus
  12. Mess with color-ramp to change defocus range

Please let me know if you a picture for the node setup

$\endgroup$
2
  • $\begingroup$ Alright, so I tried the defocus node, but it doesn't work so well... imgur.com/FiHAwIb Also I can't seem to get the mist working: I can't see any results, and I tried all possible combinations of start and depth (including 0 0) $\endgroup$ Commented Nov 17, 2016 at 19:36
  • 2
    $\begingroup$ Turn off the "preview" mode on the Defocus node, looks like you're set to the low-quality preview mode on it atm. Also, if you want to do the mist method use the "bokeh blur" node, not gaussian blur. Actual lenses will never defocus on a gaussian pattern, the result looks very fake. $\endgroup$
    – JtheNinja
    Commented Nov 18, 2016 at 3:11
2
$\begingroup$

I would render a scene like this with 2000 samples minimum, setting pixel filter width to 1 (under FILM Panel in the Render Settings Tab). This should deliver a clean result, which then can be have added real life camera imperfections in the compositor.

By the way, I think it is always better to add real life camera imperfections such as DOF (using z depth), Dispersion, grain and so in in the compositor. Imagine you are not comfortable with the DOF of the render, then you can't change it without re-rendering it, which can be painful especially for large renders. Regarind your image it look already very good, but it would look even better with very little dispersion (Lens distortion node in the compositor).

$\endgroup$
1

You must log in to answer this question.

Not the answer you're looking for? Browse other questions tagged .