0
$\begingroup$

enter image description here

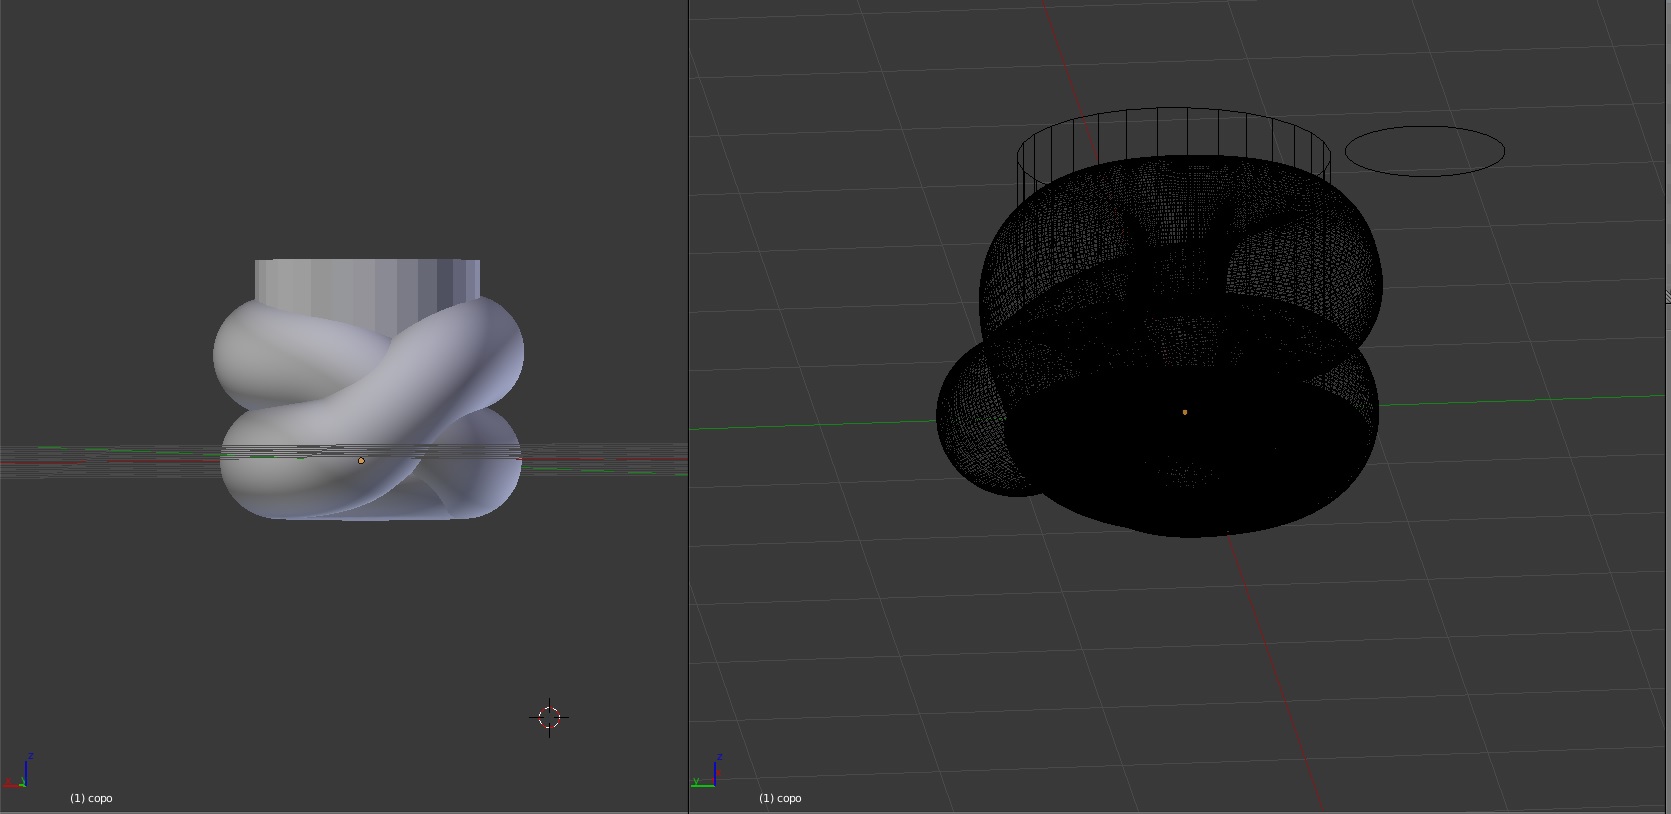
I want to cut out the "cylinder" inside this shape I made to create a coffee cup, but after choosing Difference as the operation and the cylinder as the object, all I'm left with is the cylinder.

The outer shape was originally made using several connected bezier curves, closing the shape and then converting it to mesh using Alt+C in object mode.
I have tried removing doubles as a means of resolving this issue (as suggested on other questions) on both objects, but it always says 0 vertices removed.

P.S: I am not very experienced with blender, so excuse my noob-ness.

EDIT:

$\endgroup$
4
  • $\begingroup$ Try going into both meshes, and in Edit mode select all vertices, then in the Panel @ Left (toggle via the "T" key) there is a tab for "Shading/UVs". Under the Normals section: Click, "Recalculate". Then make sure that you are performing the operation as Blender expects it. If you want to remove the Cylinder from the Rope, then Add the Boolean>>Difference modifier on the rope mesh, and in the object section of the modifier select the reference to the cylinder. Another note of caution, is that these modifiers are never 100% from my experience. $\endgroup$
    – Rick Riggs
    Commented Feb 22, 2016 at 16:27
  • $\begingroup$ Welcome to the Blender.SE! I'd like to admit this is rather strange coffee cup :) But seriously this may be too complex shape for Boolean modifier which doesn't like intersecting geometry among some other things. You could upload your file to this service for more in-depth investigation. $\endgroup$
    – Mr Zak
    Commented Feb 22, 2016 at 17:03
  • $\begingroup$ @RickRiggs I did all those things, and still got the same result, unfortunately. Do you know another way to get the same effect using another tool, maybe? $\endgroup$ Commented Feb 22, 2016 at 21:30
  • $\begingroup$ @MrZak Thank you! It's strange indeed, I'm doing it for a design contest/college project. Do you know another tool or another way to get a similar result? All I'm missing is that inner concavity. I also added the file if anyone wants to check it out. $\endgroup$ Commented Feb 22, 2016 at 21:32

2 Answers 2

2
$\begingroup$

It will be rather hard using Boolean in this case because there are a lot of self-intersecting parts in the mesh and modifier won't give expected results just after it's added; additional complexity is provided by form of the mesh.
It's possible to cut through it without using Boolean modifier, however form of the cup which should be cut out won't be taken into account.

Knife Project

To cut through this mesh use Knife Project tool. For details see How would you cut a shape out of an object using another object

  1. Enter Edit mode of the cup's design, select its bottom, and separate it by selection (P > By Selection). The bottom part shouldn't be cut through. If skipping this step the hole will be all through the mesh.
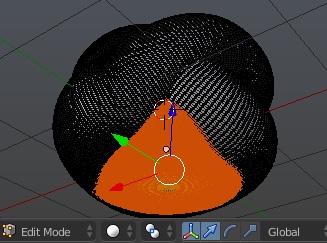
    mesh shown from below, bottom is selected

  2. Enter Edit mode for cylinder and delete everything but the top face.

  3. In Object mode select ex-cylinder (now that Ngon), then select design of the cup, press Numpad 7 to enter Top View.
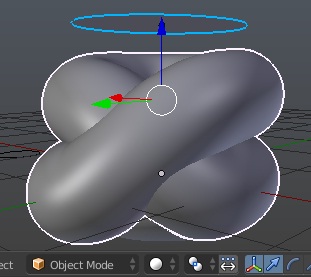
    setting up for Knife Project

  4. Enter Edit mode of the highpoly cup and on the Toolshelf panel (T in 3D View) find Knife Project. After executing in the operator's options check Cut Through. This is done to make tool to cut through all mesh, not just what is seen from the current view.
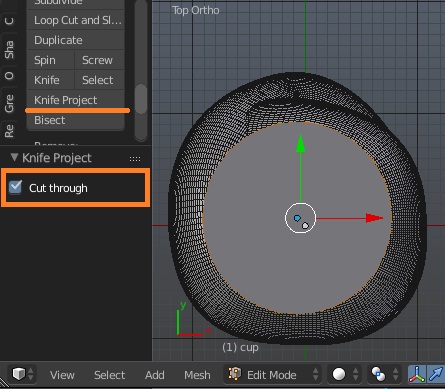
    Knife Project options

  5. If the inner part of the mesh shouldn't be filled with loops, then it's ready (you can recreate the cylinder and join it to "hide" the inner geometry). If this open geometry is undesired then you should manually select parts of loops and use Bridge Edge Loops, like this:
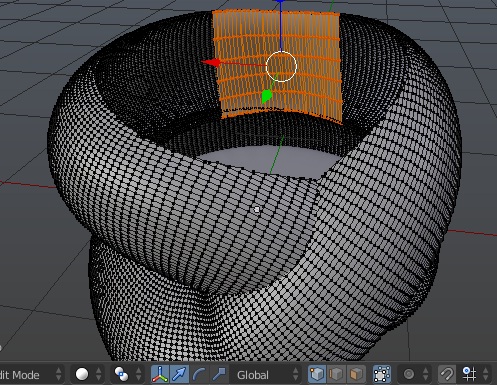
    filling with loops

Boolean

It is possible to cut the cylinder out using modifier, though it's much more complex. It didn't work before because of self-intersections in the mesh; thus you should get rid of them.

To do that, in Edit mode select all and press Ctrl+F > Intersect. Make sure in operator's options check Self-Intersect. It's a kind of Boolean but in Edit mode.

It made all intersected parts to be cut by each other. The only (easy one) thing left is to delete those parts which were cut.
Example of such selecting these "self-intersecting" parts is shown below:

Selecting a mess inside of mesh

Note that this is not the only part you should select in order to make Boolean work right afterwards. This is quite time-consuming process so prepare to use some selecting tools like Loop Select, Select Loop-Inner Region and so on.
Once these parts are deleted select all and access Mesh > Clean-Up > Delete Loose, and (there too) Degenerate Dissolve.
Note: removing doubles will delete supporting vertices around intersecting parts, so shading and form of mesh can be corrupted.
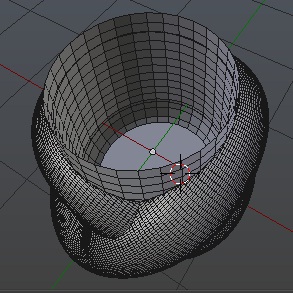
cutted out cup

Still the resulting mesh seems to cause Blender not responding sometimes, so it may be unnecessary complex and heavy. It's worth using 1-st way, leave some parts of geometry and hide them with cylinder of the cup itself.
You can take a look at the file if it meets your needs.

$\endgroup$
1
  • $\begingroup$ Since I did not want to cut the shape all the way through (though now I know how to do it if I ever need to), I kept the file with the cylinder showing and simply deleted the "extra" parts (the parts of the cylinder that extend beyond the rope loop. Thank you so much for your help! $\endgroup$ Commented Feb 23, 2016 at 21:00
1
$\begingroup$

I do know of a way that you can accomplish this.

It is not as elegant as using a Modifier (but hey when the Modifier doesn't work that's not very elegant either).

Essentially here is what I recommend:

  1. go into edit mode on the cylinder (Make sure you are in Ortho Mode NOT Perspective 5 Toggles).
  2. erase the intermediate edges and faces (ONLY).
  3. separate the two circles (highlight one and P >> Selection).
  4. while in edit mode -> if you selected the top and separated that selection from the bottom (then goto the bottom view eg. Ctrl+7), otherwise goto the top view 7. 5.Turn your snapping on to face mode, then make sure the drop-down mode is set to Closest, and then click the button just to the right two buttons that has a circle and square icon (if you mouse over it it will say something like project individual elements...).
  5. Highlight all of your vertices, and then G, then Z, then move your mouse toward the top of the screen, and left click.
  6. Repeat the same steps for the opposite (separated sides).
  7. When you have both rings projected down to the "Rope" shape, go to the top view and circle select all of the verts inside the circles & delete them.
  8. Go back to edit mode, then select the two loops & the "Rope", and join them all.
  9. you are going to have to fill the gap between all of the perimeter of the broken "Rope" and the rings with new faces.
  10. select both ring verts, and then W >> Bridge Edge Loops.

This should all work.

----Per the comments Below--

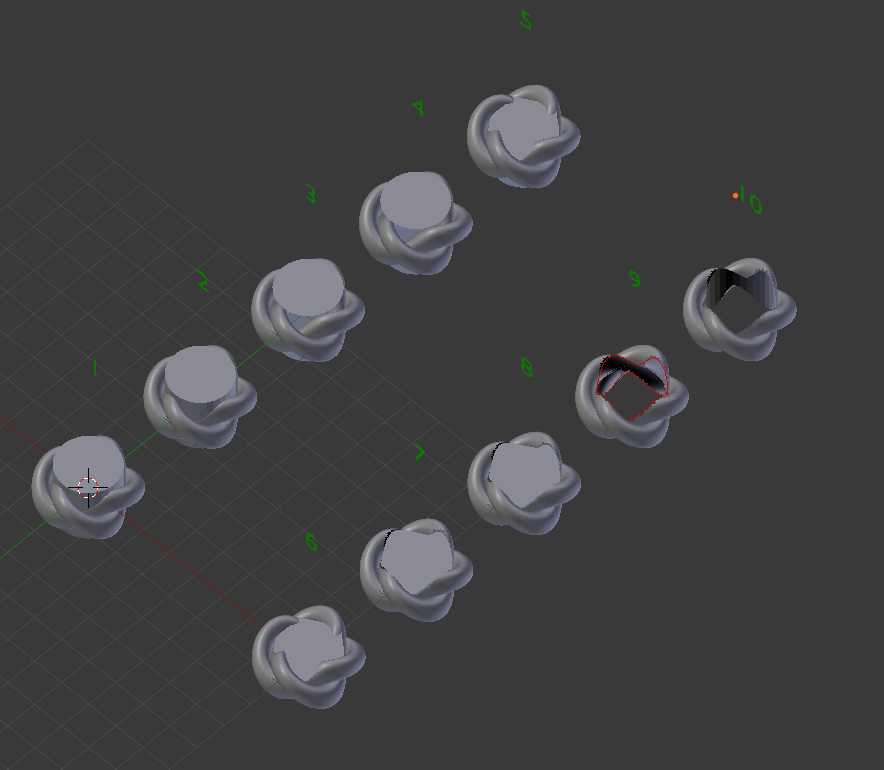
Here's the image:

enter image description here

Here's the blend:

$\endgroup$
2
  • $\begingroup$ OK, I will add both a screenshot and a correlating blend file to this, each number in the screenshot relates to the basic steps described in the answer. The only thing left undone here is the cleanup of the edges, but that is because I don't really have the time to bridge those edge-loops at the moment just to answer the question. $\endgroup$
    – Rick Riggs
    Commented Feb 23, 2016 at 0:56
  • $\begingroup$ That is fine, thank you very much for your help, I even learned some new things! $\endgroup$ Commented Feb 23, 2016 at 20:38

You must log in to answer this question.

Not the answer you're looking for? Browse other questions tagged .