8
$\begingroup$

I've seen other questions around, but none that answered my current problem.

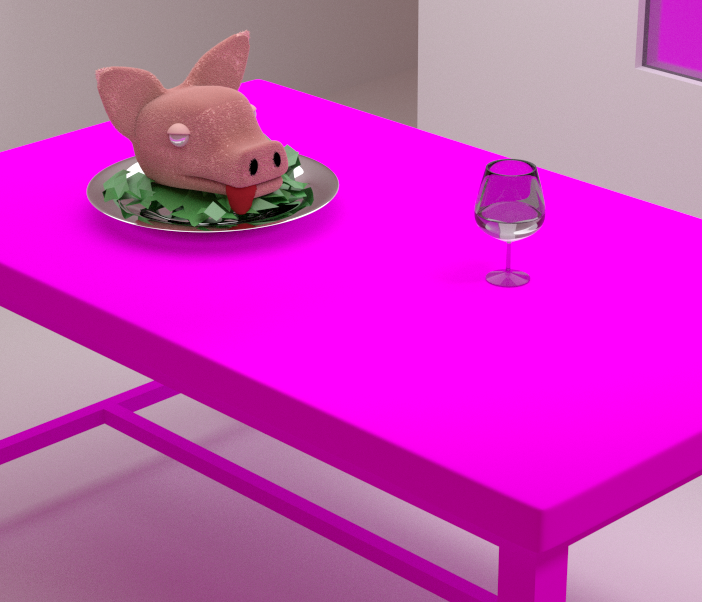
I've been working on this scene for a few days, and when I wanted to render it, the produced result wasn't quite like I expected, very grainy:

enter image description here

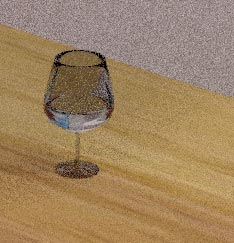
Here's a detail:

enter image description here

This was rendered at 500 cycles.

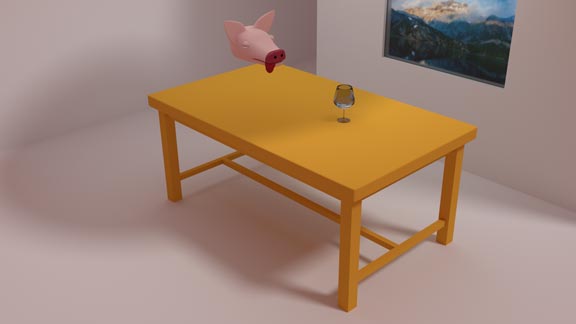
A previous render when the scene wasn't finished gave much clearer results:

enter image description here

What could be causing this, and what are the basic things to check to troubleshoot this kind of problem?

EDIT: Here's the .blend file (click on the orange button, sorry about the ad pop-up, the file is over the 30 mb limit of blend-exchange, feel free to suggest alternative hosts in the comments)

$\endgroup$
6
  • $\begingroup$ Can you upload your file? $\endgroup$
    – user1853
    Commented Dec 12, 2015 at 17:14
  • $\begingroup$ Ok, just added it $\endgroup$ Commented Dec 12, 2015 at 23:01
  • $\begingroup$ please use blend-exchange.giantcowfilms.com to upload. Make it easier for people to help you. $\endgroup$
    – user1853
    Commented Dec 12, 2015 at 23:03
  • $\begingroup$ My file is over 30 mb so I can't $\endgroup$ Commented Dec 12, 2015 at 23:07
  • 2
    $\begingroup$ sometimes you just need more samples. A lot of finished still renders I've seen have thousands of samples $\endgroup$ Commented Dec 13, 2015 at 4:12

2 Answers 2

9
$\begingroup$

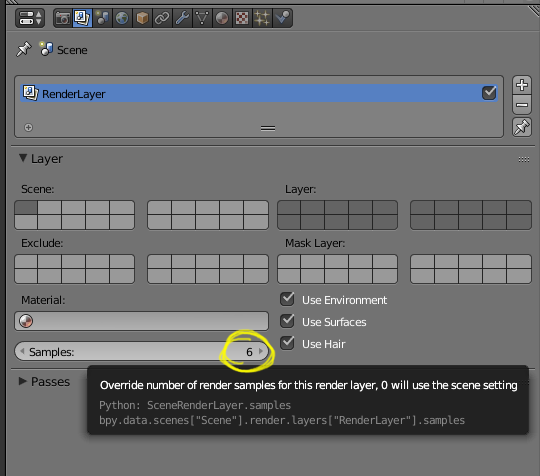
The issue here is that even though you set your scene to render at 500 samples, that number is being overridden and is controlled by the number of samples on the render layer.
enter image description here

And there you have set the number of samples to 6...

Any number other than zero here will become the total number of samples used for this particular render layer.

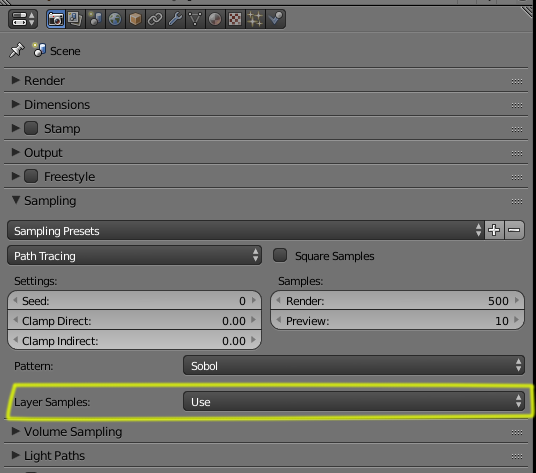
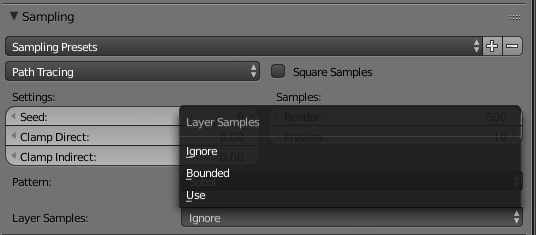
On the on the scene sampling section you will see a new control for "Layer Samples" the default is set to Use (meaning that it will use the number of samples set in the render layer section).
enter image description here

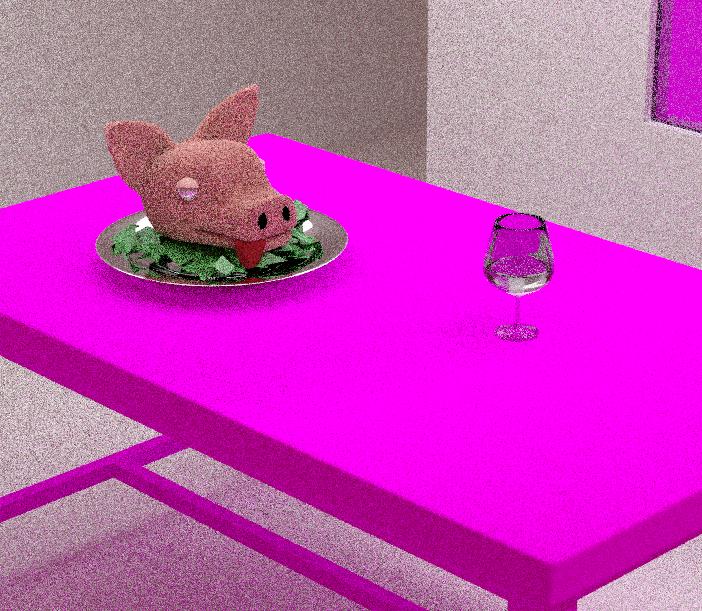
So instead of 500 you are just using 6 samples...
enter image description here

To fix this issue you have a two choices:

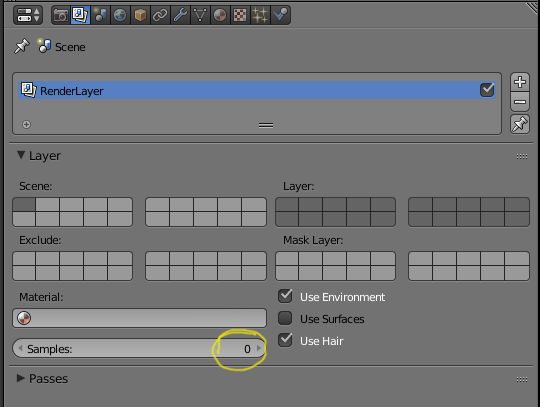
  1. Set that Samples number to 0 in the Render layers, so that the control reverts to the scene settings.
enter image description here

OR

  1. Set the layer samples to Ignore.

Then you'll get a nice clean render using all 500 samples.
enter image description here

enter image description here

Other tips:

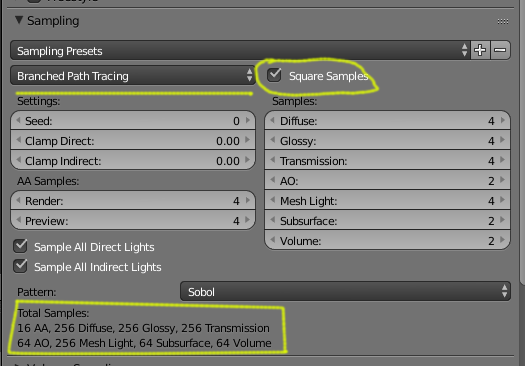
To bring the noise down without a high number of samples you can also use branched path tracing
enter image description here

enter image description here

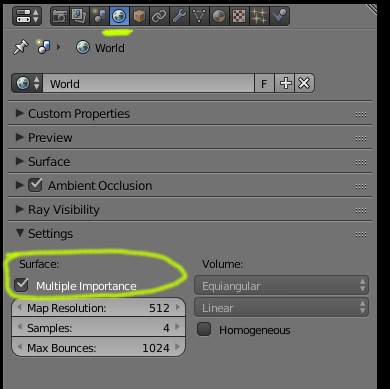
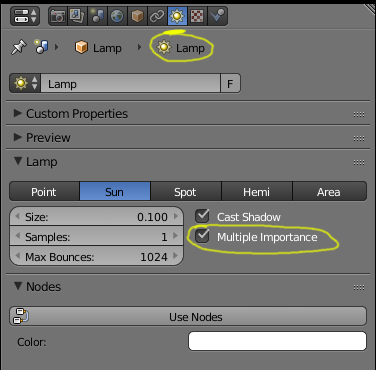
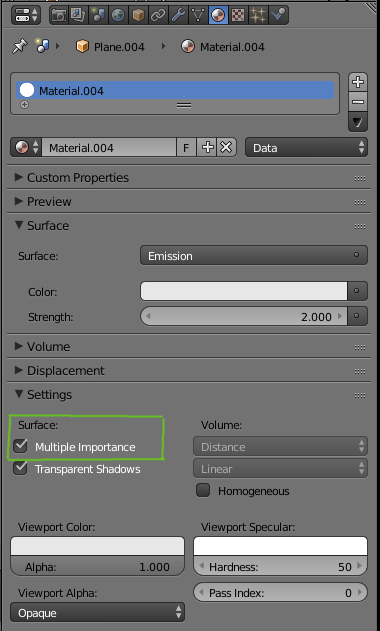
For cleaner images enable the Multiple Importance sampling for your lights, Emitter planes and environment.
enter image description here

enter image description here

enter image description here

For More info read this posts:

What is multiple importance sample option

When should MIS be used and when should it be disabled?

Now as a final note, not necessarily related to the noise: it seems to me that polygon density for your objects is too much: The total number of vertices for such a simple scene the is over one million vertices and faces... just the emitter object on top of the table has 4225 vertices, when it could easily have just 8 or even 4... In your subsurf modifiers you are using way too many unnecessary subdivision levels, bringing the polygon count way up for such simple objects. Most of the subsurf modifiers you have set at 6 for rendering...Do you really need that many? You certainly don't need subsurf on the flat floor or walls or for most of the flat table... Having that much unnecessary geometry will have a negative impact on the performance of your computer. To get an idea of how many more polygons you generate when you subsurf please read: https://blender.stackexchange.com/a/15667/1853

$\endgroup$
0
1
$\begingroup$

Attaching a blend file is the way to go... as its hard to look at the image and guess why. But still...for interior scenes this might help quite a bit any way..

USe light portals to reduce interior noise in cycles... It involves using an area light(other lights dont work) in the opening where the light should be coming in from and in the lamp settings turn on "use portal". This helps reduce noise in interior renders by a huge margin.

A more detailed explanation can be found in the youtube link and a stack exchange post here.. What does Light Portal mean?

https://www.youtube.com/watch?v=1LjLyTBbl6s -cheers

$\endgroup$
3
  • $\begingroup$ Thanks for pointing that out...very new to stack exchange. Post edited. -cheers $\endgroup$
    – Hyenaman
    Commented Dec 12, 2015 at 13:06
  • 2
    $\begingroup$ @Hyenaman Welcome to Blender Stack Exchange! Thanks for contributing. Any Stack Exchange site can seem unwelcoming and impersonal at first if you immediately receive criticism on something you posted before you even get to "hello". But stick with it. People here care most about amassing a collection of high-quality questions and answers, so if you always think of your audience first you will be well-received. Cheers. $\endgroup$
    – Mentalist
    Commented Dec 12, 2015 at 16:37
  • $\begingroup$ @Hyenaman I just added it $\endgroup$ Commented Dec 12, 2015 at 23:01

You must log in to answer this question.

Not the answer you're looking for? Browse other questions tagged .