0
$\begingroup$

So I am building a scene, and I applied a simple gradient material to an object, and it wasn't behaving as expected, so I tried troubleshooting.

In the edit mode of the affected mesh, I added a plane, separated it, and applied all visual transforms.

Then I added a separate plane object and gave it the same material. The new plane object behaved as expected with the material.

I can't figure out what's wrong with the object of the initial mesh that's causing the material to display incorrectly.

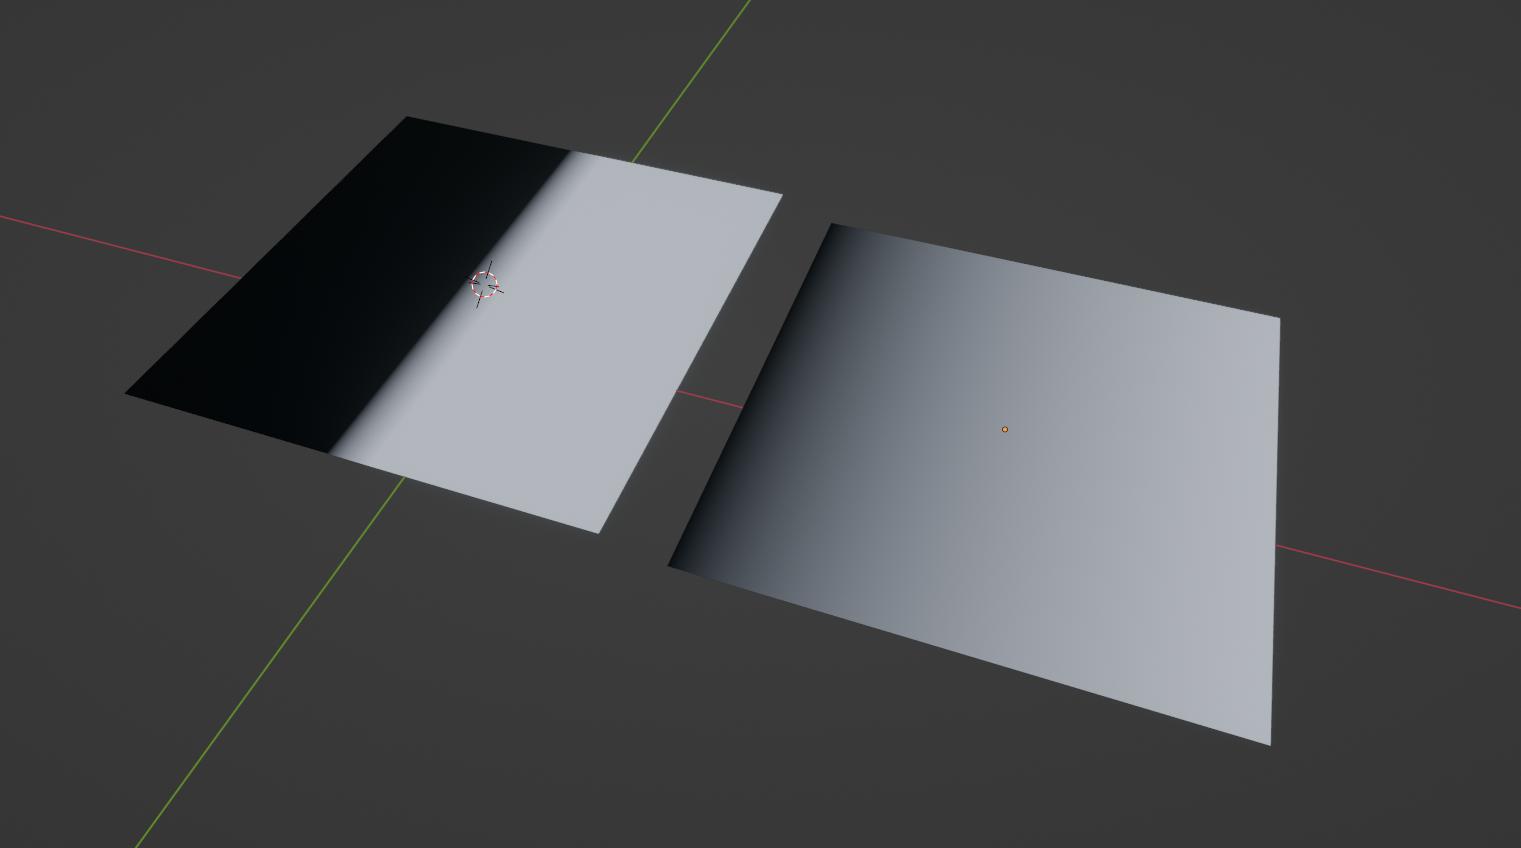
The two planes.

Original mesh with wrong shading on the left, and new plane with the expected result on the right

enter image description here

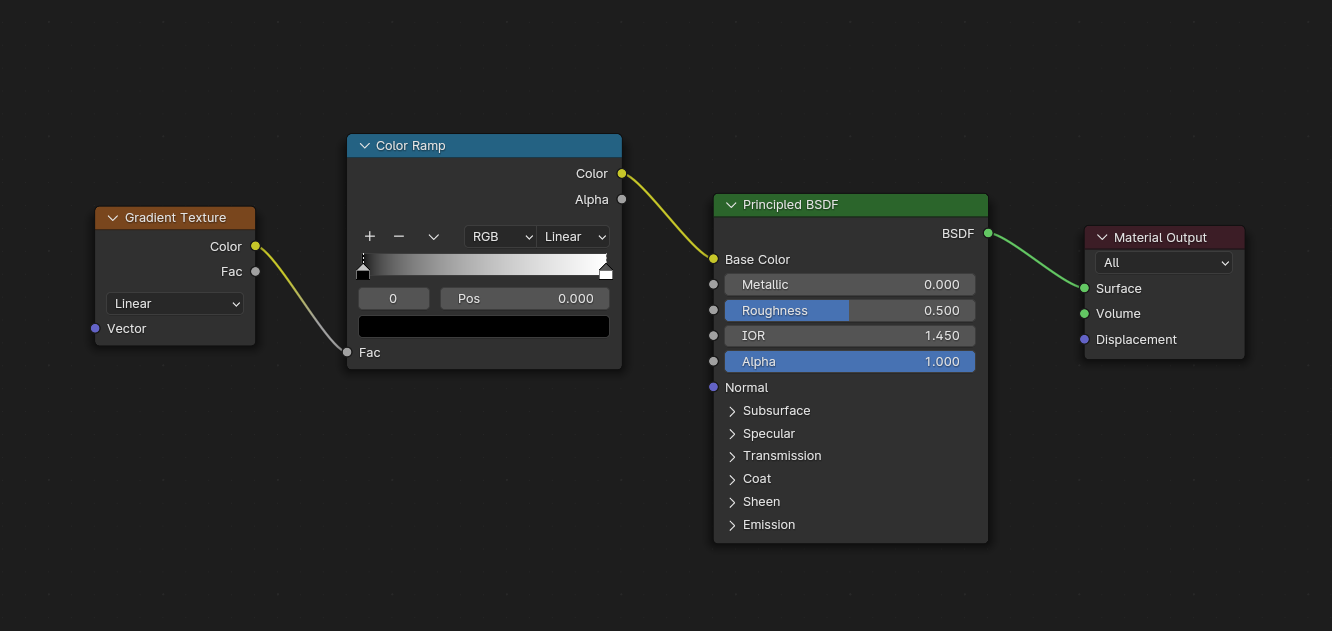
The shader graph

enter image description here

$\endgroup$
3
  • $\begingroup$ I think we'll need to see your Blend file. You can share it via blend-exchange.com following the instructions there to copy the link on that page and then edit your question here and paste the link into it. $\endgroup$
    – John Eason
    Commented Dec 22, 2023 at 10:01
  • $\begingroup$ Some more information might be helpful - as @MarkusvonBroady shows in his answer, this can happen when you scale it in Edit Mode and did not yet switch back to Object Mode for the coordinates to be recalculated. But in your screenshot no objects seem to be selected and it is not apparent if any of those objects is in Edit Mode... so if the provided answer is not solving your problem, we definitely need more information what exactly is going on there (or even see the file as suggested). $\endgroup$ Commented Dec 22, 2023 at 11:01
  • $\begingroup$ It turns out it was probably a glitch in Blender. Blender ran out of memory and crashed. When I reopened the file, it somehow resolved itself. Thanks for the help 👍 $\endgroup$
    – Default_dx
    Commented Dec 22, 2023 at 12:38

1 Answer 1

2
$\begingroup$

If you right-click on the Gradient Texture node, and choose Online Manual option, it will send you to the documentation page which says:

Vector

Texture coordinate to sample texture at; defaults to Generated texture coordinates if the socket is left unconnected.

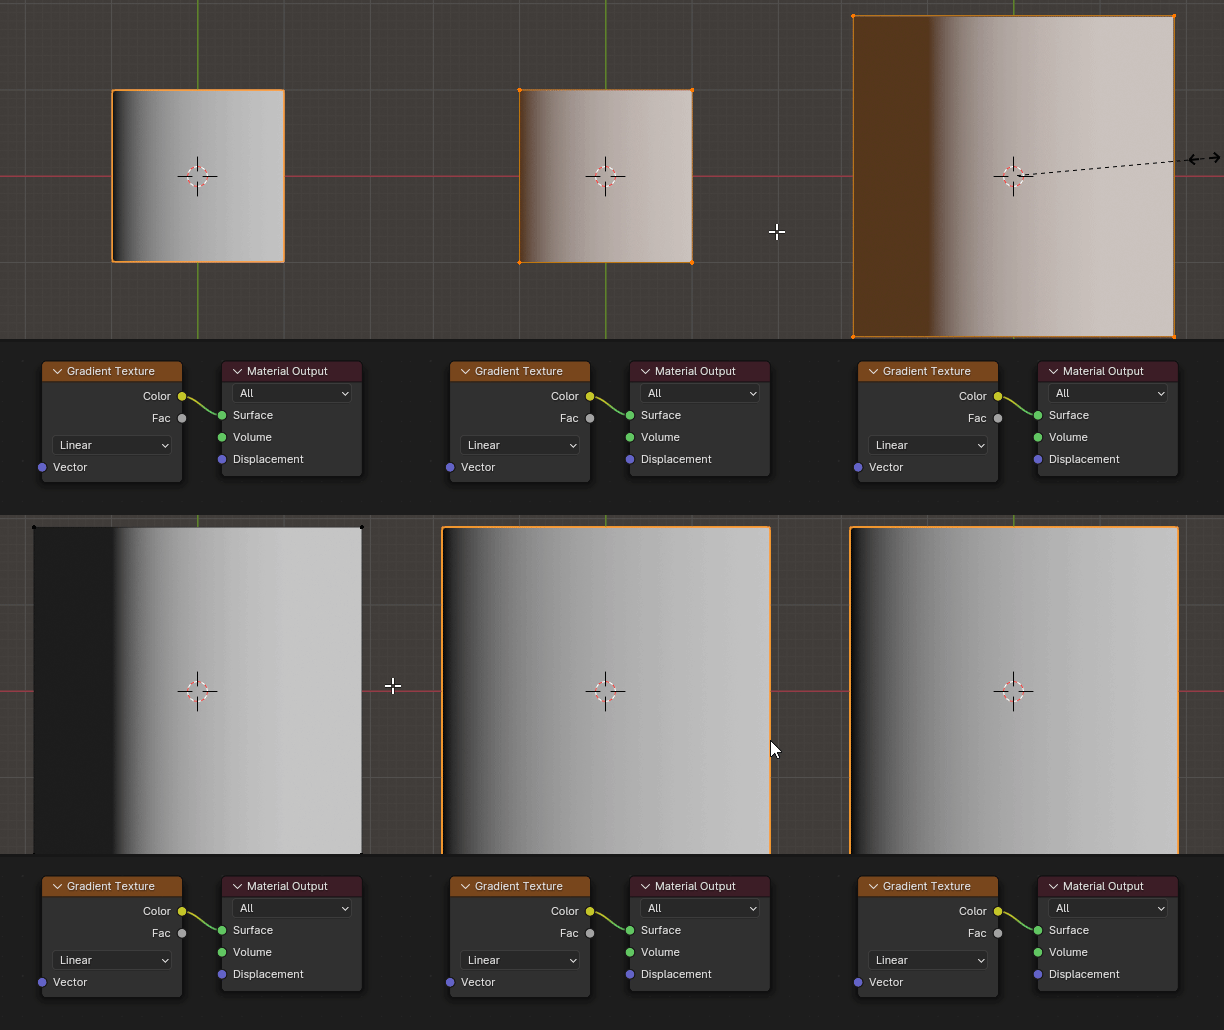
Generated texture coordinate automatically adapts to the bounding box, to always have the minimum coordinate on each axis equal $0$, and maximum coordinate equal $1$, so it's just normalized coordinates. This is what you can see on the right plane, a gradient from $0$ to $1$.

I think the first plane is simply scaled in Edit Mode and hasn't yet had a chance to recalculate the coordinates, which will happen when you switch to Object Mode:

$\endgroup$

You must log in to answer this question.

Not the answer you're looking for? Browse other questions tagged .