0
$\begingroup$

I want to apply the same texture image to parts of the top face of a mesh cube at different angles.
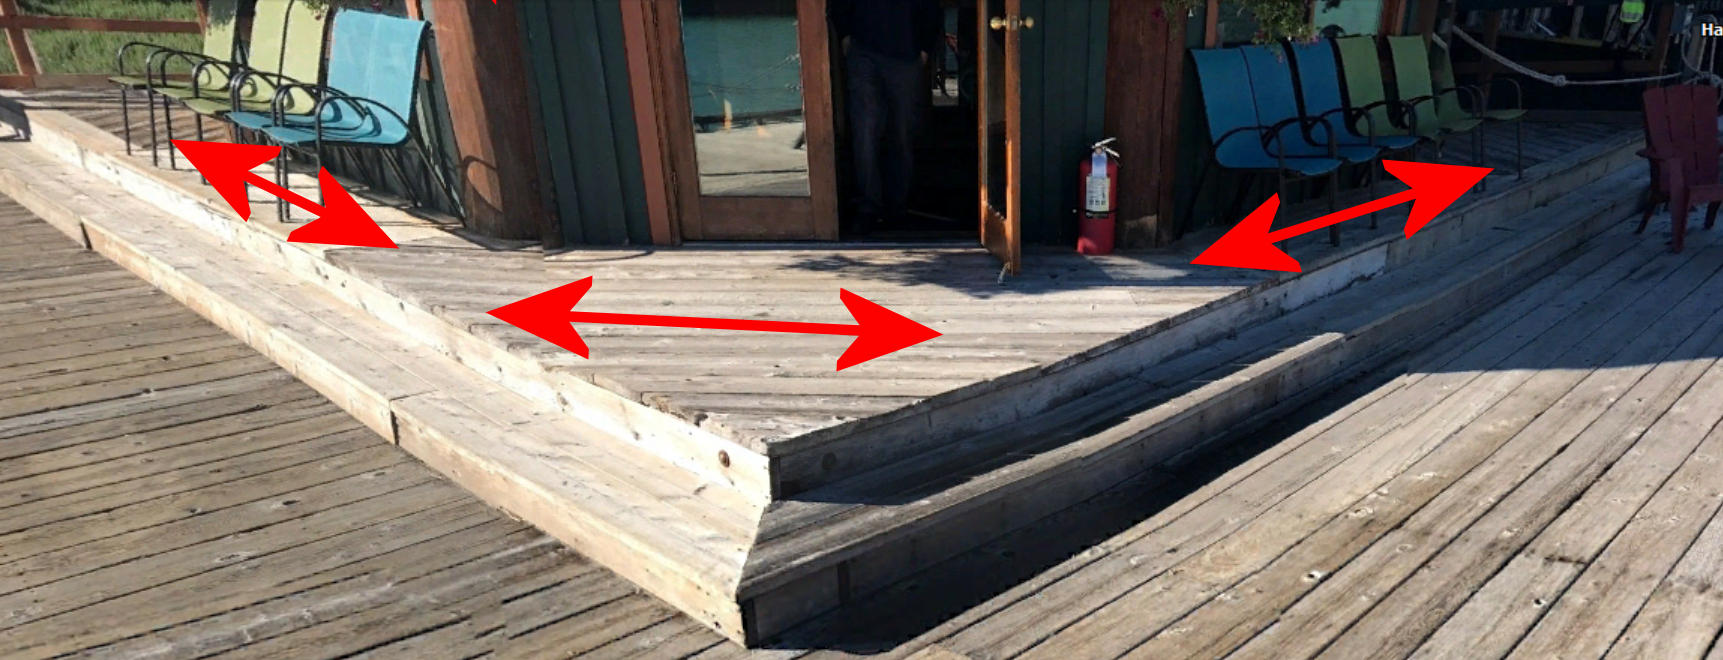
Refer to image below which shows the 'decking' around the building with planking at different angles. I have added red arrows where the change of direction of the planking is.
I guess I need to 'break up' the top face into separate faces and then apply the texture image to each face but what is the best method to break a single face into multiple faces?
Note how the planks in front of the doorway are diagonal to the sides and the planks next to those are parallel to the sides.

[added later]
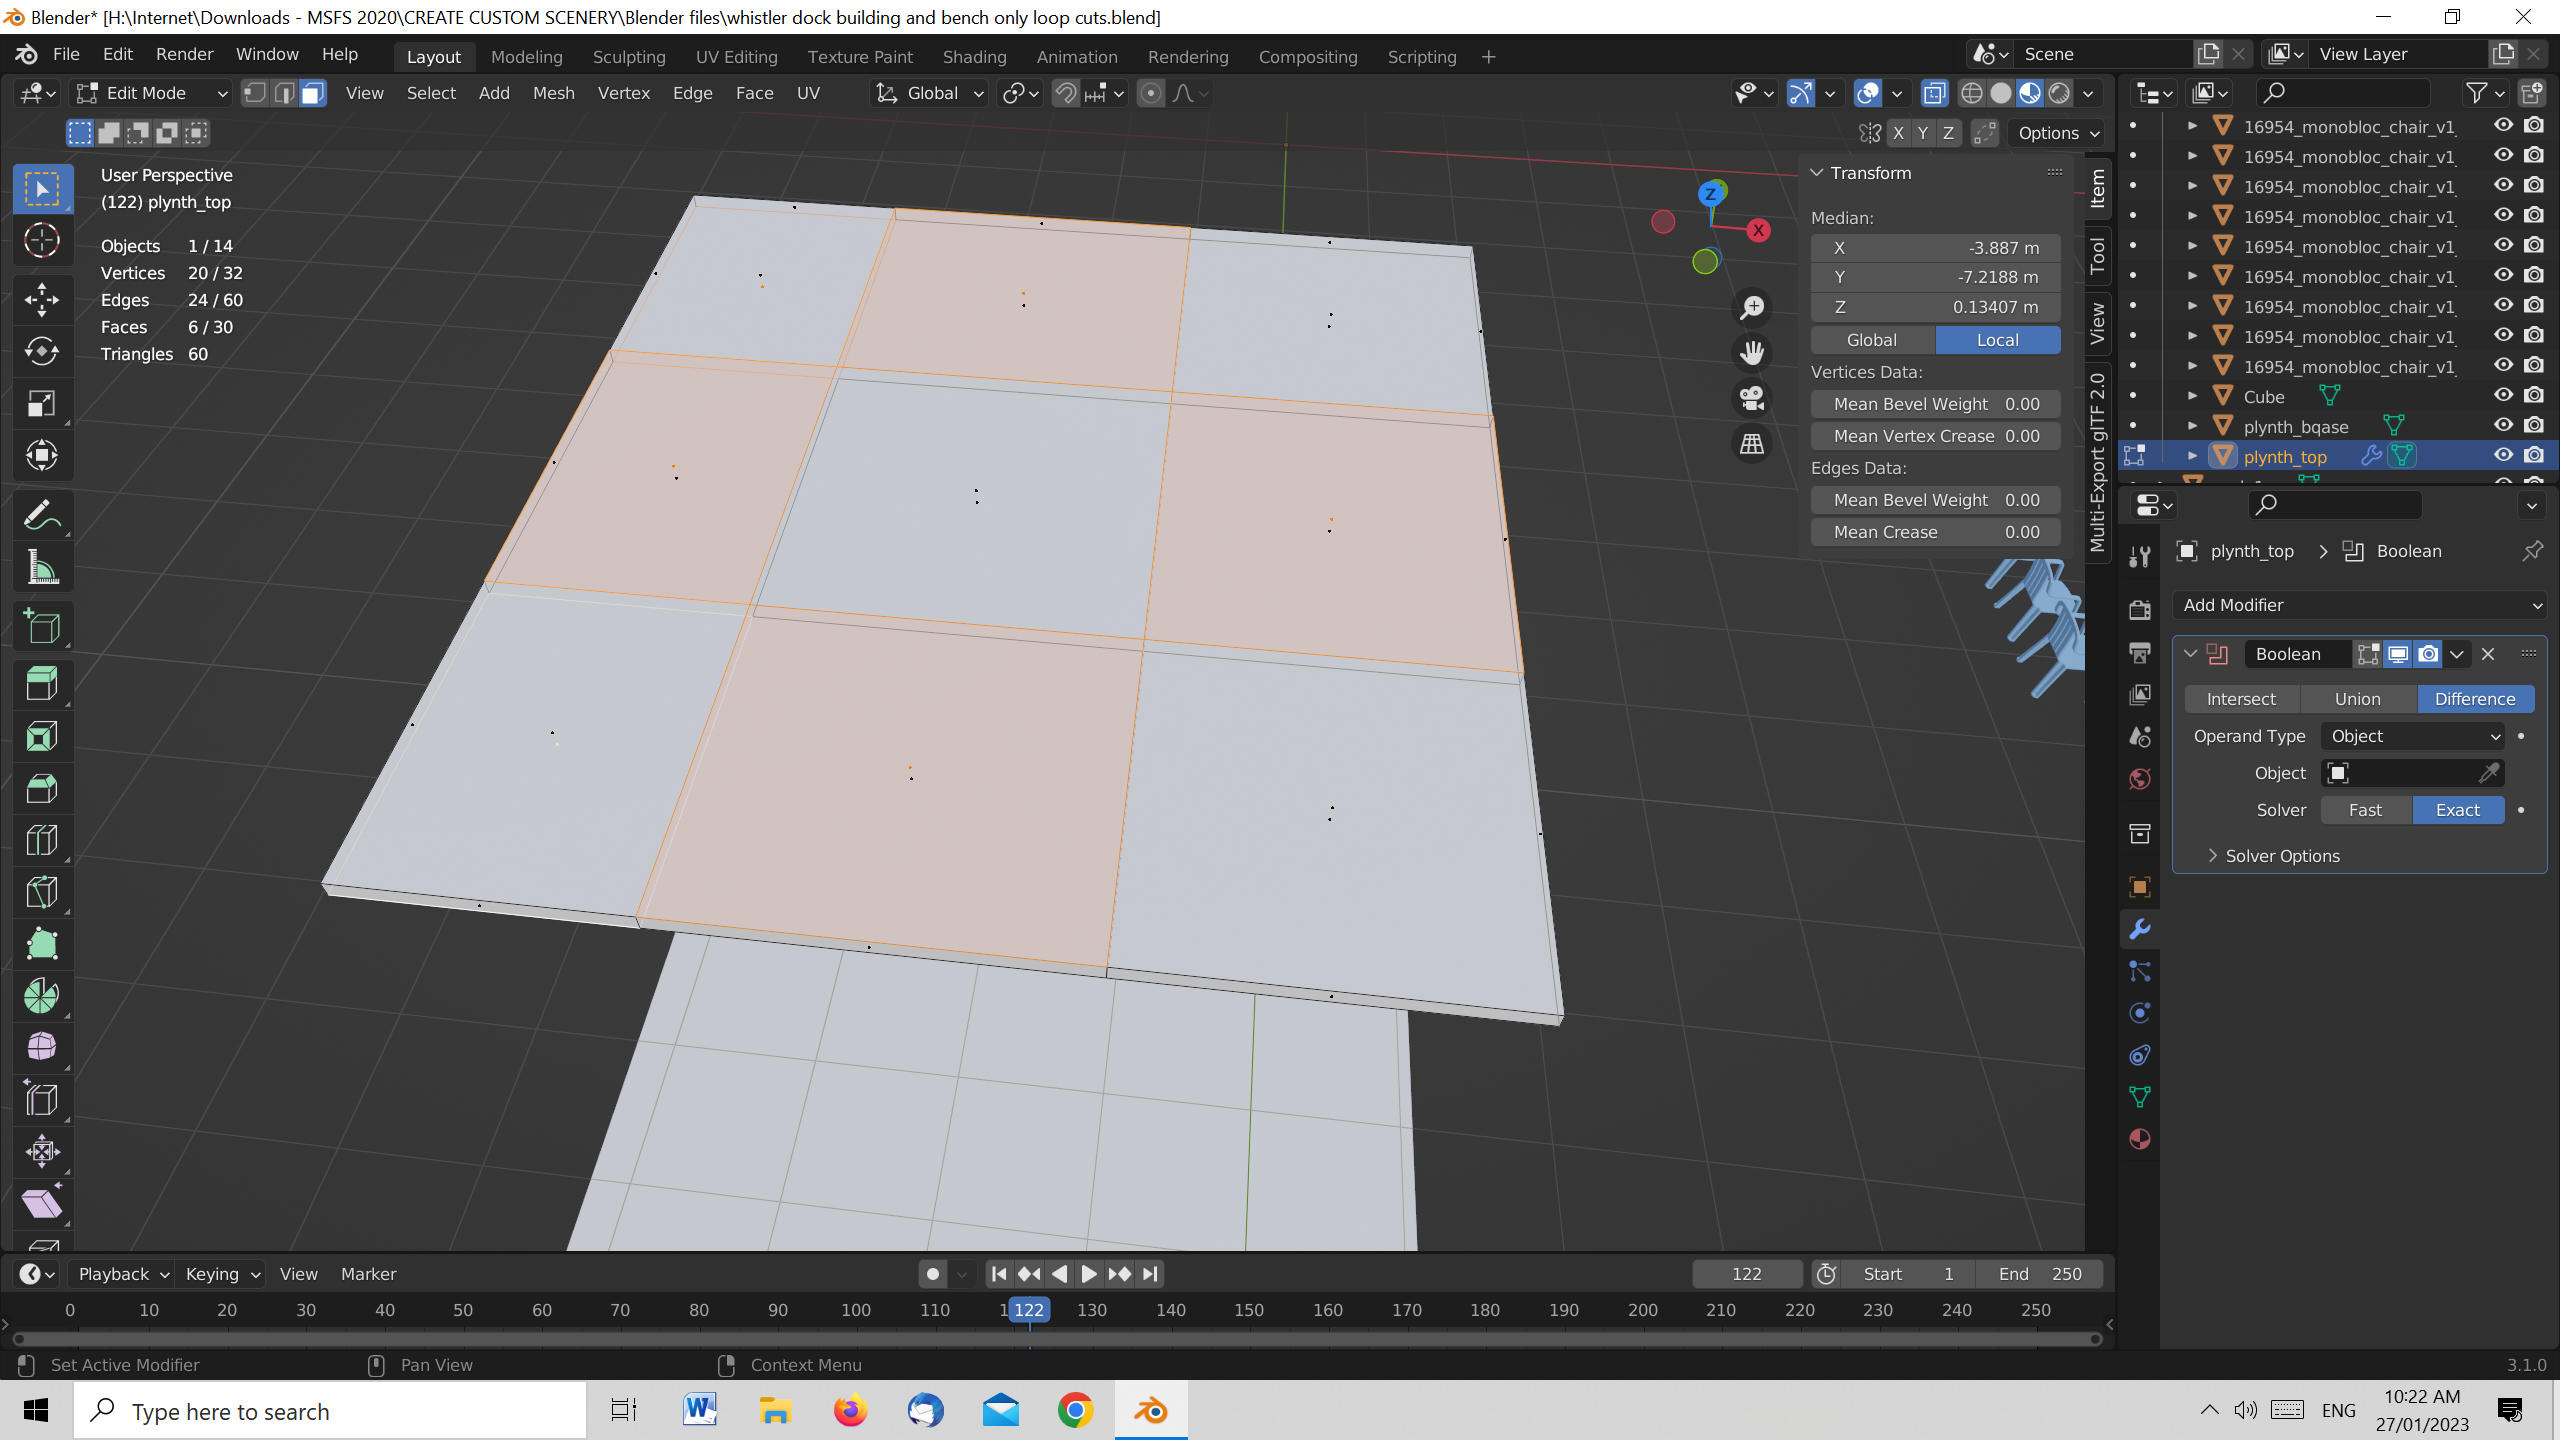
I tried adding loop cuts and moving them appropriately but then could not select individual faces to add material.

Here is my Blender file with cuts added but I cannot select the individual faces on the top surface to add material.

enter image description here

[image added later to demonstrate problem - see bottom of thread]

enter image description here

$\endgroup$
7
  • $\begingroup$ What do you mean after adding loop cuts you could not select individual faces to add material? I downloaded your file, I can select faces. Assigning materials to them would be easier if there were materials on the object, but after I added them I could assign them to individual faces so I don't know what you mean. $\endgroup$ Commented Jan 26, 2023 at 8:23
  • $\begingroup$ As the problem was with selecting faces to apply a material not the material I didn't think uploading the material was necessary. HURRAH I have just noticed that for those faces which do not get highlited when I click on them (and the face on the bottom gets highlited instead) if I then double click it then selects the face on the TOP. I have NEVER needed to double click to select before! Well that is news to me (need to double click to select) . If only someone before you had suggested that I double click to select (when the first click selected the face on the bottom). $\endgroup$ Commented Jan 27, 2023 at 5:46
  • $\begingroup$ You could simply disable X-Ray if you want to work on faces at the top. Without X-Ray the bottom faces will not be visible or selectable through the top faces. Click the button or hit Alt+Z to toggle X-Ray mode on and off. $\endgroup$ Commented Jan 27, 2023 at 6:46
  • $\begingroup$ That (You could simply disable X-Ray if you want to work on faces at the top) is a great suggestion and perhaps a trap for the unwary like me. And also something no one else picked up on (from my Blender file) $\endgroup$ Commented Jan 27, 2023 at 7:23
  • $\begingroup$ No, no one picked that up because it is not wrong to model in X-Ray if you knew what it does. Sorry, no offense - but you should really try to learn the basic functions, options and modes of how to use the viewport and the basic tools. You are sometimes asking for slightly advanced stuff like unwrapping etc. and it would make it much easier to help you with more complex problems if you knew the basics. $\endgroup$ Commented Jan 27, 2023 at 7:27

2 Answers 2

0
$\begingroup$

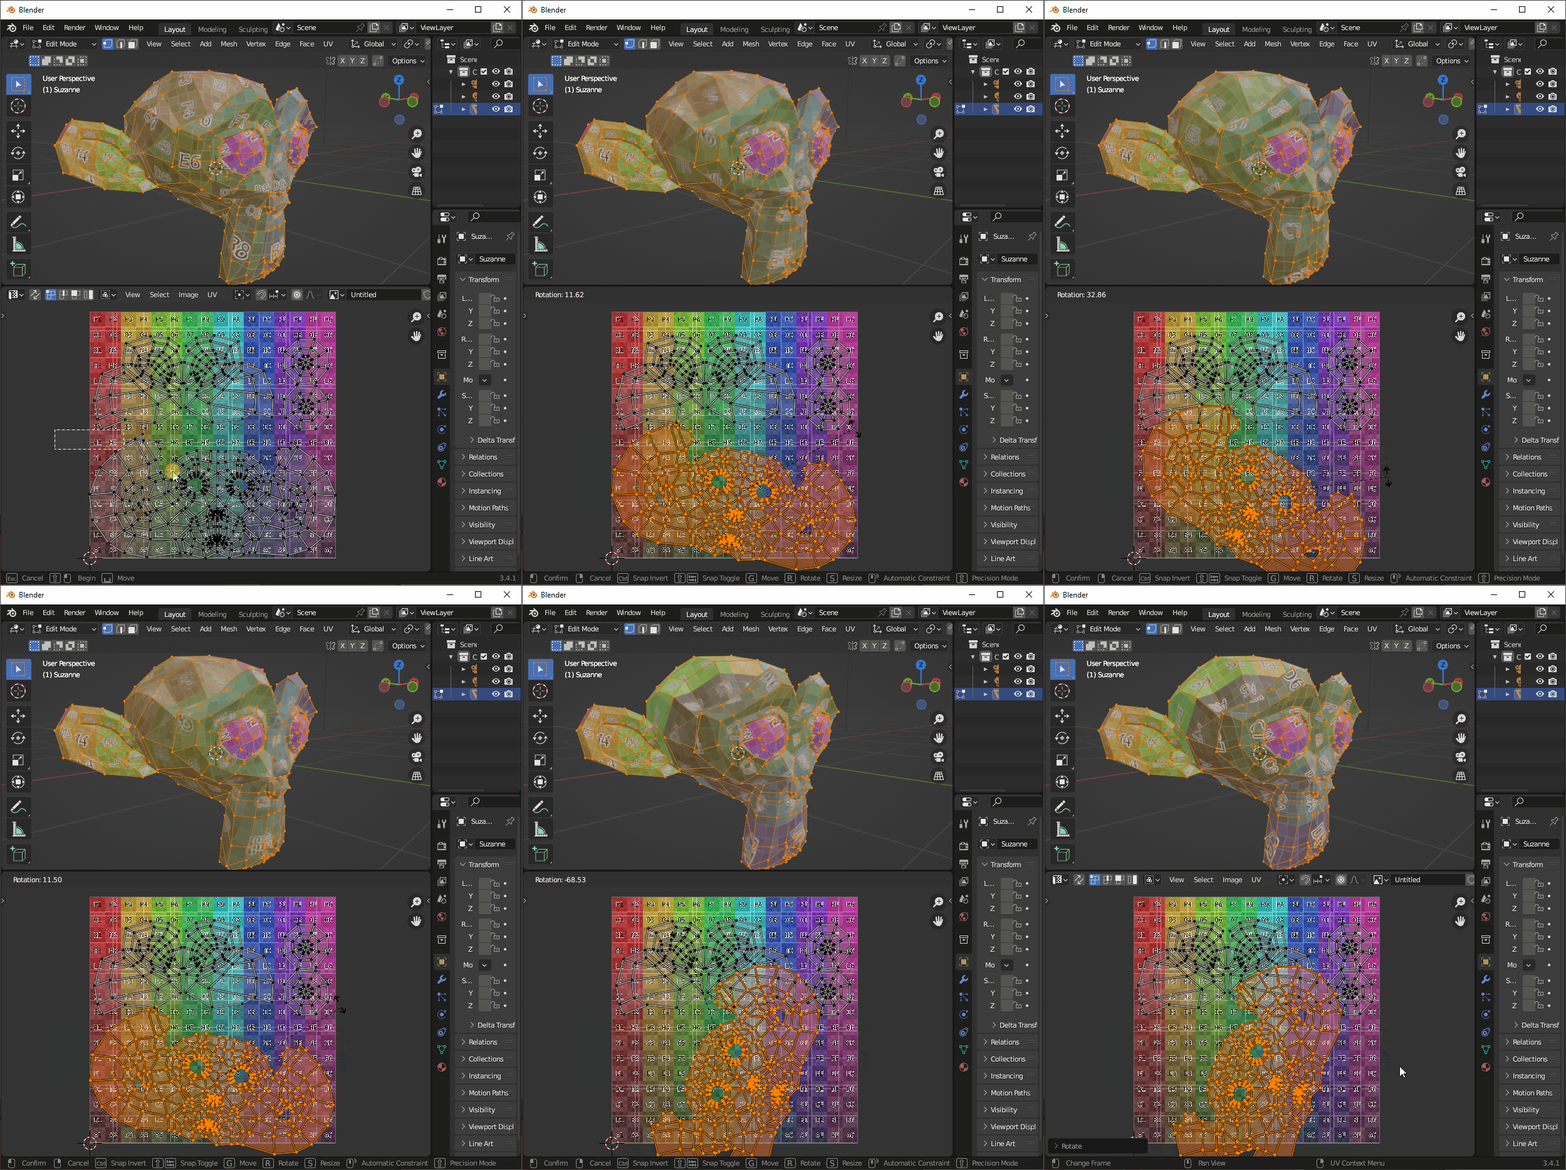
Simple UV mapping is usually used to control how textures show up on a 3d model. UV mapping defines texture coordinates of a 3d model in 2d space. It's a way to unfold the 3d surface of a model to 2d image texture space. It is sort of basic principle in 3d graphics and you can find all the information about it online. It's really easy to find plenty of good tutorials about it online.

See the documentation on UV tools in Blender: https://docs.blender.org/manual/en/latest/modeling/meshes/editing/uv.html

Blender.org offers plenty of good resources for getting started: https://www.blender.org/support/tutorials/

enter image description here

$\endgroup$
8
  • $\begingroup$ Thanks for your interest. I have been successfully 'unwrapping' texture images for some time by adding the texture image material, select edit mode, ctrl E and select mark seams then press u twice then select Uv Editing also in edit mode using face select and then click on the face required and applying an image texture but for this NOTHING works. Obviously it has something to do with the fact that I did some loop cuts which I have never done before but I have no idea why I can't unwrap. Maybe the only method is to create my decking with 9 separate mesh cubes? $\endgroup$ Commented Jan 26, 2023 at 7:57
  • $\begingroup$ [added later] Or (as I just found out by experimenting) select each separate cube formed by loop cut and then press p and select by selection to form separate mesh cubes and then apply material to each separate mesh cube. Surely that is not the best way? $\endgroup$ Commented Jan 26, 2023 at 8:23
  • $\begingroup$ It definitely works. One material is enough if it is one material you want to create. Make sure you make separate UV islands for parts you wish to be different and rotate the UVs as needed. I think watching a few tutorials could be helpful. $\endgroup$ Commented Jan 26, 2023 at 9:29
  • $\begingroup$ I am only wanting to use one material for each face created by loop cuts (but rotating it for different UV islands). I cannot find a tutorial which specifically explains how to add a single material to each face created with loop cuts. I have reworked and reworked my model starting with a mesh cube which I CAN apply a material to but once I add loop cuts if won't work. Please advise a suitable tutorial to watch as I cannot find any and/or open my blender file and see if you can apply a SINGLE material to each SEPARATE face created by the loop cuts. $\endgroup$ Commented Jan 26, 2023 at 10:21
  • $\begingroup$ This is very basic stuff and I am not sure what exactly the problem is. I mean, it's really hard to understand how you attempt to do it and where it fails. I strongly recommend watching the basics tutorials from blender.org - they will sort all problems out. Example you provide in the question could be done like this. My seems are marked red there. They are on the corners and the diagonal line. $\endgroup$ Commented Jan 26, 2023 at 11:57
0
$\begingroup$

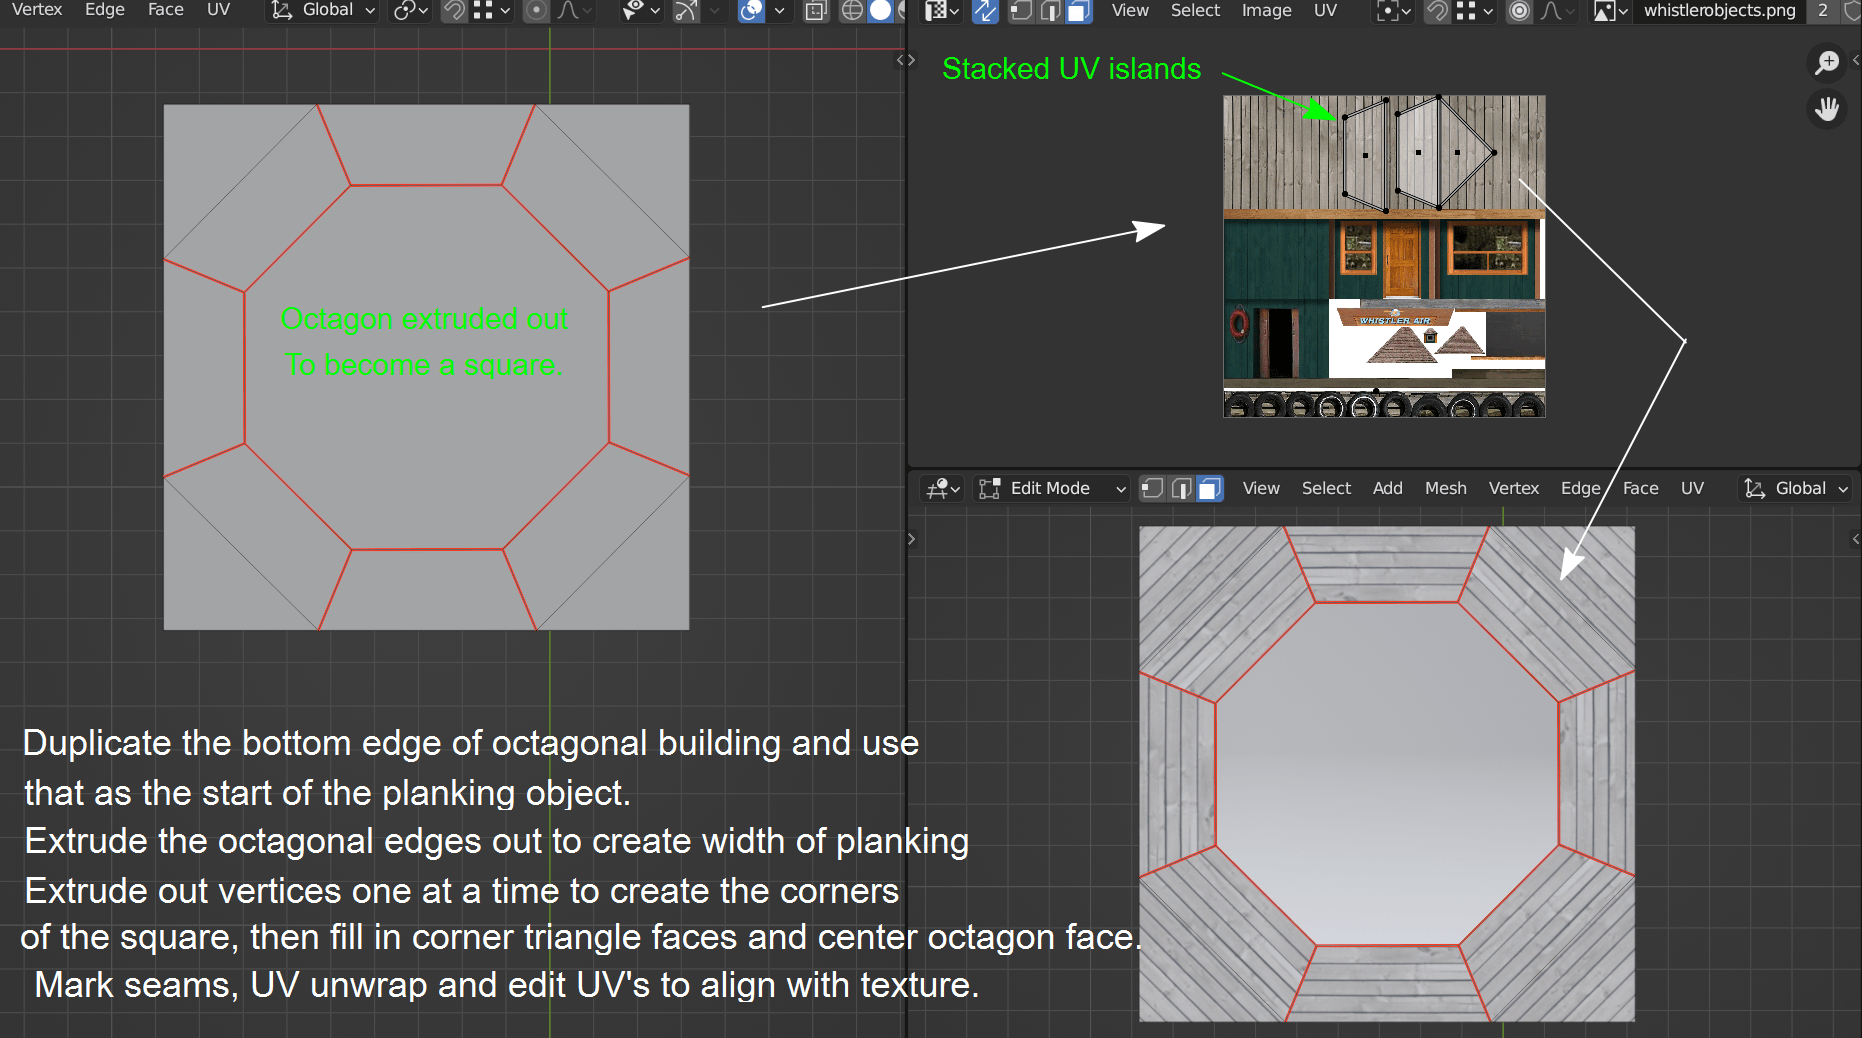
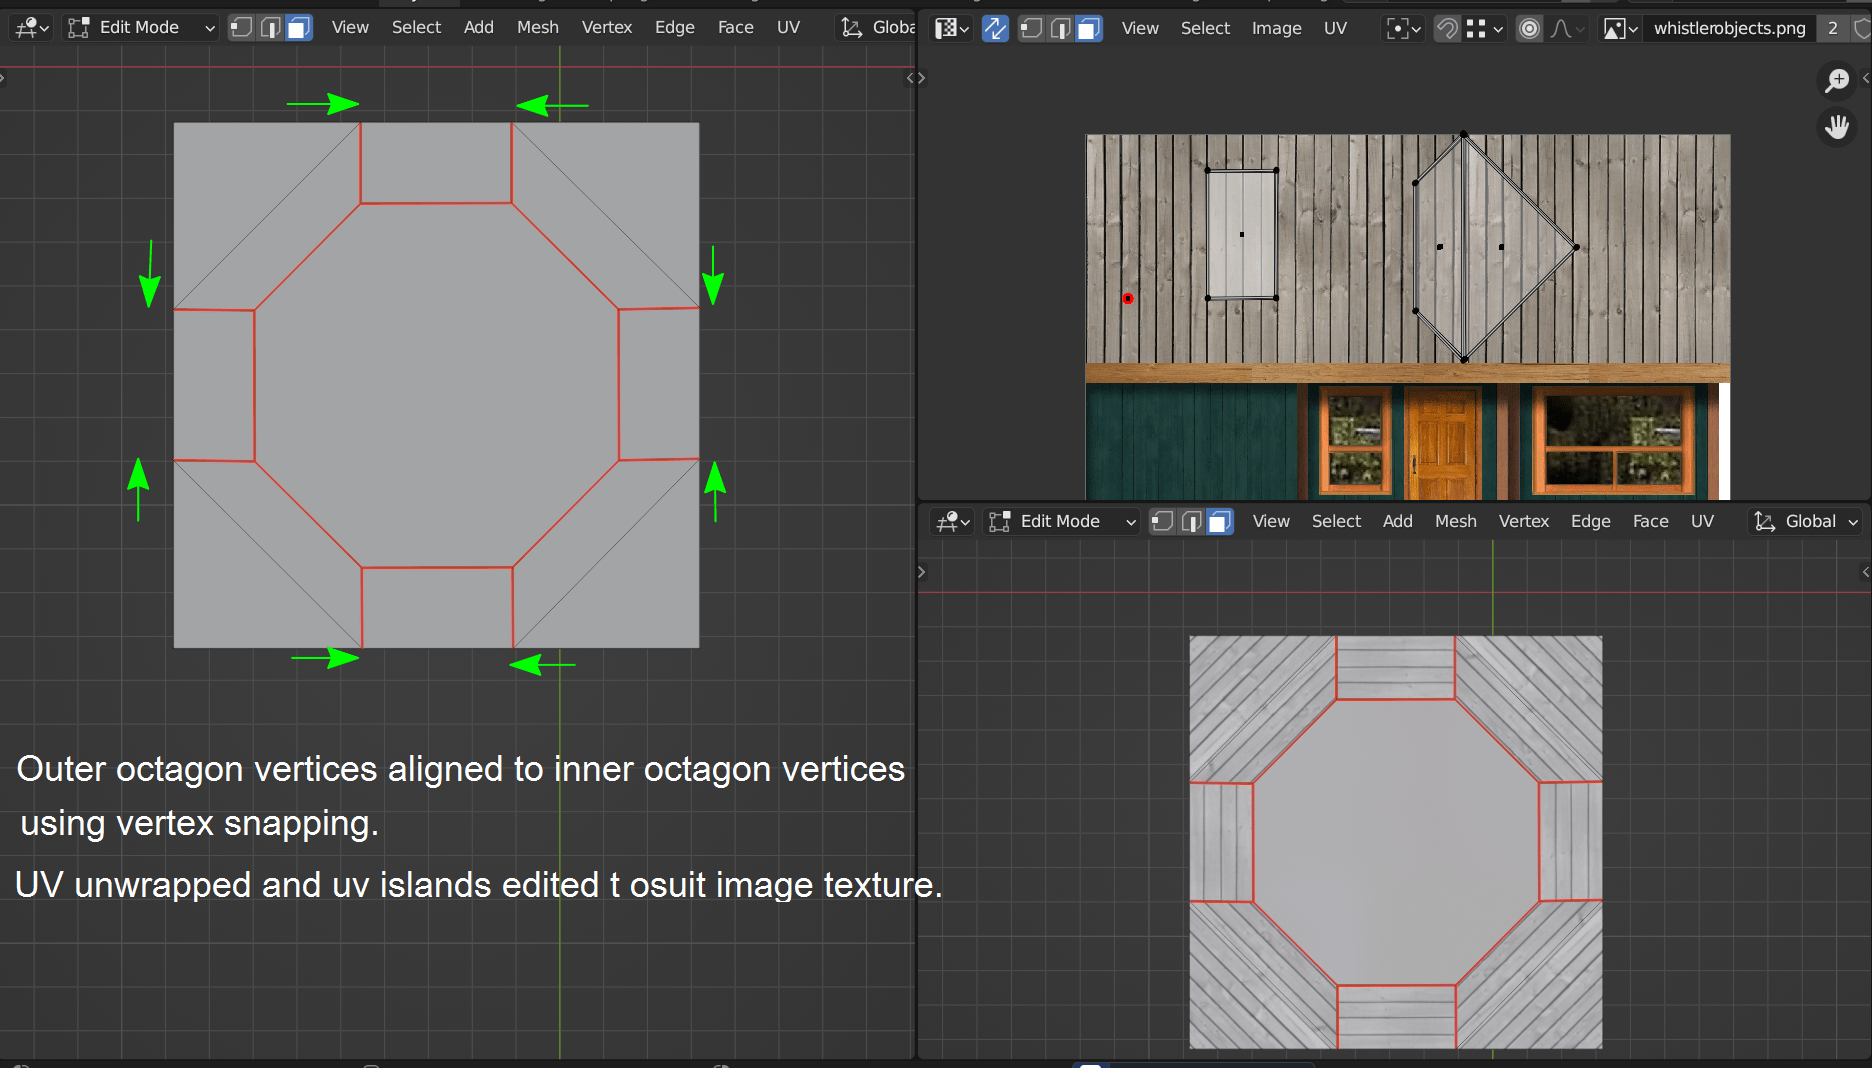
Start by selecting the bottom 8 edges of the building and making a copy of them with Shft D. Next make these new edges a separate object, P > Selection.

In object mode hide the building, H key.

Select the new octagon edge object and tab into edit mode. In top orthographic view select all of the octagon and extrude out to create the width of the planking. With a combination of individual vertex extruding and snapping add the corners to create the square shape and then fill in any missing faces.

Next add seams as shown in the image below and then UV unwrap.

Edit the resulting UV islands so that similar islands are stacked one above the other, see image below and rotate, position and scale UV islands to align with texture image. enter image description here

Alternative vertex alignment : enter image description here

To give the planking thickness you would need to extrude the outer edges of the square down a little before the marking ofseams and unwrapping.

$\endgroup$
1
  • $\begingroup$ Thanks 3fingeredfrog. I had replied before but since then Gordon has sent a reply (see top of thread) and after that with experimenting on my part I discovered that if I double clicked on a face (created with the loop cuts) which would only select the face on the bottom, it would then select the TOP face. So I don't need to use your suggestion but do THANK YOU very much for taking the time to do that for me. As mentioned to Gordon in my reply to him, I have NEVER needed to double click on a face before and it was completely NEW to me. Thanks again. $\endgroup$ Commented Jan 27, 2023 at 6:07

You must log in to answer this question.

Not the answer you're looking for? Browse other questions tagged .