0
$\begingroup$

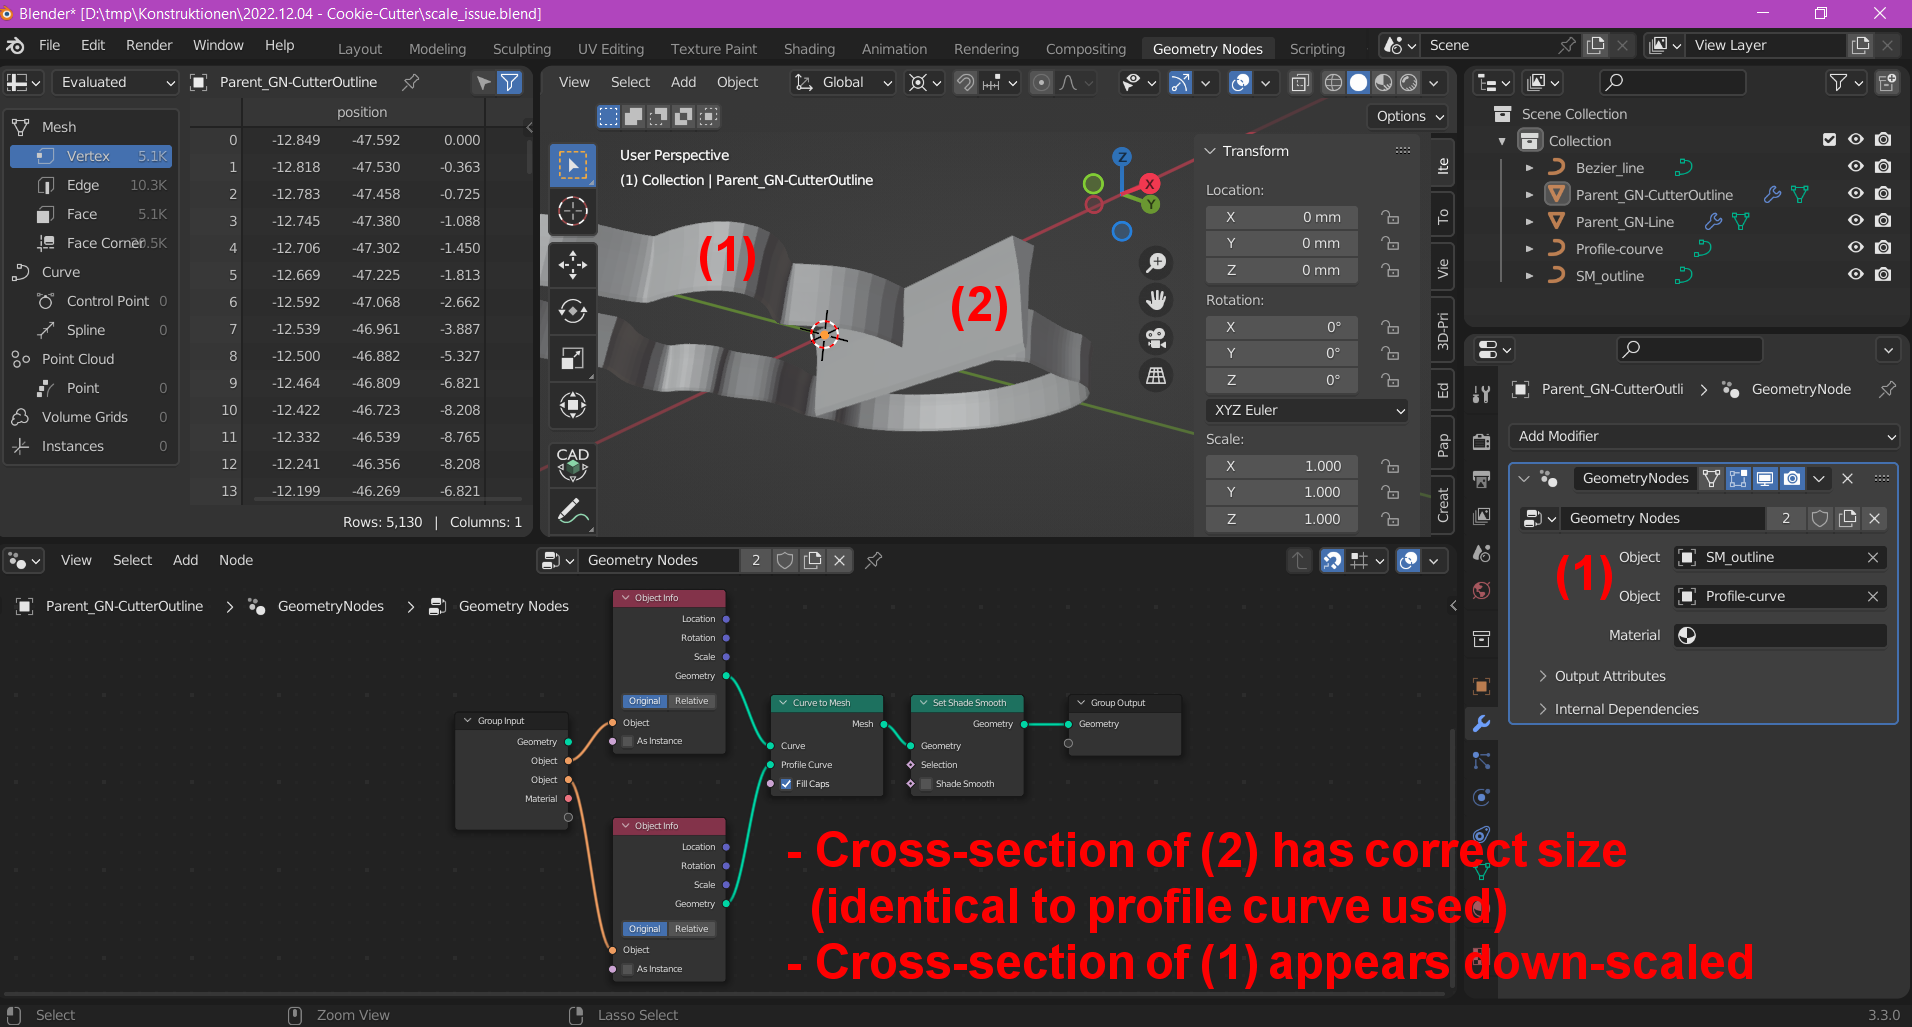
I've two different 2D Bezier-curves, one straight line, the other a closed curve "drawn" with the Curve-Pen tool. I subject both to the same GN-tree via "Object-Info" along with a common closed profile curve. Rotation and scale of all three curves are applied.

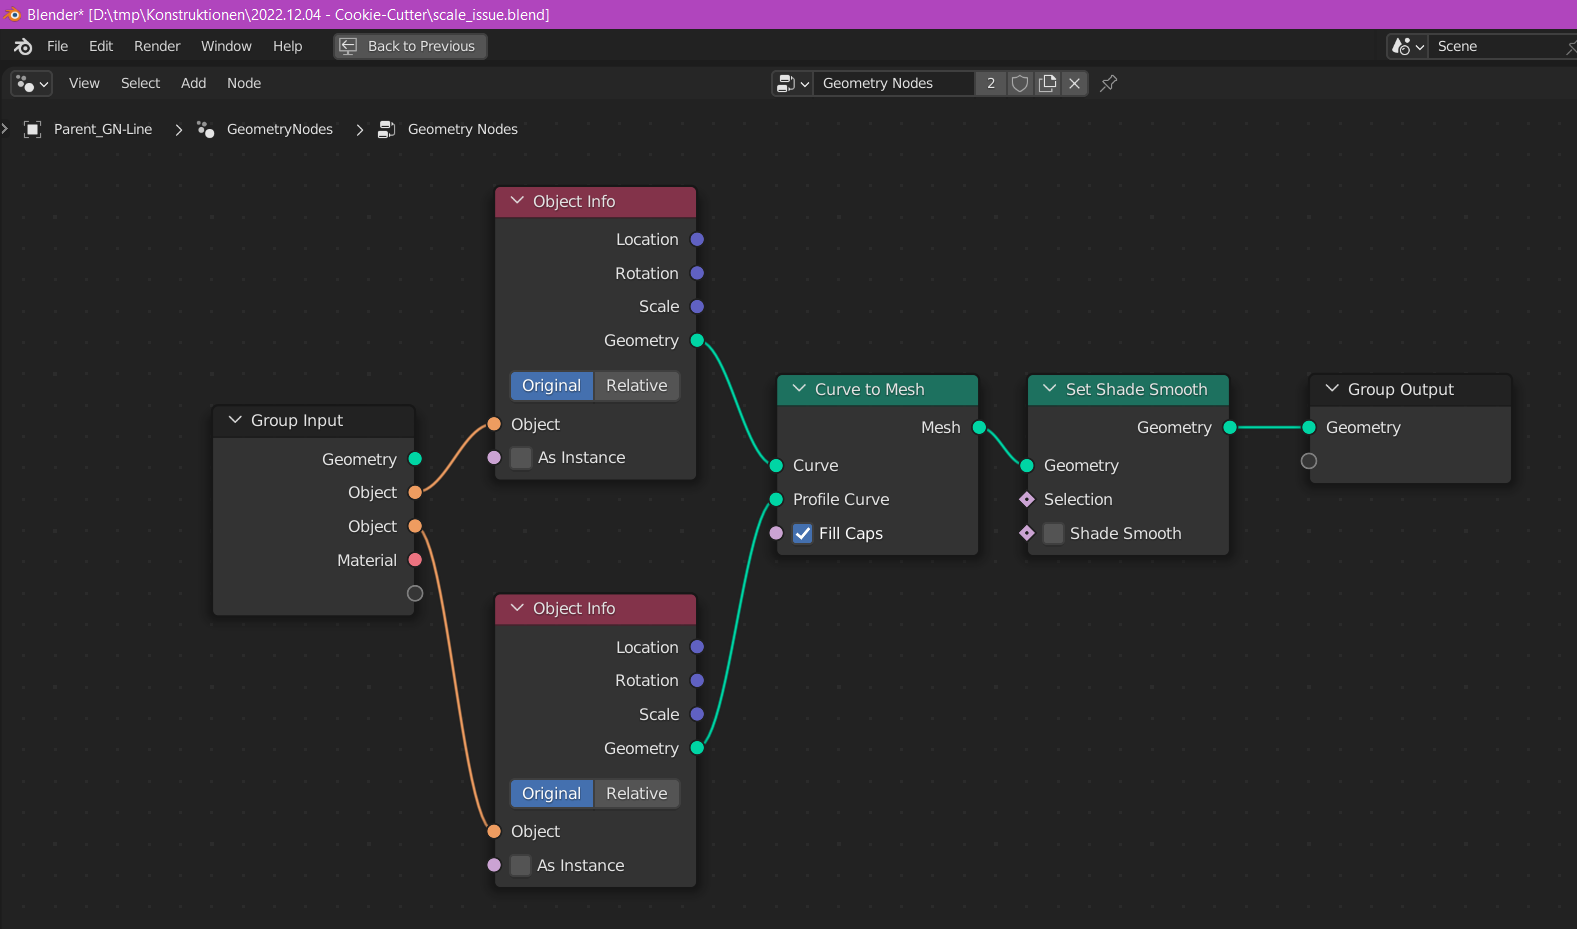
The GN-tree simply applies the base-curve(s) and the common profile curve to a "Curve-to-mesh"node and outputs the resulting mesh with flat shading set.

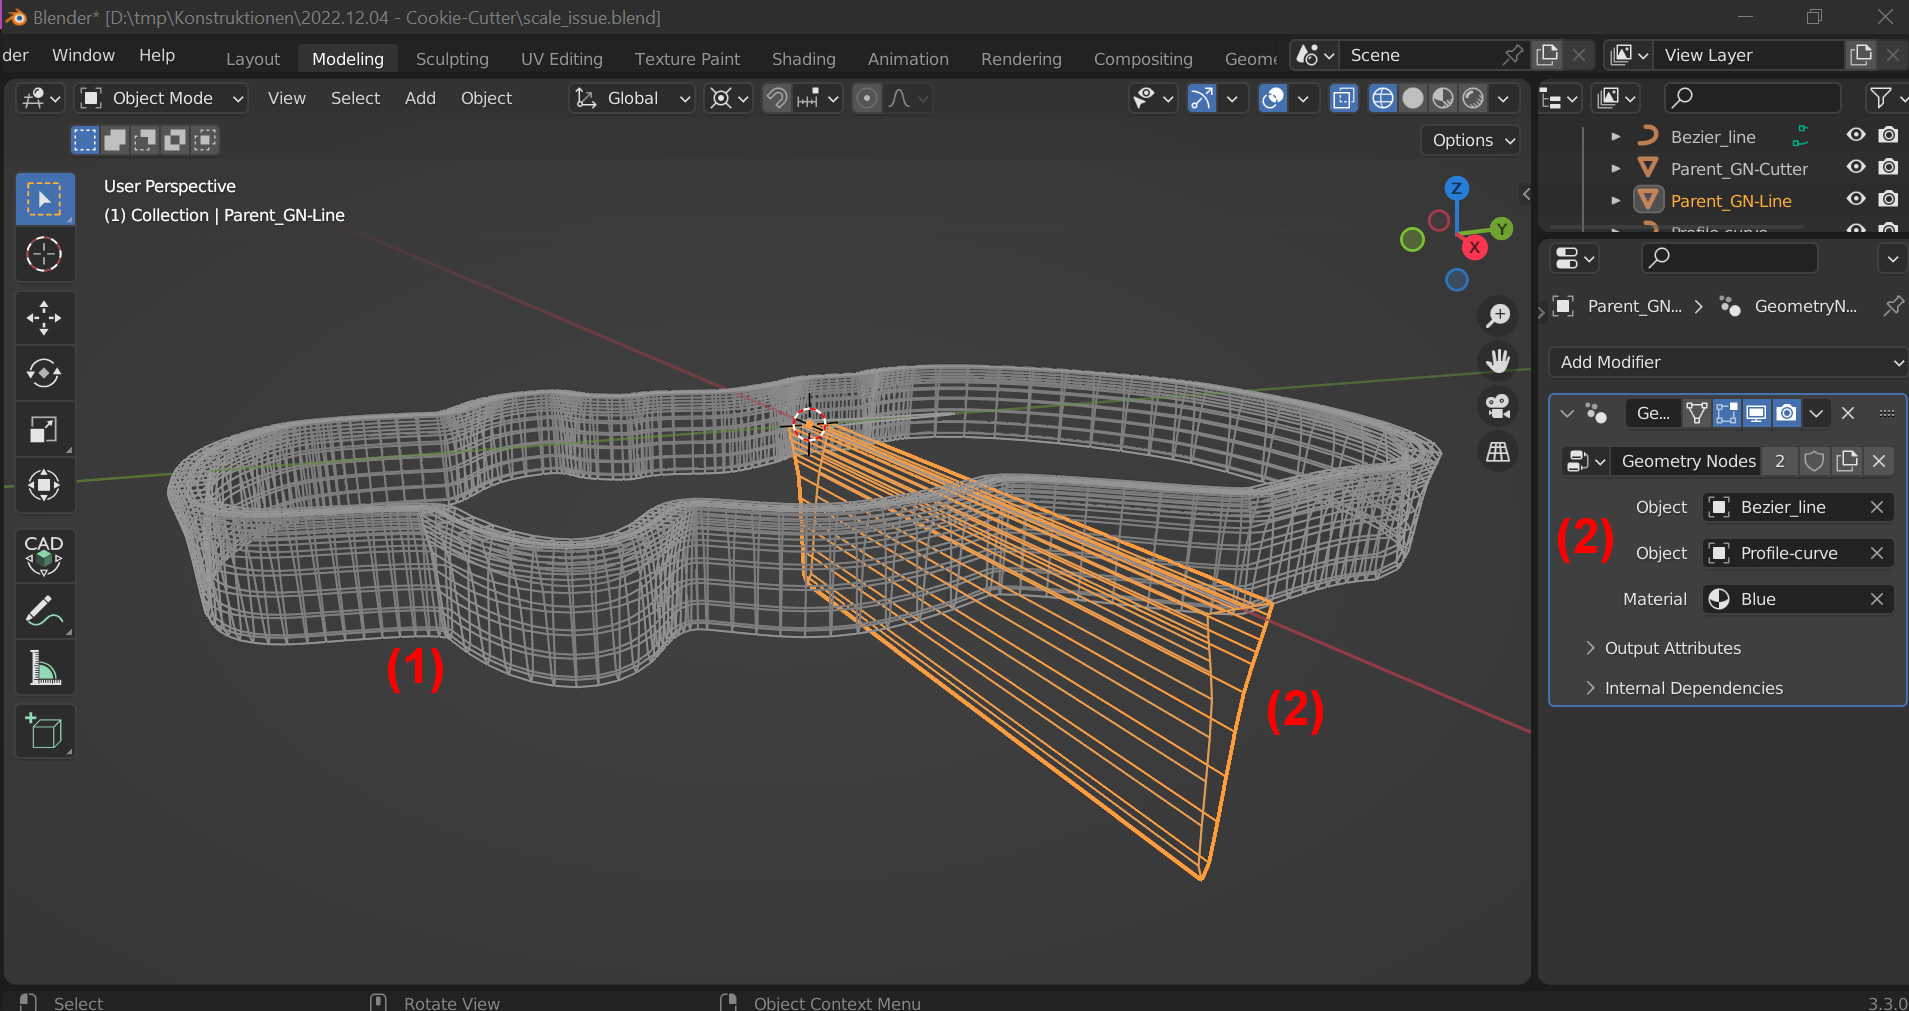
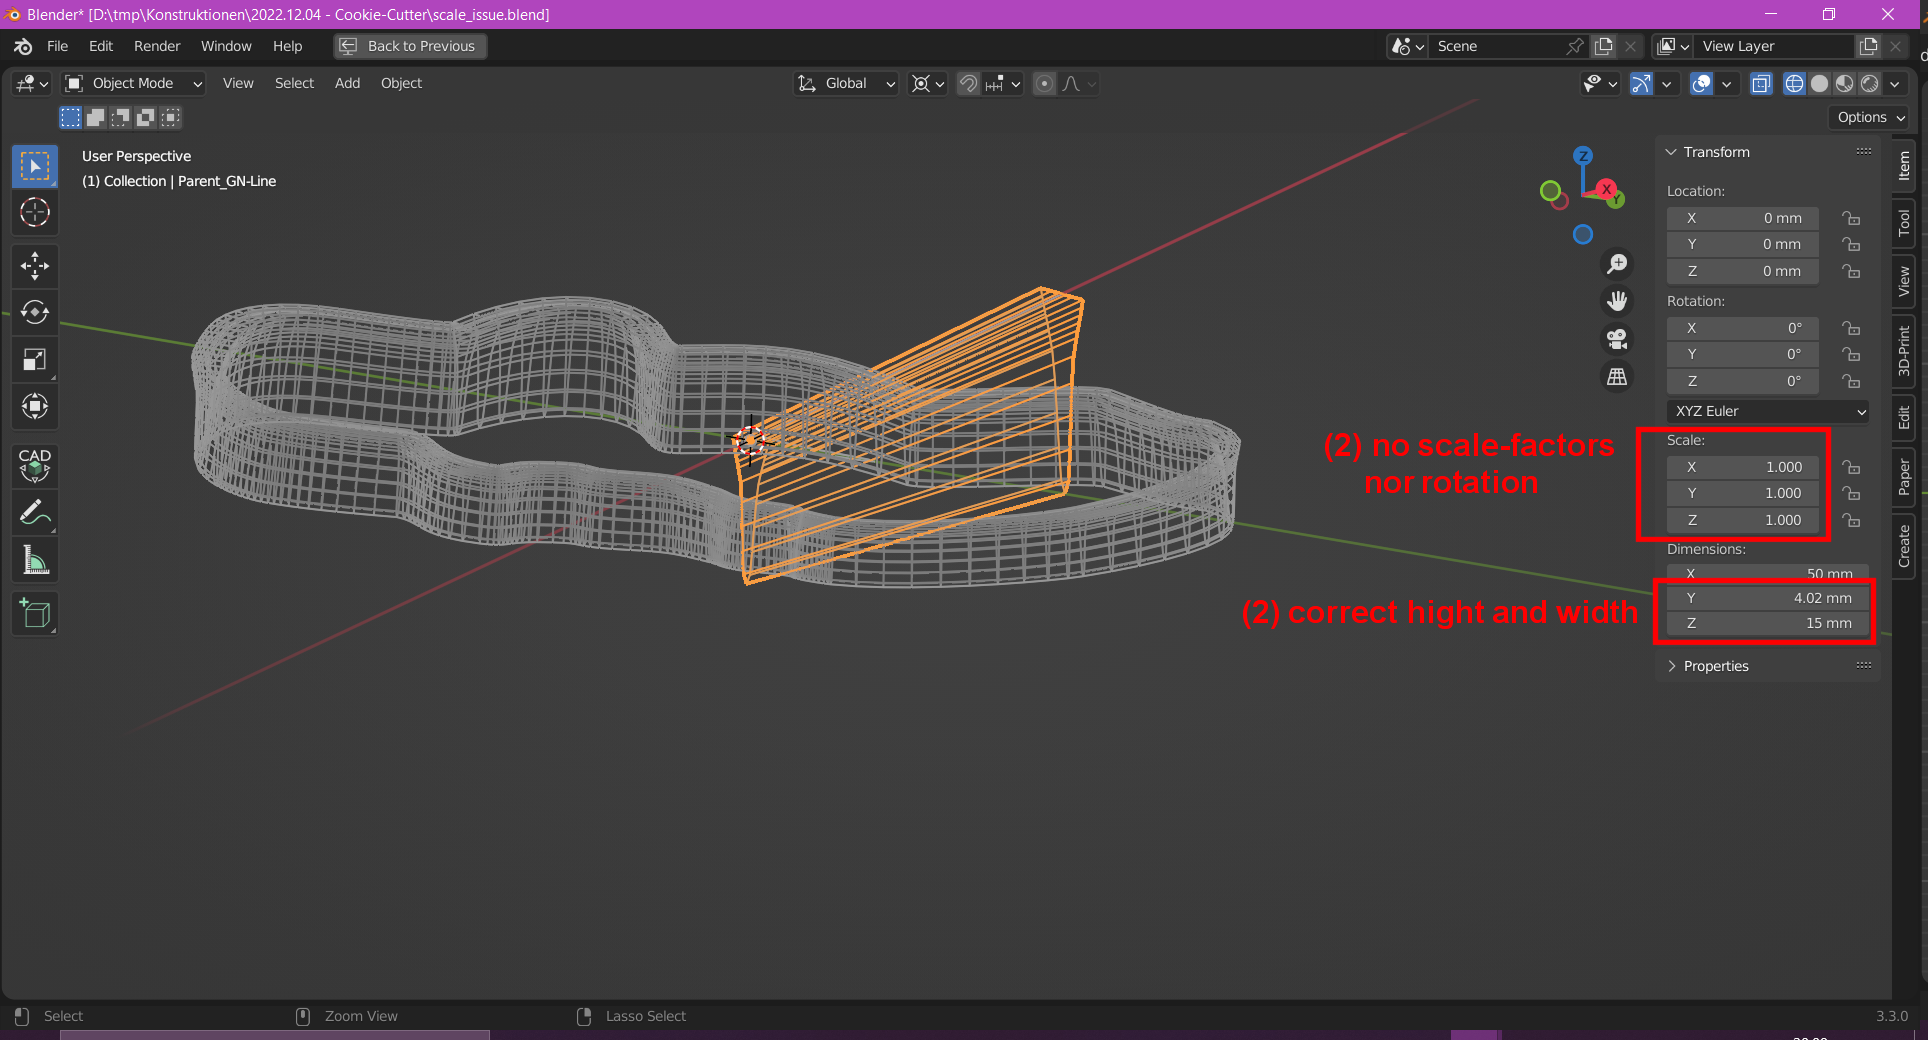
The result with the Bezier-line as base curve works as expected, the resulting mesh has the shape and exact hight and width of the profile-curve.

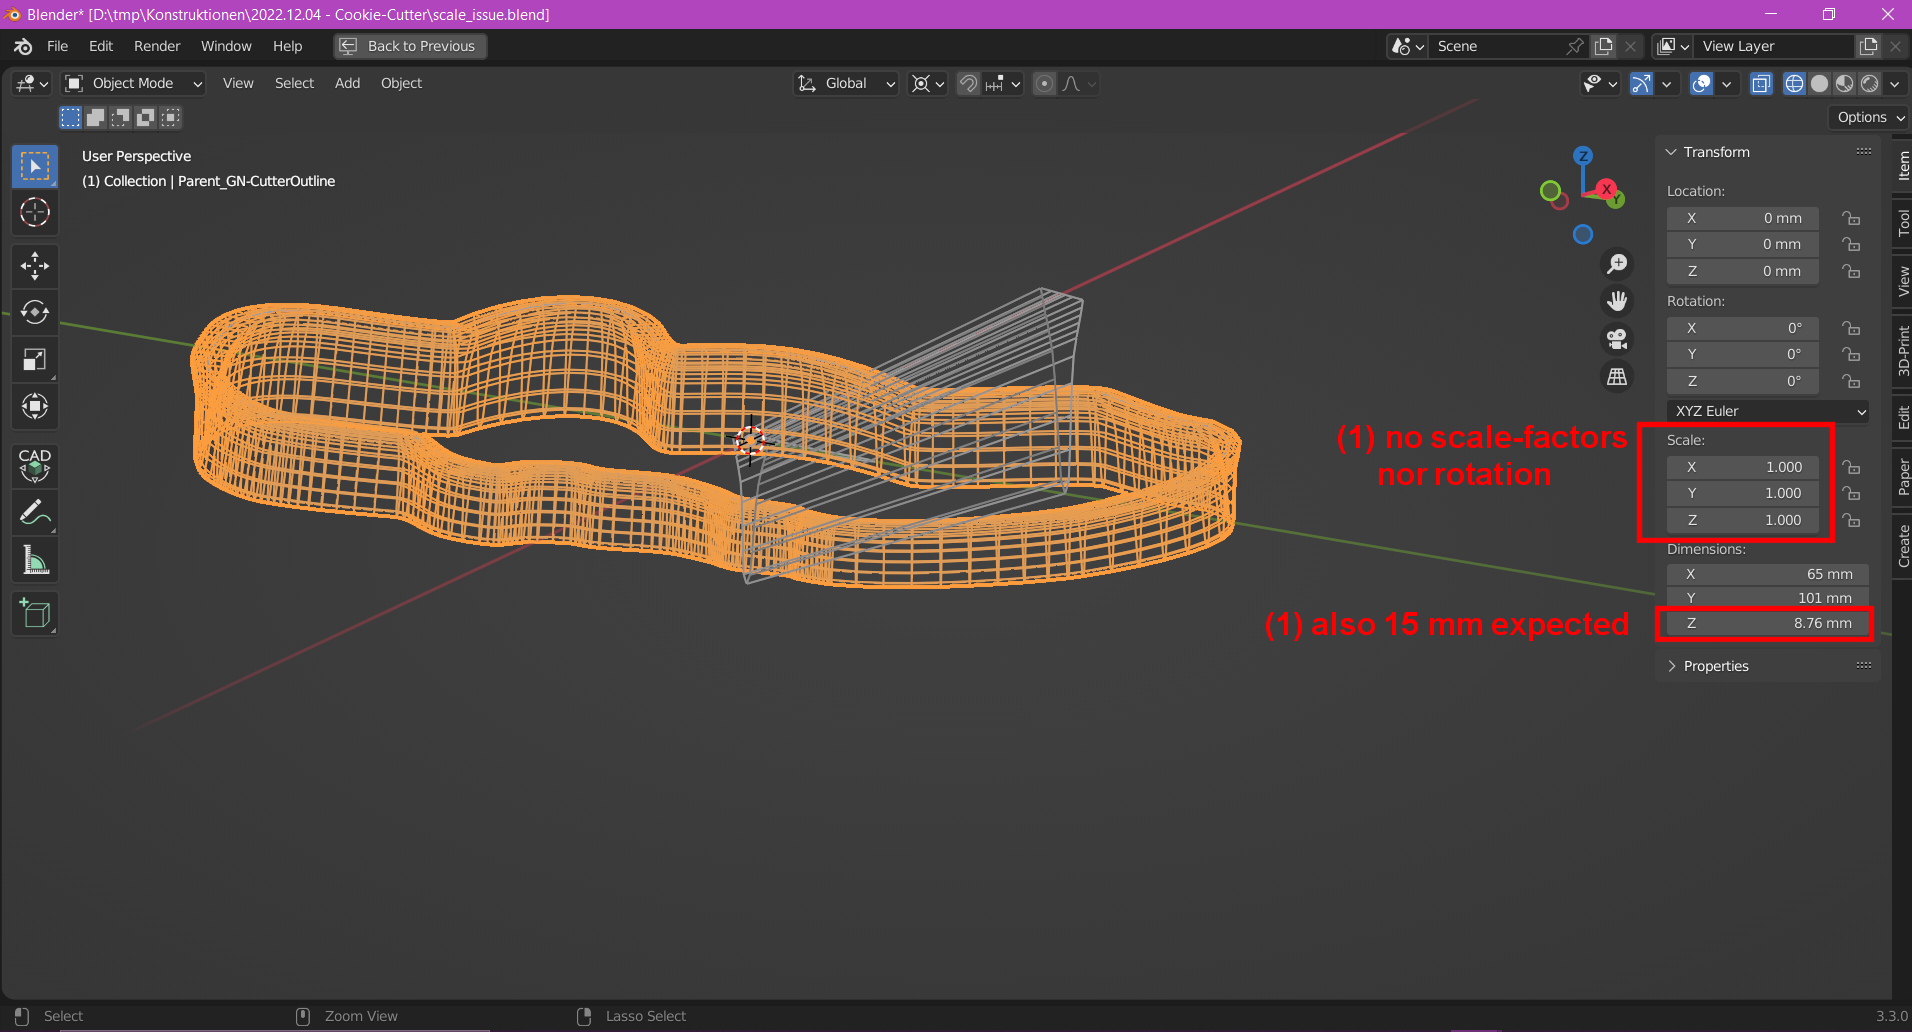
The resulting mesh of the manually drawn curve however has also the right shape, but hight and width are smaller, as if the mesh was down-scaled, which is not the case (at least not deliberately).

What am I missing here? Why has the mesh derived from the manually drawn curve a seemingly downscaled cross-section compared to the profile curve applied in the "curve-to-mesh" node?

I'm using Blender 3.3.0 on Windows 10.

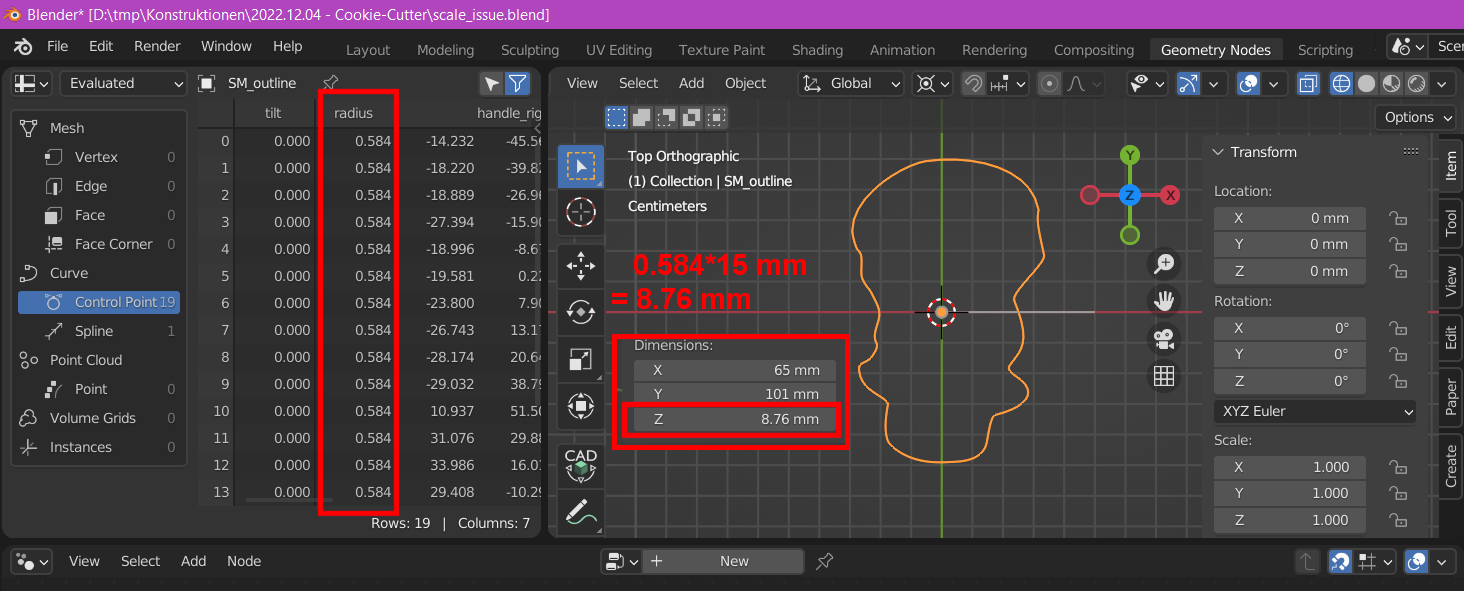
Same node-tree, same profile-curve, but different cross section sizes in the resulting meshes Wire-frame view Wire-frame in orthograpic side view. Cross section (1) equals profile curve in shape and size. (2) is way smaller. Node tree No scale-factor nor rotation (Bezier-line) No scale-factor nor rotation (manual curve)

For full reference see the Blend-file

Thanks in advance and kind regards

Sven

$\endgroup$

3 Answers 3

4
$\begingroup$

It's the radius.

When you scale a profiled curve in Object Mode, by, say, 2, that transform is matrix-multiplied into the entire mesh, after everything else. Internally, the object-space vertex-locations are as they were before the scale.. and so is the curve's radius, despite, visually, the object having twice the girth it had before.

When you apply the scale, the object-level transform is baked into the mesh data. The curve's own control-point locations are scaled by 2, and, to maintain the appearance, so is its radius. If the curve had a radius of 1 before the scale-application, it now has a radius of 2.

Any profile you give the curve then, will be twice as large as it is on another curve, with radius 1.

$\endgroup$
0
$\begingroup$

@robin-betts Thanks a lot, you nailed it! The hand drawn curve seems indeed to have been scaled in object-mode and then applied the scale. All control-points' radius is 0.584 which, multipied with the 15 mm hight of the profile curve, gives the 8.76 mm hight of the cross-section of the resulting mesh.

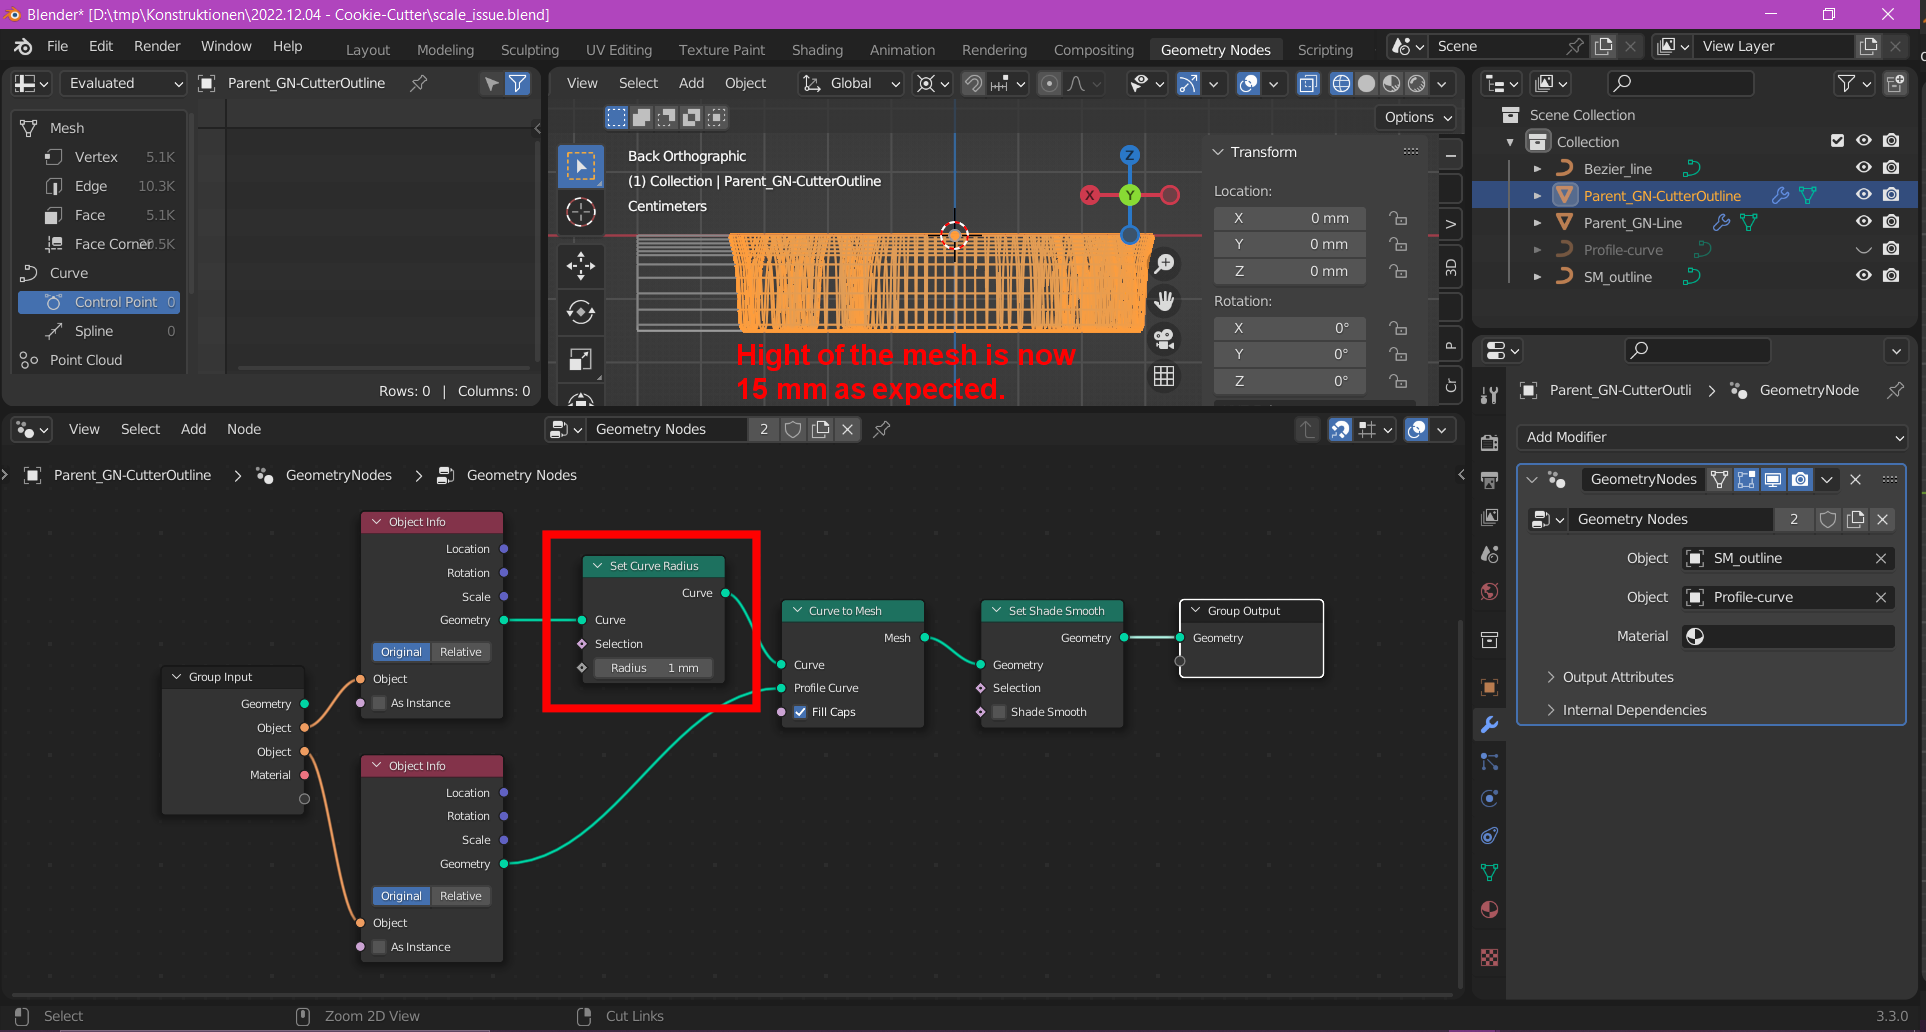
The easy fix was to explicitly force the curve radius back to 1.0 with a set-curve-radius node.

Radius of the hand-drawn curve was indeed not 1. A set-curve-radius node fixed the issue

$\endgroup$
0
$\begingroup$

The way it worked for me was:

  1. Ctrl+A Apply > All transformations in the objects without the modifiers I wanted to apply
  2. Adding the new node Set curve radius to 1, as suggested here, in the modifiers.
  3. Selecting the objects (with and without the modifiers) in the correct order
  4. Ctrl+L Copy modifiers
$\endgroup$

You must log in to answer this question.

Not the answer you're looking for? Browse other questions tagged .