0
$\begingroup$

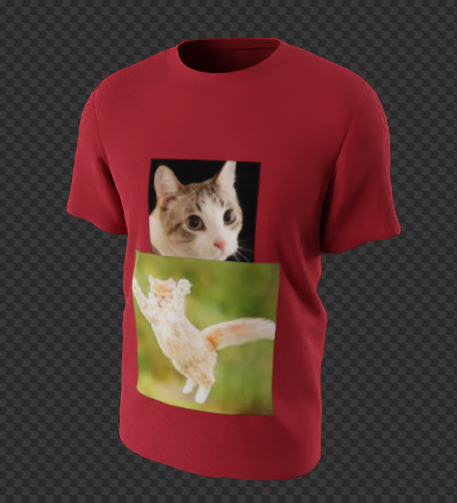
I have a scene where a few of the meshes have between two and three materials stacked atop one another -- the meshes with three materials appear to darken the base material color in the final render (Cycles). The meshes are coming from an imported GLB.

The transparent materials are using the A channel of an RGBA PNG to establish transparency. They should be fully transparent (I think), but it seems like maybe some multiplication is happening during sampling and resulting in a darker output.

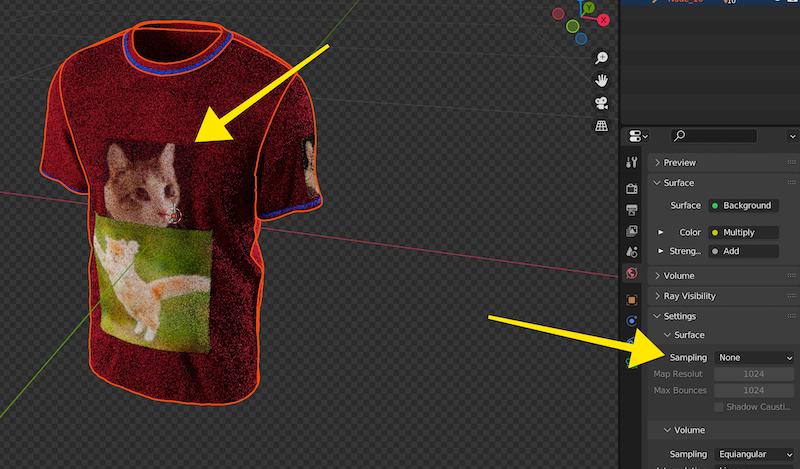
I'm using an HDR for lighting -- if I set "surface sampling" to "none" in the world settings I get slightly more accurate colors, but some transparency starts to creep into the opaque portions of the transparent layers.

How can I make my stacked, transparent layers truly transparent in Cycles? Am I missing some sampling / blend setting that is causing the transparent layers to darken?

render w/ darkened appearance

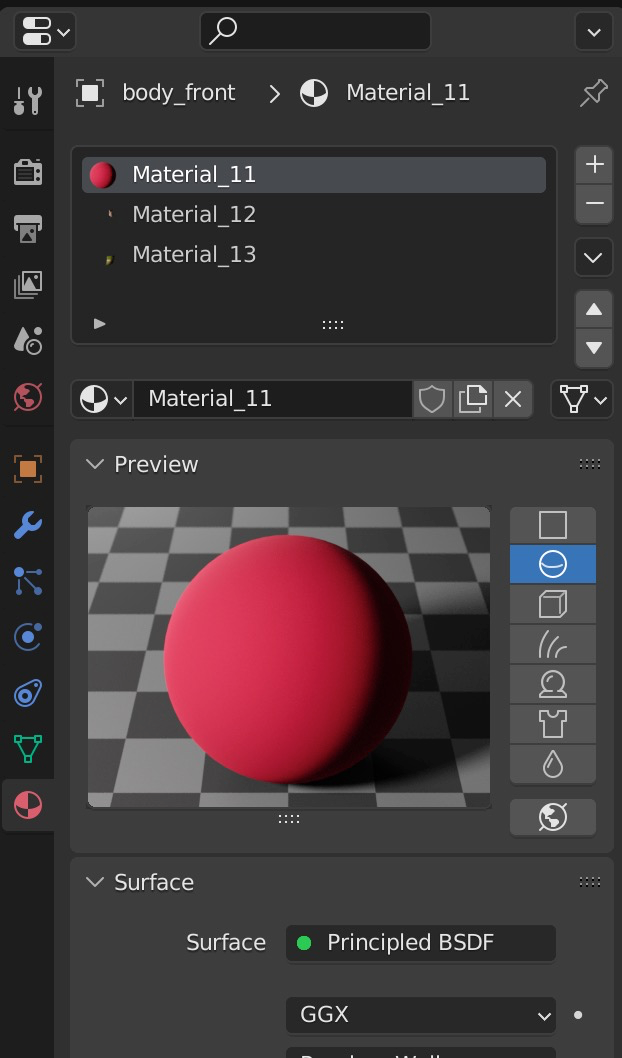
stacked materials

"surface sampling" -> "none"

$\endgroup$
5
  • $\begingroup$ Does this answer your question? blender.stackexchange.com/questions/27718/… $\endgroup$ Commented Oct 6, 2022 at 19:08
  • $\begingroup$ You have multiple meshes all in the same place, for each material its own, and even worse - one object with the red base color, than another object with a mesh for the red base color again, than one mesh for the first picture, and another for the second picture. This is a complete mess and results in things like Z-fighting: the render engine doesn't know which faces are in front and visible for the camera. Instead you could a single mesh with a single material for all layers - just mix them accordingly with Mix RGB nodes in the Shader Editor. $\endgroup$ Commented Oct 6, 2022 at 19:57
  • $\begingroup$ @DuarteFarrajotaRamos unfortunately altering the "light paths > transparent bounces" settings doesn't seem to make a difference... $\endgroup$
    – rpnzl
    Commented Oct 6, 2022 at 20:21
  • $\begingroup$ @rpnzl Well, as I said in my comment, it's a mess. You're correct, it has nothing to do with the Light Paths. I'm working on an answer. $\endgroup$ Commented Oct 6, 2022 at 20:24
  • $\begingroup$ @GordonBrinkmann thanks for the insight -- I see that there are multiple primitives within the same mesh using both the Babylon.js and Three.js editors / inspectors. I don't see how Blender is categorizing these separately, though, they're all displayed as the same mesh within the outliner. Is there a way to make those visible within the Blender UI? $\endgroup$
    – rpnzl
    Commented Oct 6, 2022 at 20:30

1 Answer 1

0
$\begingroup$

First of all: you don't need any of those "inner" objects I think, in some parts they're going through the outer parts and they are overlapping them mostly - I would delete them all.

Next: Select the "body_front" object, go into Edit Mode and make sure nothing of the mesh is selected by pressing Alt+A.

Then in the Material Properties click on "Material_12", the first cat image. Click on Select below the material slots, this selects all faces that have this material. Then in the viewport click X > Delete > Vertices.

Repeat the same for "Material_13", the second cat image. Now there is only the mesh left that uses "Material_11", the red base material.

Click on "Material_12" (first cat) and go into the Shader Editor. Select the three Image Texture nodes, then Ctrl+C to copy them.

Switch to Slot 1 in the Shader Editor and press Ctrl+V to paste the image textures from the other material slot. Now you can mix the red base color nodes with the cat nodes like this: Plug "BASE COLOR > Image_1" (red) into the Color1 input of a Mix RGB node. The "BASE COLOR > Image_16" (cat) plug into Color2 and the Alpha output of the cat image into the Fac input of the mix node.

The same procdure you repeat for the "METALLIC ROUGHNESS" textures and the "NORMALMAP" textures. Mix them before the Separate RGB / Normal Map nodes. Now you have the first cat image on the red base color of the shirt.

Now switch the Shader Editor to Slot 3, copy the textures there and switch back to Slot 1 to paste them there. You mix these textures similar to the ones before. Only this time, the output of the first Mix RGB nodes go into Color1 of a new Mix RGB node. The second cat image textures go into Color2 and their Alpha outputs into Fac. Now you have put the second cat image over cat 1 and the red base.

Since you now have it all in "Material_11", you don't need the separate cat image materials anymore and so you can delete "Material_12" and "Material_13" from the object. This was a lot to describe, here is an overview of the material node tree:
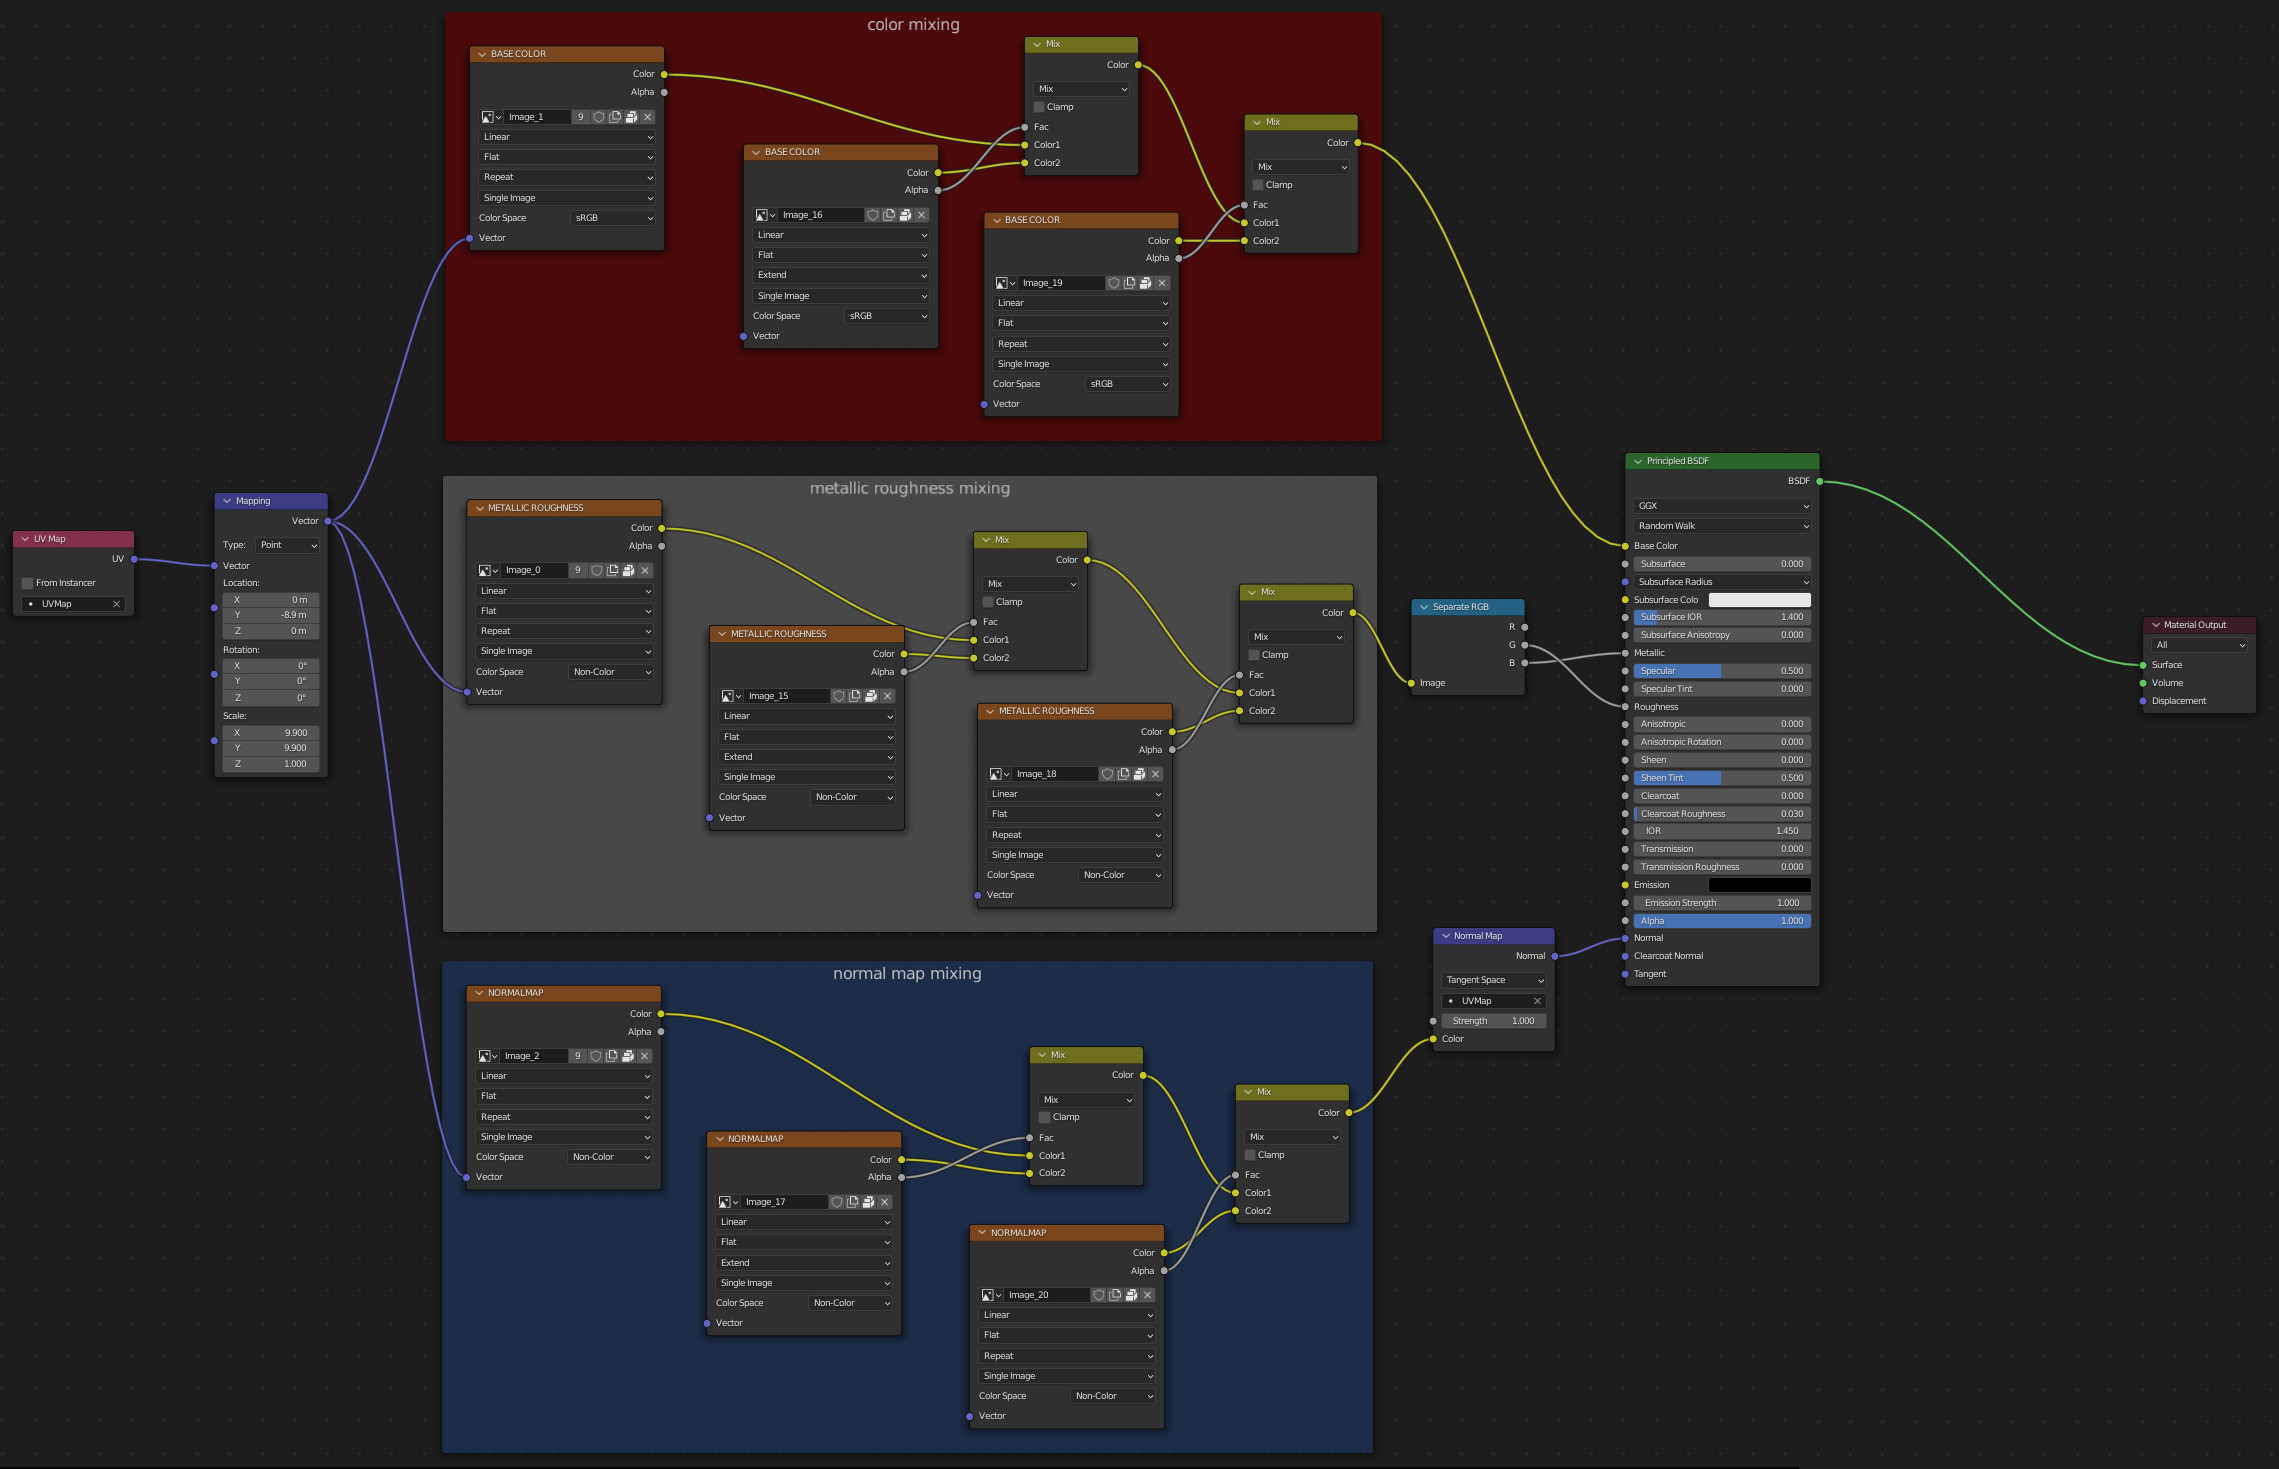
layering

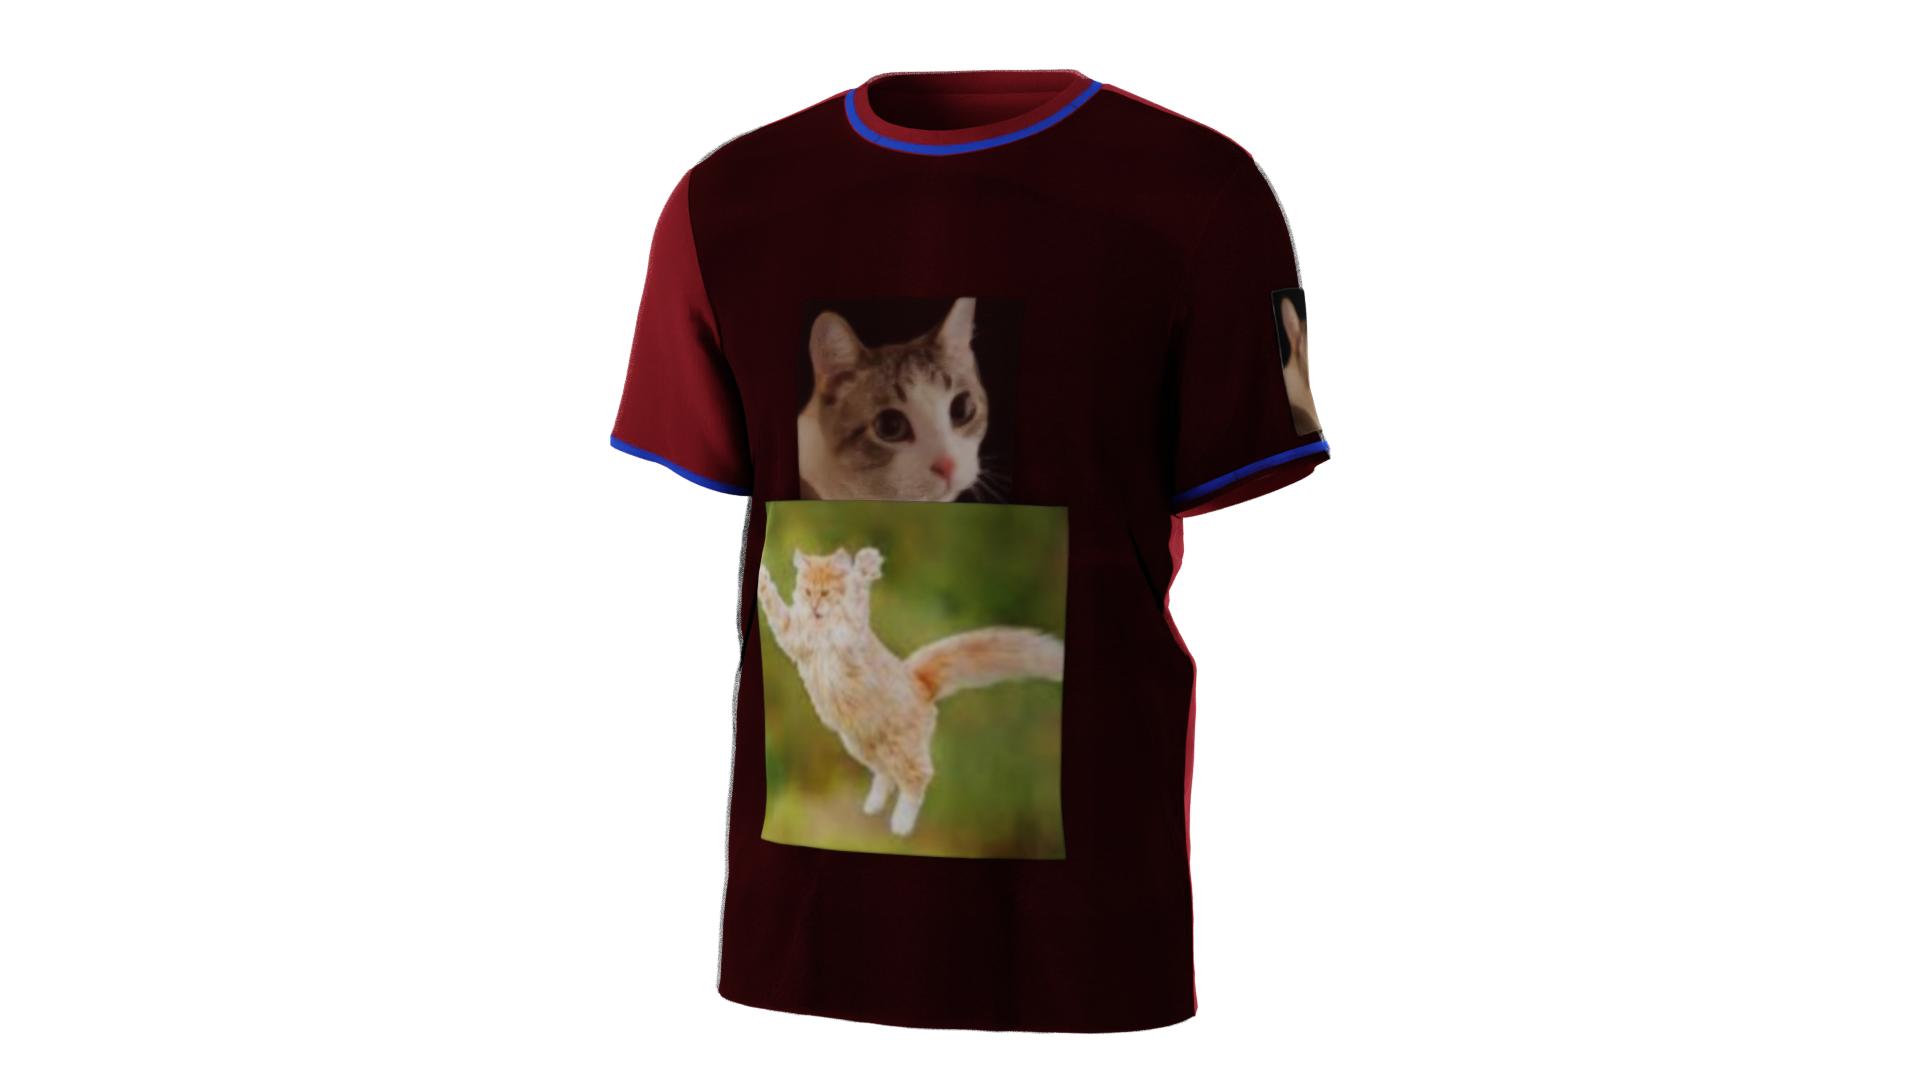
And here's the result:

shirt

$\endgroup$
2
  • $\begingroup$ Super helpful, Gordon, thanks for walking me through this so thoroughly. I see now how the vertices have been multiplied per material, resulting in 3x the geometry to support three materials applied in the same area. Handling this in the shader editor by mixing the materials seems like the right way to deal with this issue -- thank you again! $\endgroup$
    – rpnzl
    Commented Oct 6, 2022 at 21:37
  • $\begingroup$ @rpnzl Yes, because the multiple geometry will make problems and since each face can only be assigned to one material, mixing those textures in the material is the only way or else you cannot have a change from one material to another within a face. $\endgroup$ Commented Oct 6, 2022 at 22:52

You must log in to answer this question.

Not the answer you're looking for? Browse other questions tagged .