5
$\begingroup$

How can Geometry Nodes be used to generate instances that inherit the texture color of their emitter/instancer?

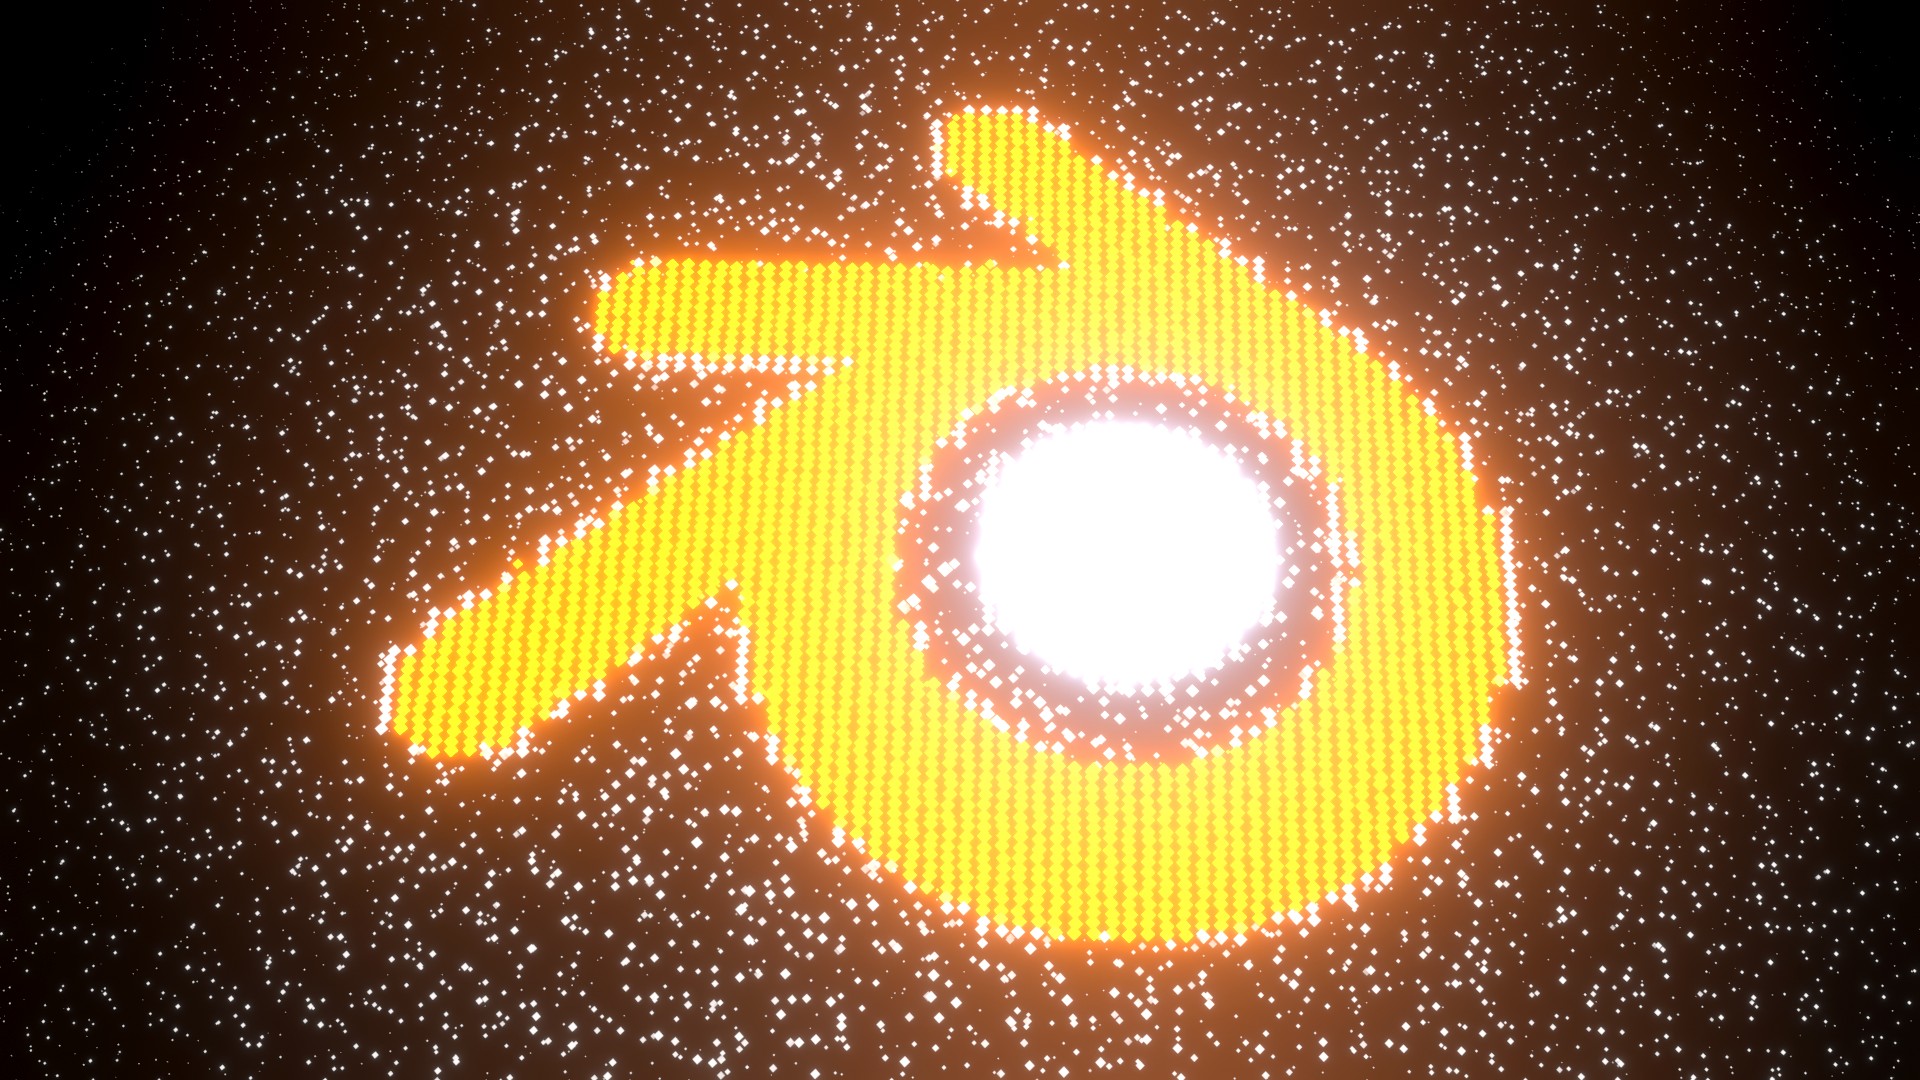
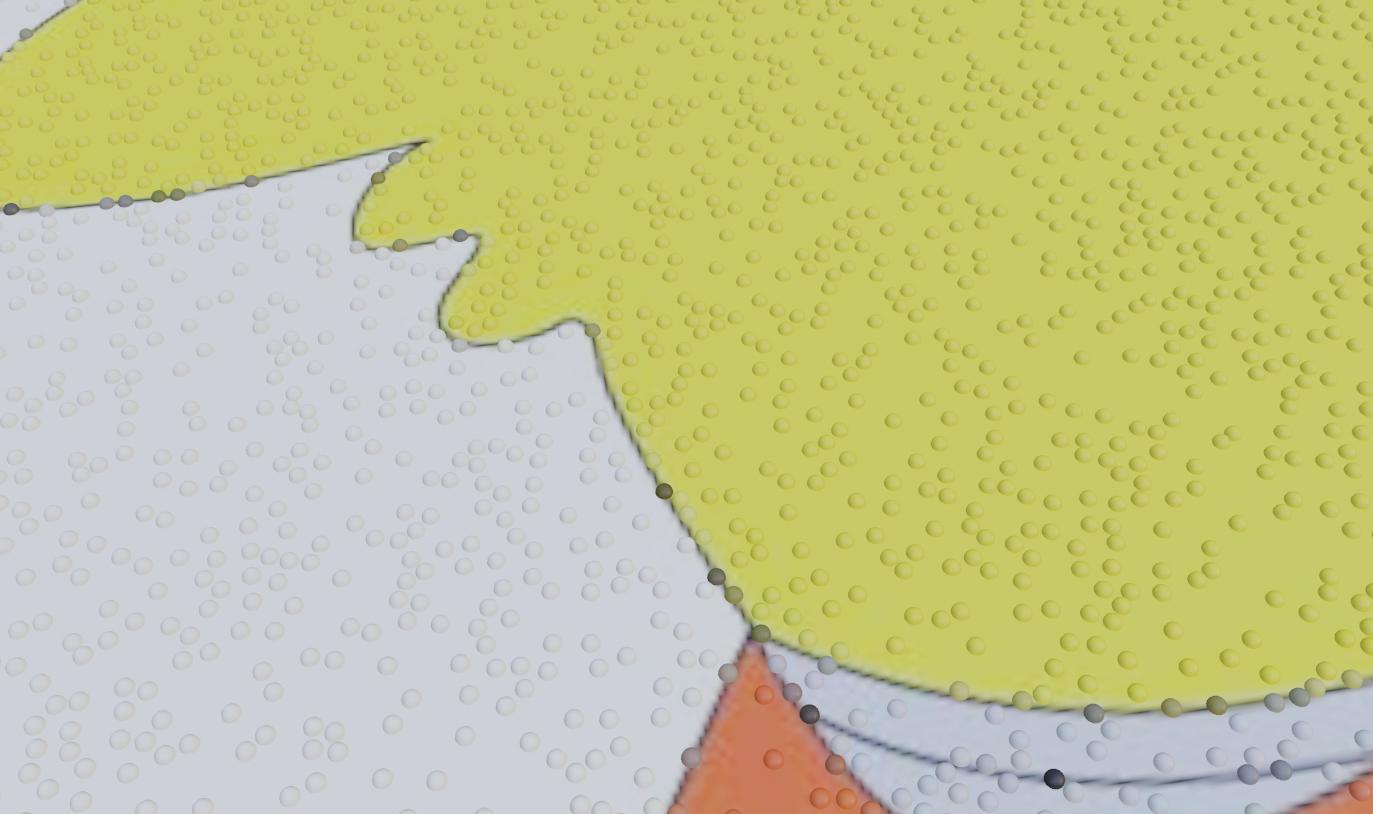
Reference image of desired result:
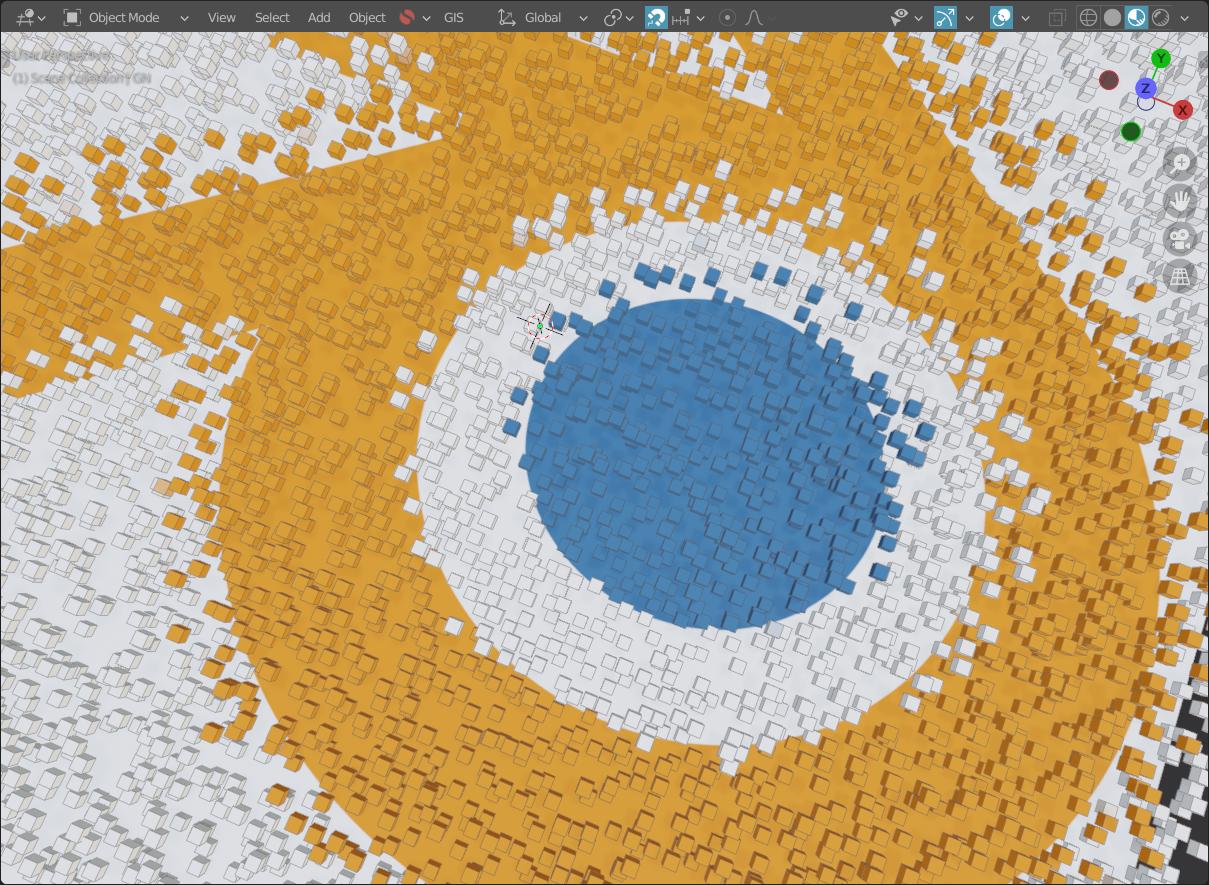
(Above: screenshot by quellenform)

There is already a solution using particle systems in Cycles. Now I am looking for a way to do it using Geometry Nodes (that will be compatible with Eevee as well).

Because the "From Instancer" checkbox on the Texture Coordinate node is only for Cycles, and because particles and GN instances are fundamentally different, a new approach is needed.

(I have found an answer that uses the material index to assign multiple materials, but using multiple materials is something else altogether, and would only work for images with a handful of colors.)


$\endgroup$
6
  • 2
    $\begingroup$ Note to contributors: Thank you all for the 3 (as of this writing) helpful answers! I did not anticipate such a swift response. While I have upvoted each of them, I am having trouble determining which should be the "accepted" answer. Since I want to be fair, I will take some time to try out the different methods. If one stands out as most optimal, I will accept it. If I don't accept any, consider it a tie. Reminder to the community: Please upvote any answer that helped you. $\endgroup$
    – Mentalist
    Commented May 23, 2022 at 9:14
  • 2
    $\begingroup$ Expect the unexpected, here on blender.stackexchange.com and take the time you need ;-) $\endgroup$
    – quellenform
    Commented May 23, 2022 at 9:15
  • 1
    $\begingroup$ Overview: quellenform's technique maps the texture to the object bounds. Since it doesn't rely on a UV map, the instances and the emitter plane can be joined as one object and still retain their texture mapping. TheJeran's technique and possibly ferret's technique are similar in that they both pull in a UV map through the modifier, allowing complex textured objects to be manipulated (not only planes). They differ in that the former returns a color, while the latter returns the UV (which allows for further manipulation of the vector within the material). $\endgroup$
    – Mentalist
    Commented Jun 2, 2022 at 11:49
  • $\begingroup$ For people looking into controlling color on unrealized instances: it still seems impossible and all 3 answers here realize instances. $\endgroup$ Commented Jun 6, 2022 at 11:03
  • $\begingroup$ @MarkusvonBroady True - all three answers realize instances. I didn't specify any criteria about this in the question, as my total poly count will probably not be high enough for that to be a constraint. Also, I don't know if it's possible to work around that limitation. Each instance would need to receive some kind of unique data that could then be decoded into UV or color data within the material. Maybe there is some trickery that can be done, and I'd be curious to see an answer like that. $\endgroup$
    – Mentalist
    Commented Jun 6, 2022 at 11:34

3 Answers 3

8
$\begingroup$

This variant is different because you do not need a UV map nor an existing ground plane. This is the case, for example, if you even want to create the grid on which you distribute the points in Geometry Nodes.

This is how I would solve it (no external attributes required, all in one place controlled by Geometry Nodes and independently displayable from the ground plane):

enter image description here

enter image description here

  1. Use the node Bounding Box to capture the dimensions of the grid on which you want to instantiate the cubes.

  2. Map these dimensions to a vector from $0,0,0$ to $1,1,1$ so that you can feed the node Image Texture correctly (You can of course directly feed in an external attribute, like your UV map, if you already have one).

  3. Then distribute the points with the node Distribute Points on Faces on your grid and instantiate your objects there.

  4. The nodes Random and Set Position will help you to distribute them randomly on the Z-axis in a certain area.

  5. Finally you only have to capture the color from the node Image Texture with the node Capture Attribute per instance and pass it to the Group Output, as well as define the materials.

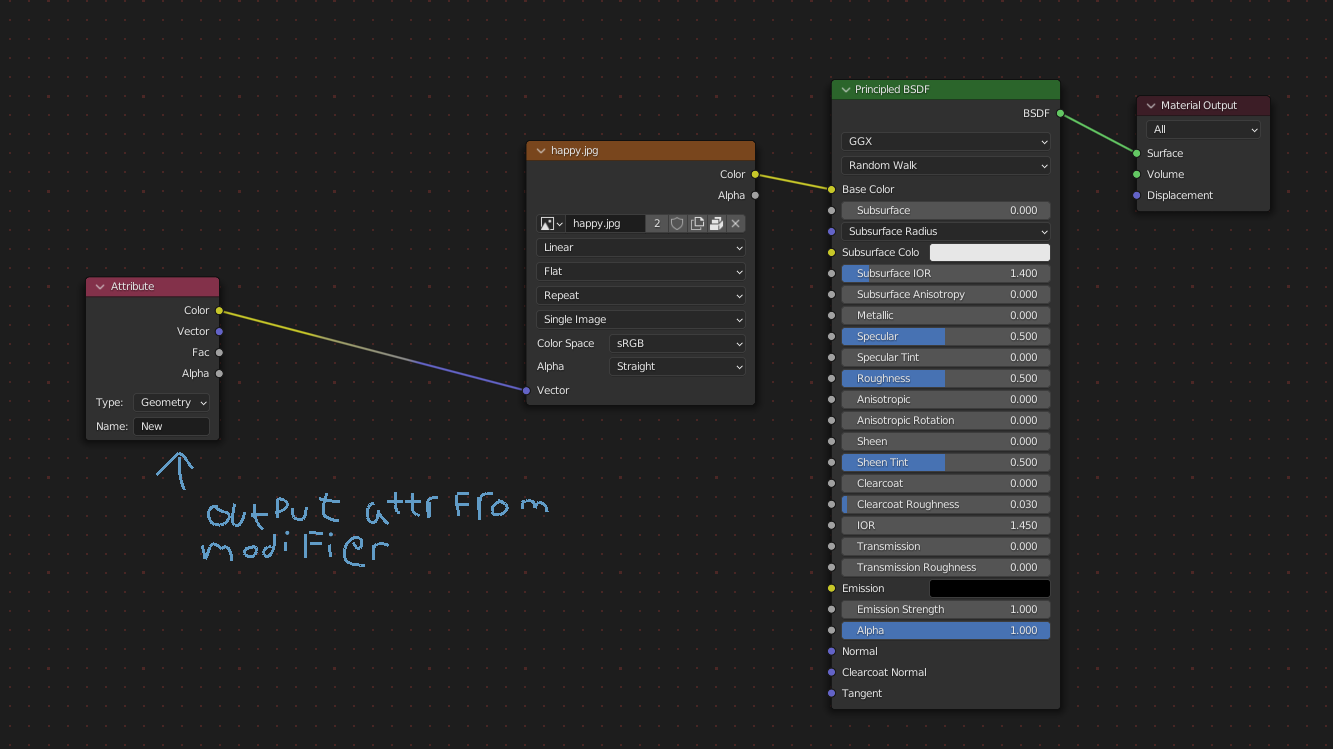
In the shader, you can then retrieve and process the color transferred to the instances with the Attribute node (in this example I also used another color for the sides of the cubes):

enter image description here


Update

enter image description here

...and here is an example and the reason why I prefer this variant: It is just super flexible and everything can be realized procedurally without UV mapping in Geometry Nodes:

enter image description here

Here's a short video, since it doesn't look good in the GIF (Rendered with EEVEE).

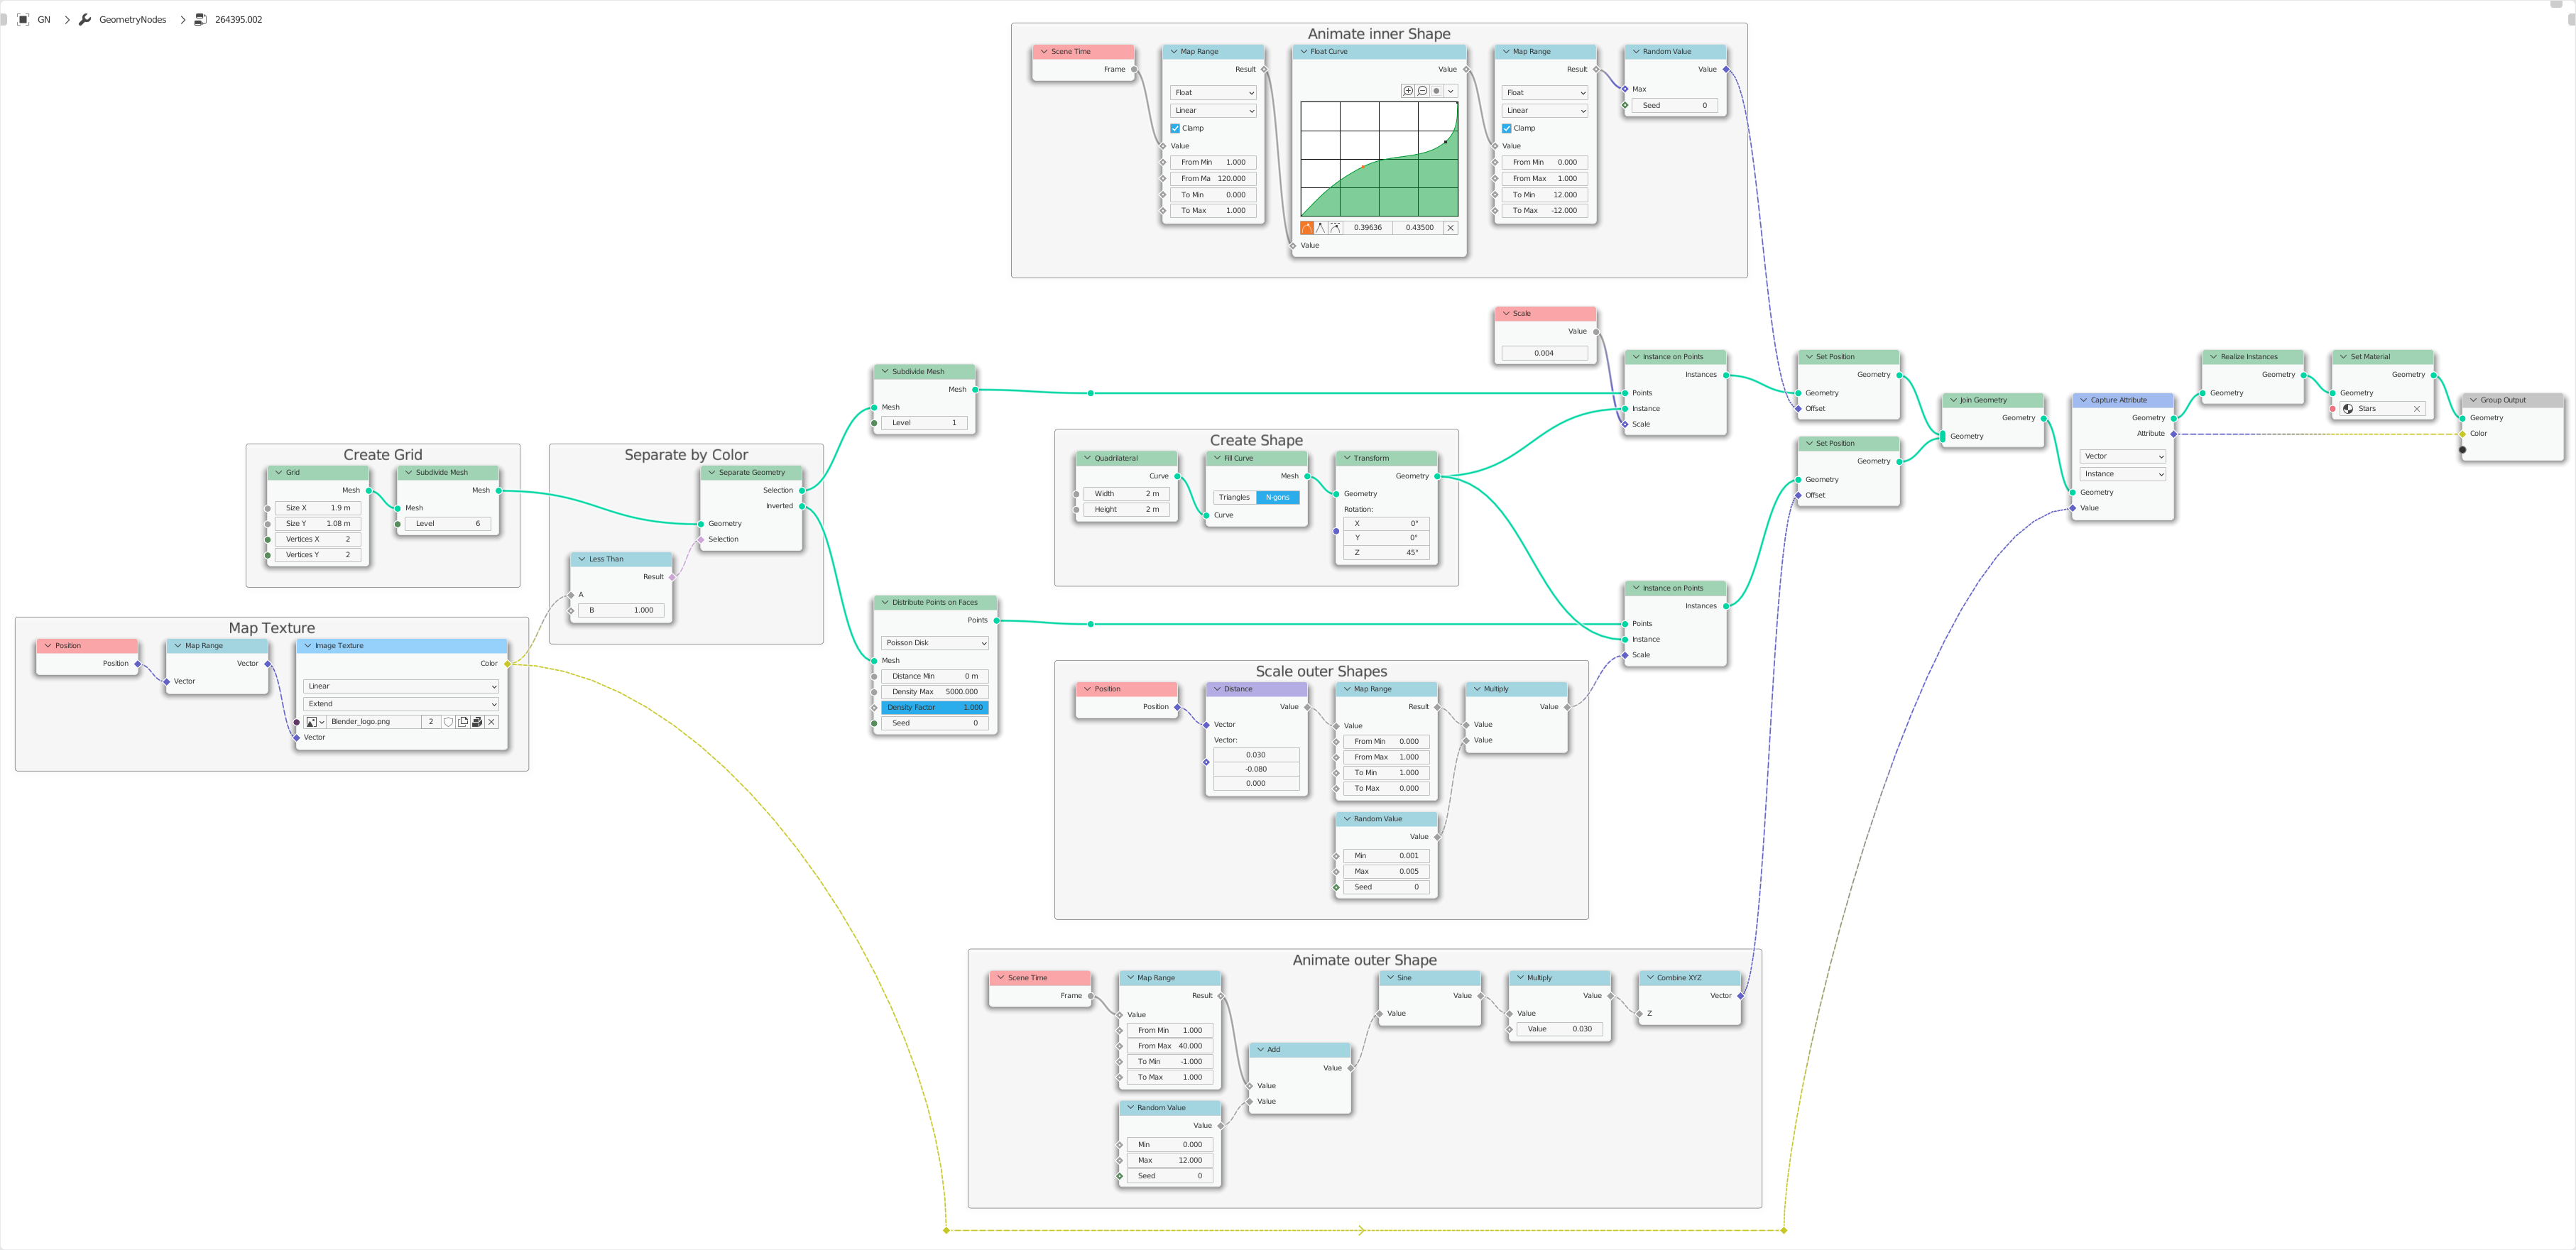
And this is the node group that generates that:

enter image description here

$\endgroup$
3
  • $\begingroup$ Nice animation you added to your answer! It does a good job of illustrating what's possible. I'm playing with your node setup and I have a question: If one were to want to project the instances out from face normals (instances rotated according to faces) on a non-planar mesh (Suzanne, Torus, etc) and use the UV map to assign the texture, what would need to change? $\endgroup$
    – Mentalist
    Commented May 24, 2022 at 4:36
  • $\begingroup$ @Mentalist Interesting idea! But I think that would almost be worth a separate question again, especially because the answer here would have to go into a bit of detail, don't you think? $\endgroup$
    – quellenform
    Commented May 24, 2022 at 17:49
  • $\begingroup$ Never mind. I achieved the result I wanted. Will share my .blend file. (Made with Blender 3.1.2) The instance rotation method is from here. I borrowed and modified your animation technique. The coloring method is the same as in TheJeran's answer. There is the limitation of the instancer not being able to retain UV data if combined with the instances in a single object... so I simply used two separate objects. $\endgroup$
    – Mentalist
    Commented May 25, 2022 at 8:42
5
$\begingroup$

The process is a bit tedious but it's quite simple.

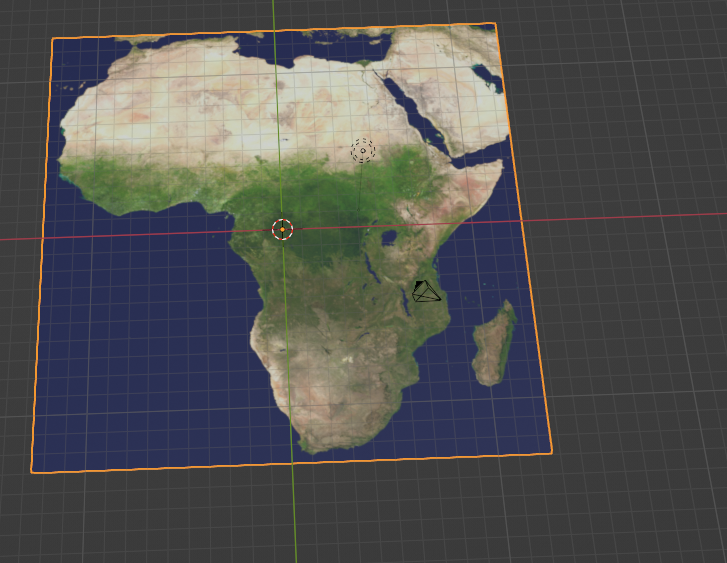
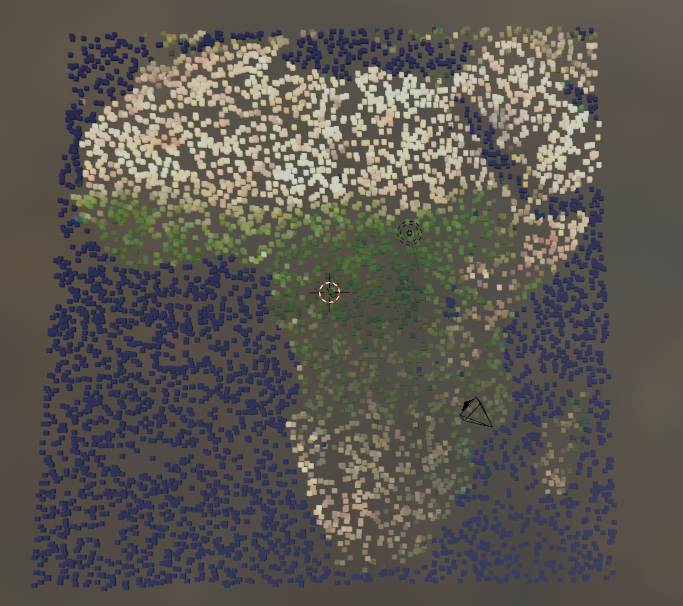
First load in the texture you wanna use (I recommend Images as planes) I have this image of africa so I'm gonna use that.

enter image description here

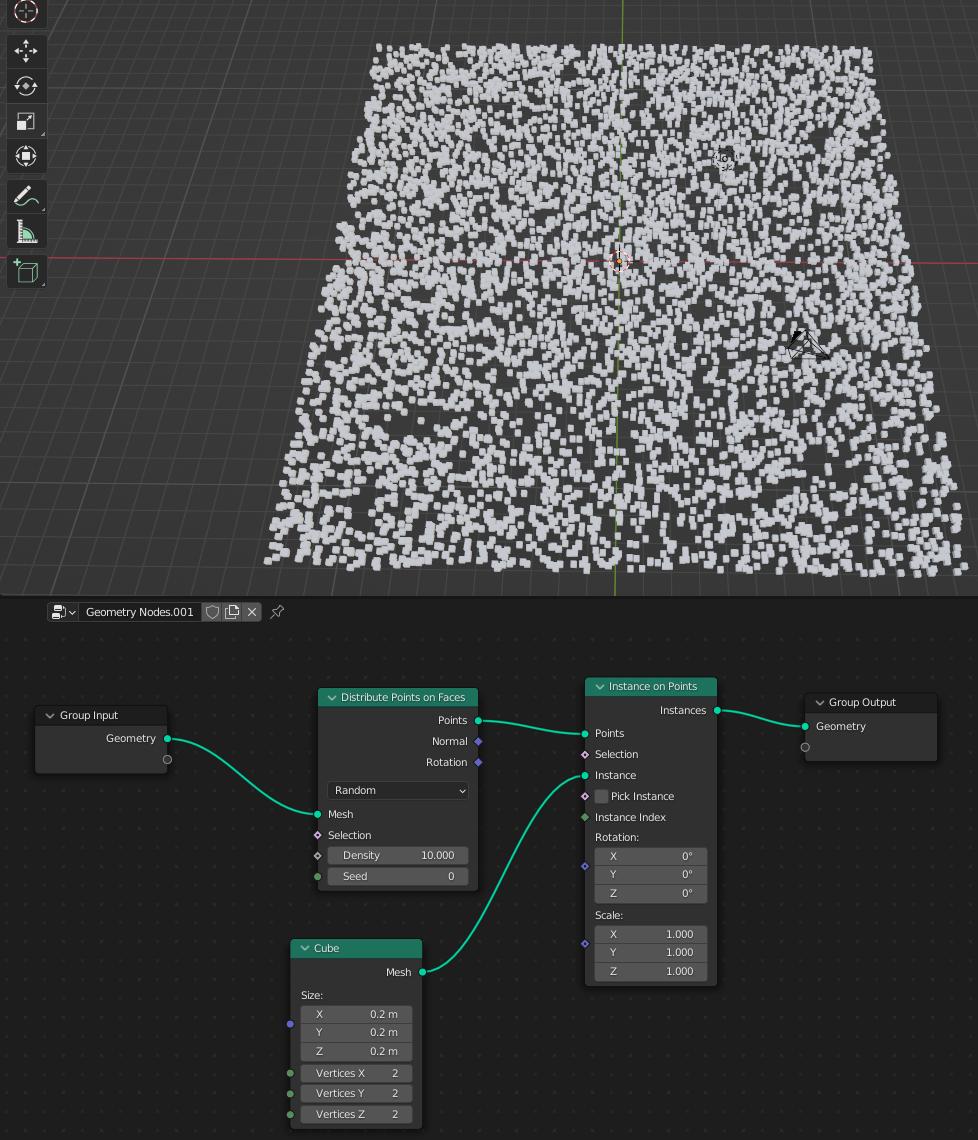
Next create your geometry node setup and distribute some points and instances.

enter image description here

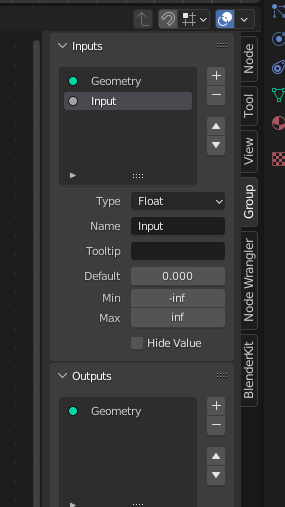
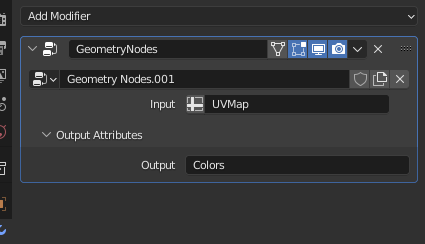
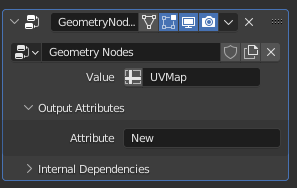
Next we need to bring in the UV data. So click the Group tab and then create a new input.

enter image description here

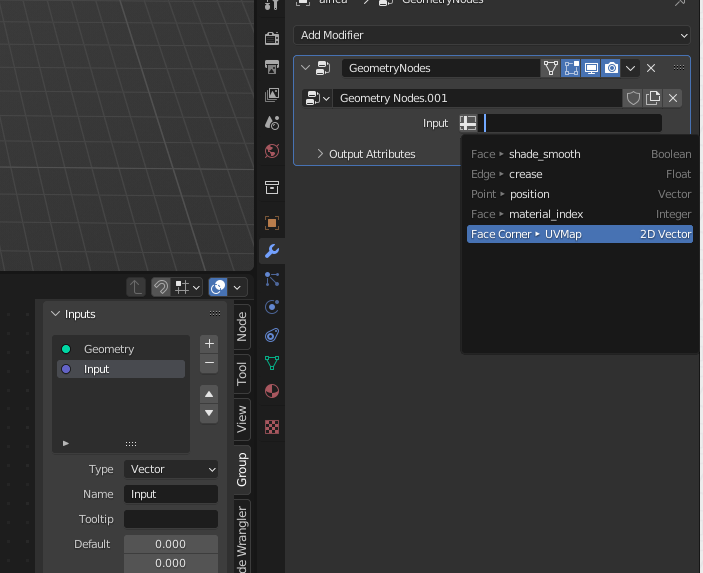
Change it to Vector type. Then make the input an attribute and select UVMap

enter image description here

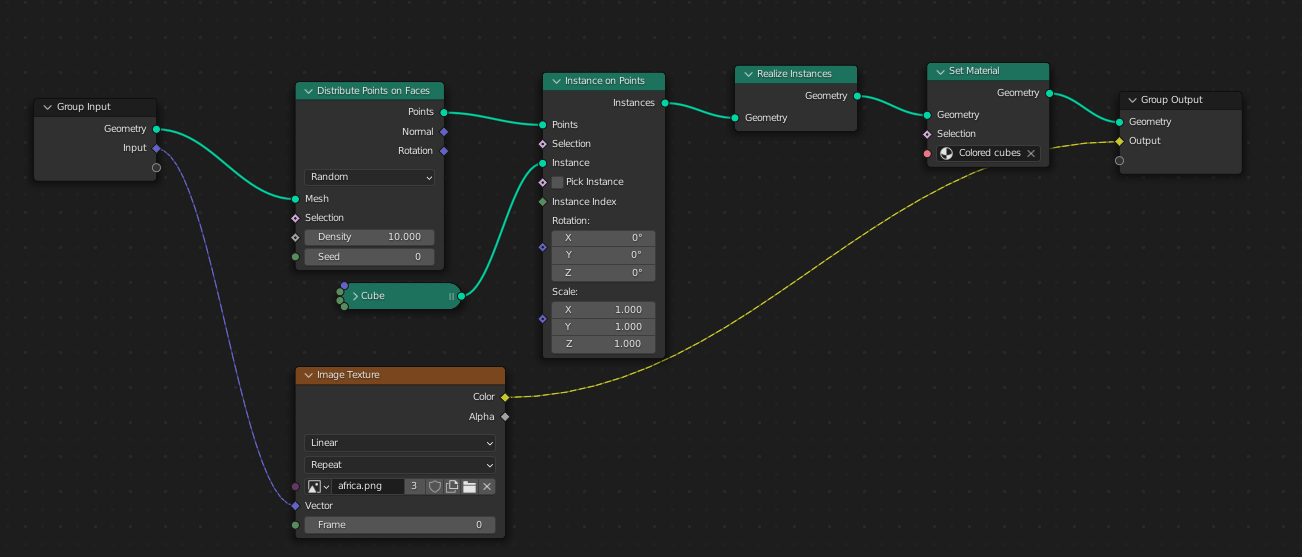
Now load your image texture into Geonodes and set-it up like I have here. You will need to create a new material to put in the set material node.

enter image description here

Give your new color output a name.

enter image description here

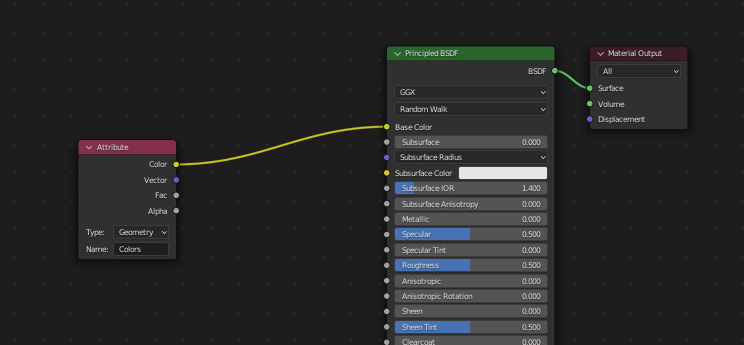
Lastly connect that attribute to the color in your shader.

enter image description here

VIOLA!

enter image description here

$\endgroup$
3
  • $\begingroup$ Hmm, and what would you do if you wanted to distribute the points on an object that you also created with Geometry Nodes? $\endgroup$
    – quellenform
    Commented May 23, 2022 at 9:12
  • $\begingroup$ You'd have to use your bounding box method as far as I know. $\endgroup$
    – TheJeran
    Commented May 23, 2022 at 9:24
  • $\begingroup$ ....yes exactly, something like that, or exactly what I gave as an answer ;-) $\endgroup$
    – quellenform
    Commented May 23, 2022 at 9:29
5
$\begingroup$

all you need to do is capture the UV attribute to the instances

enter image description here

enter image description here

enter image description here

enter image description here

$\endgroup$
2
  • $\begingroup$ Hello ! Thanks for the answer :) Could you also post the shader node tree for completeness ? $\endgroup$
    – Gorgious
    Commented May 23, 2022 at 8:51
  • $\begingroup$ it's in the blend file that you can download. $\endgroup$ Commented May 23, 2022 at 10:52

You must log in to answer this question.

Not the answer you're looking for? Browse other questions tagged .