0
$\begingroup$

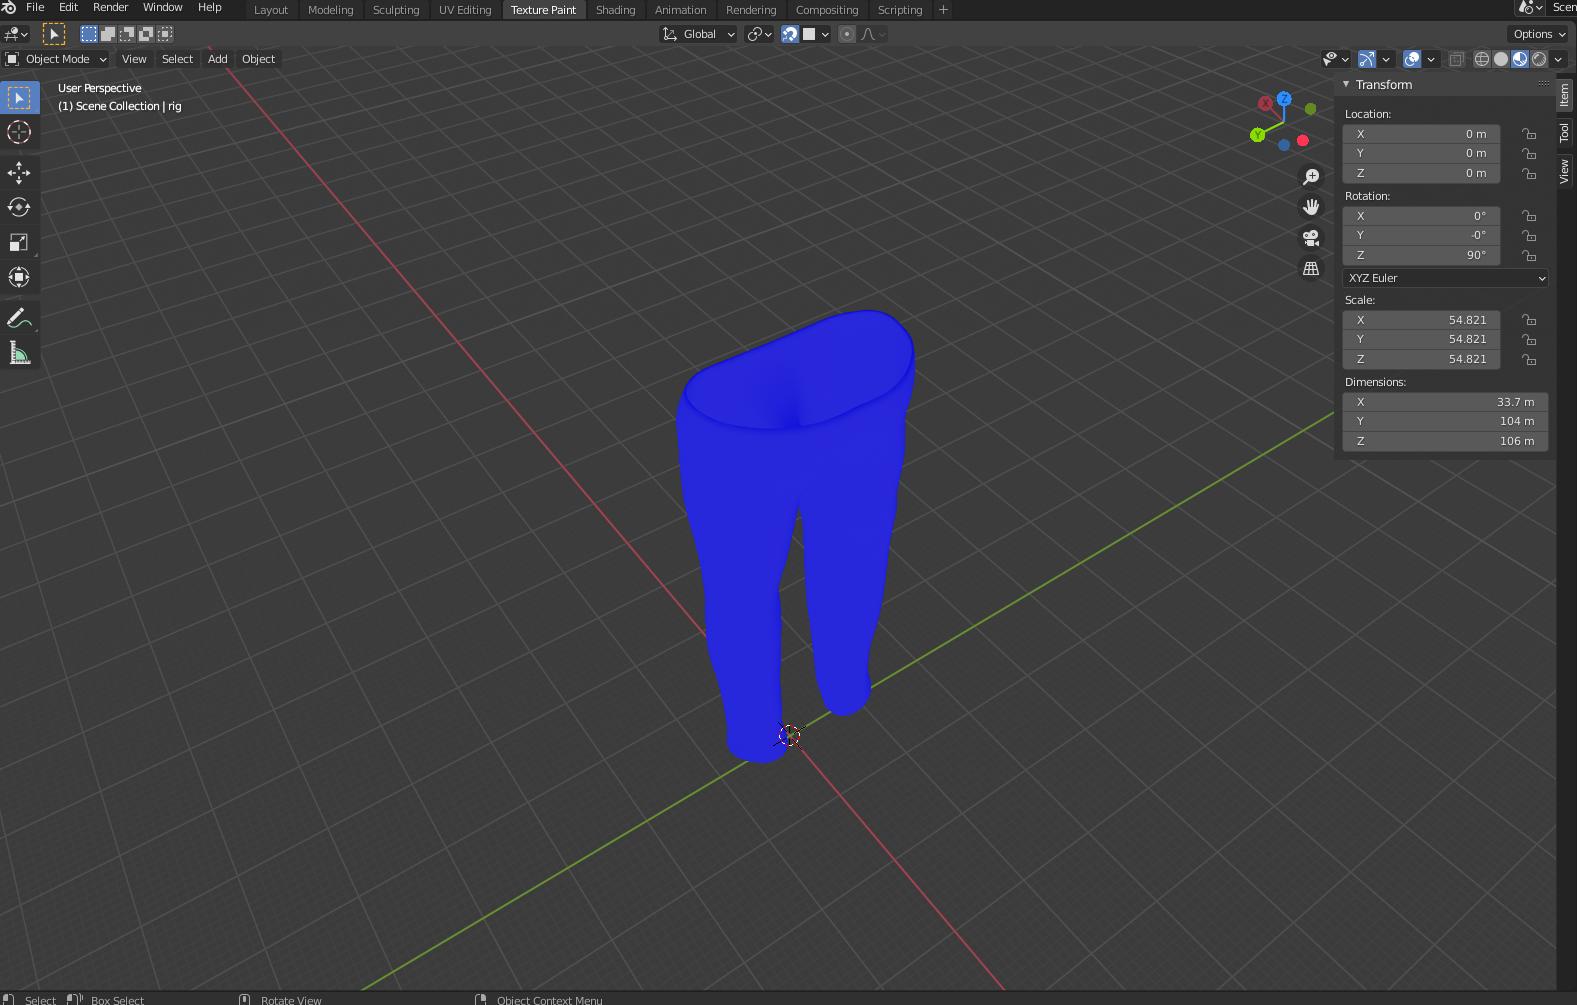
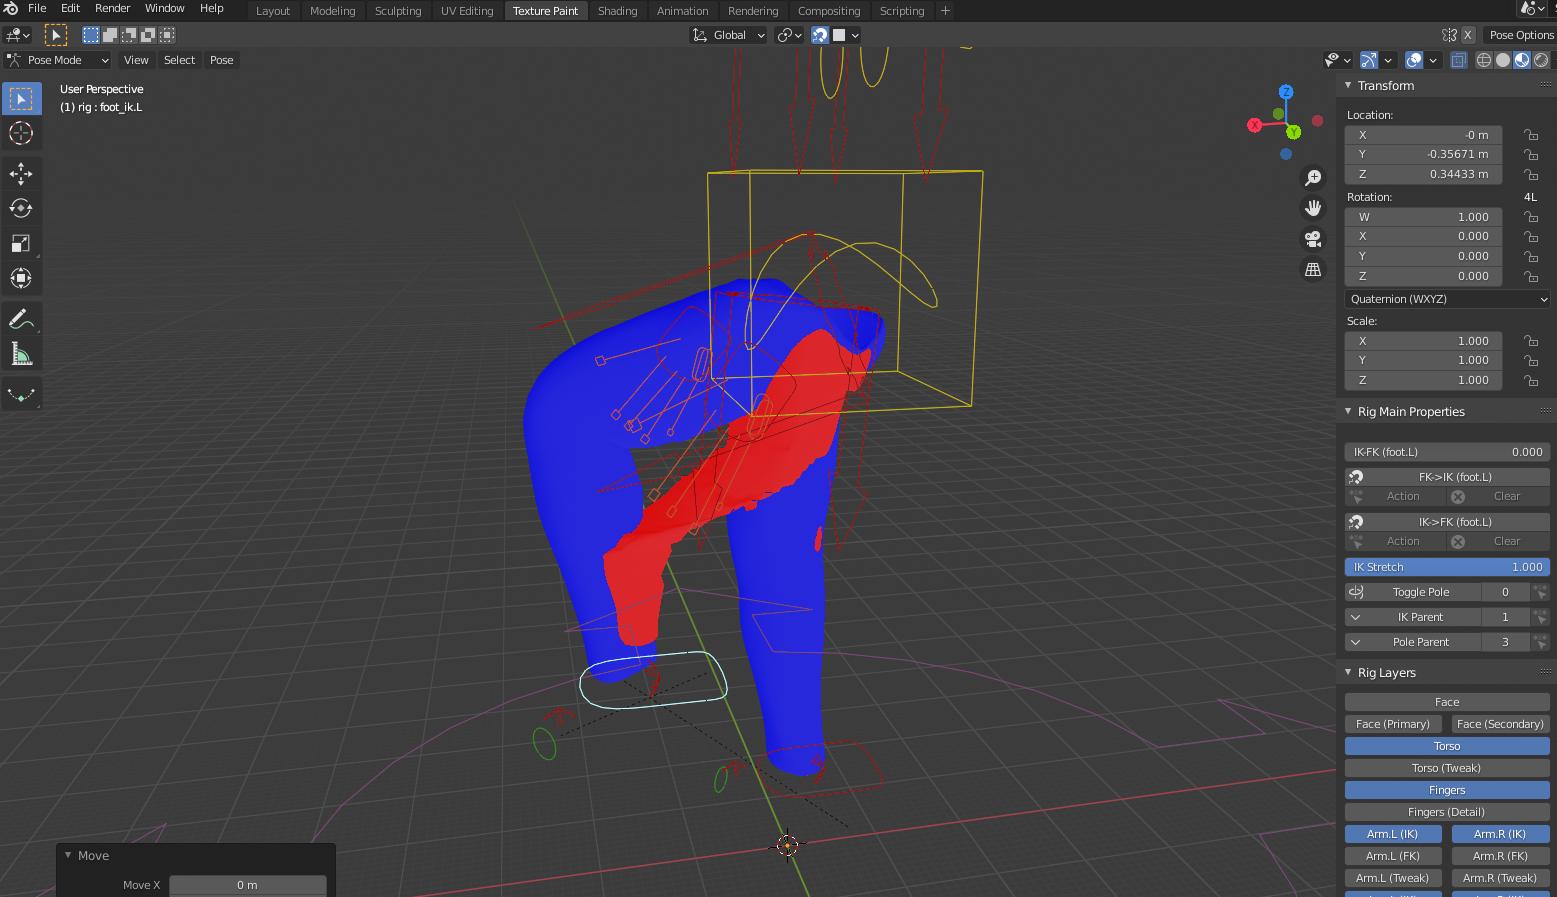
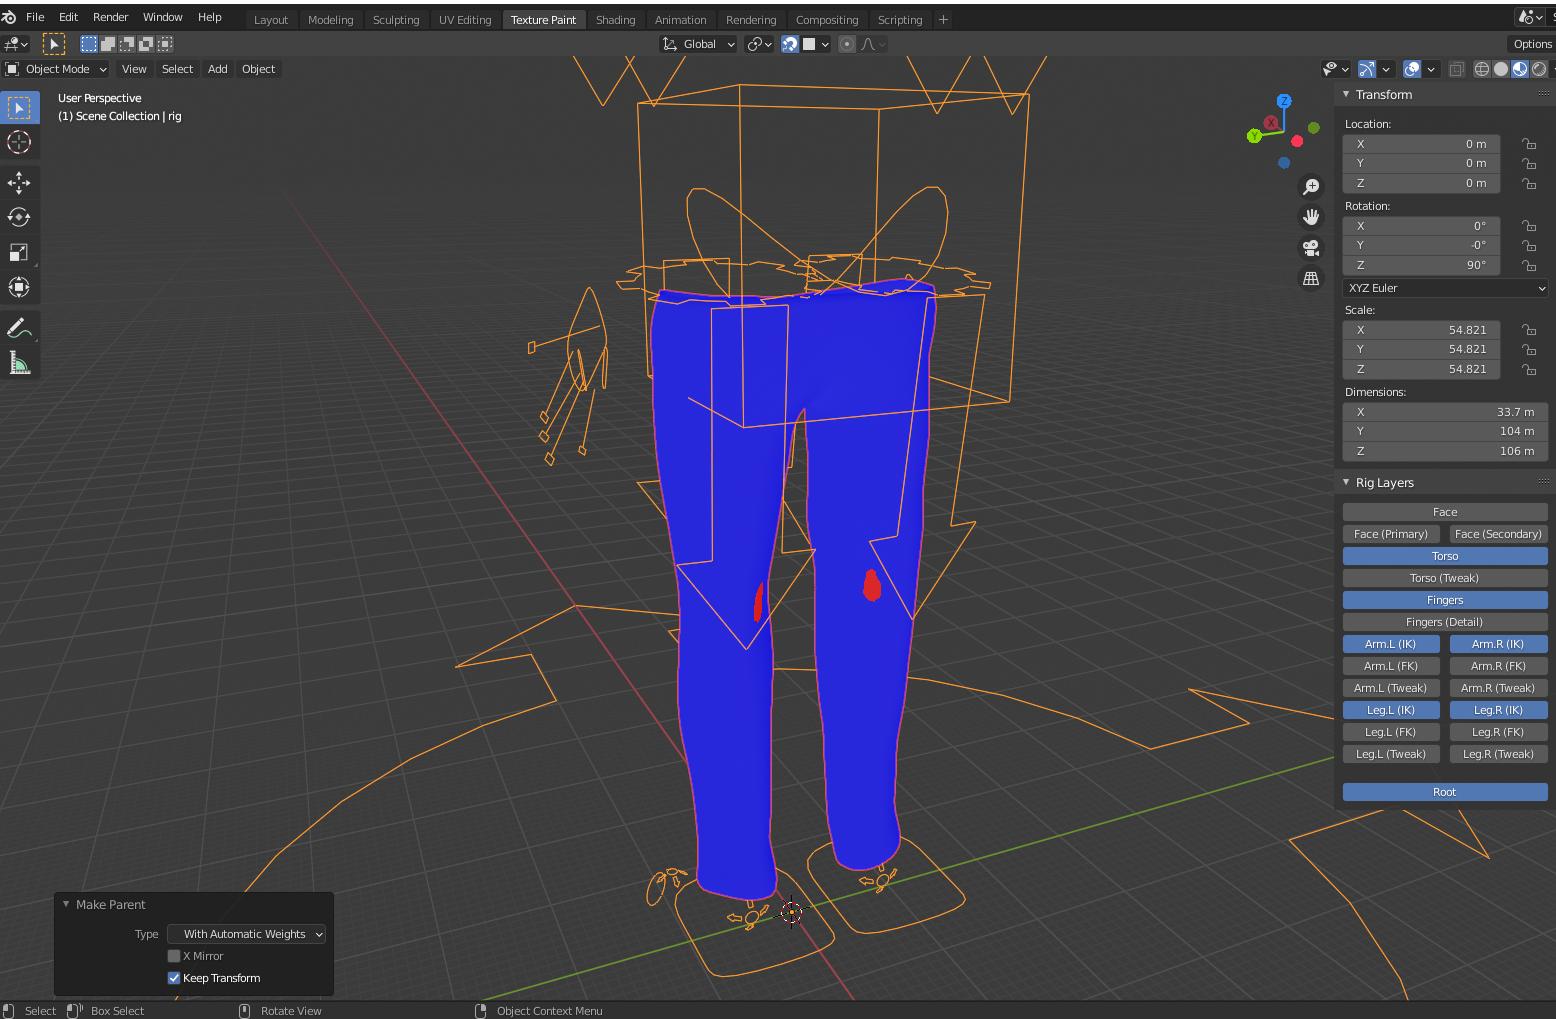
I'm trying to get a handle on rigging objects, and currently am having some trouble with the automatic weights rigging tool (which from what I've seen online, always causes some problems). I used the pants in the pictures provided as an example of what I'm seeing with most of my objects, which is trying to parent the object with the rig using Armature Deform with Automatic Weights causes some normals to reverse and then lead the mesh to split from itself and cause some strange behavior.

I am aware that sometimes, due to proximity, that other bones incorrectly move the wrong meshes, so I went through and corrected the weight maps of each bone before taking these pictures.

My best guess is it's because the pants aren't filled in but rather have a realistic thinness (e.g. the negative space isn't from one side of the pants to the other). My body mesh, which is like that, seems to have no problems rigging, which is why I think it may be because of that.

If anyone knows how to correct this error, or some things to check, it would be greatly appreciated! Thank you.

enter image description here

enter image description here

enter image description here

$\endgroup$

1 Answer 1

1
$\begingroup$

Talking about reversing normals is misleading, as rigging doesn't affect normals at all: what's happening is simply that the outer vertices of your pants are weighted slightly differently than the inner vertices, so that moving the rig makes some inner faces pass through the outer surface and show their (reversed normals) back faces.

Some solutions:

Delete all inner faces except thoose visible (the rims), as they are hidden unuseful geometry (light rigs boost performance issues).

Or

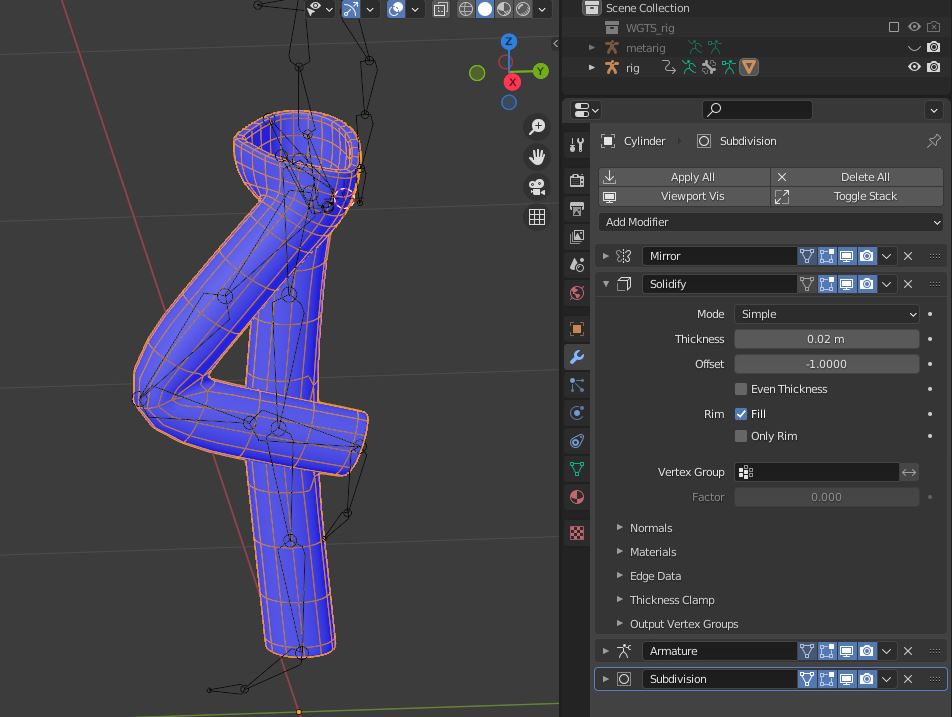
Use a solidfy modifier instead of real geometry, so that every movement of the outer faces will be exactly reflected on the inner ones (also in this case you can check if ticking its "Only rim" option is enough for your purposes).

enter image description here

Or

If you really need the inner real geometry, manually adjust the weights, so that every inner vertex will have the same exact weighting of its nearby outer vertex.

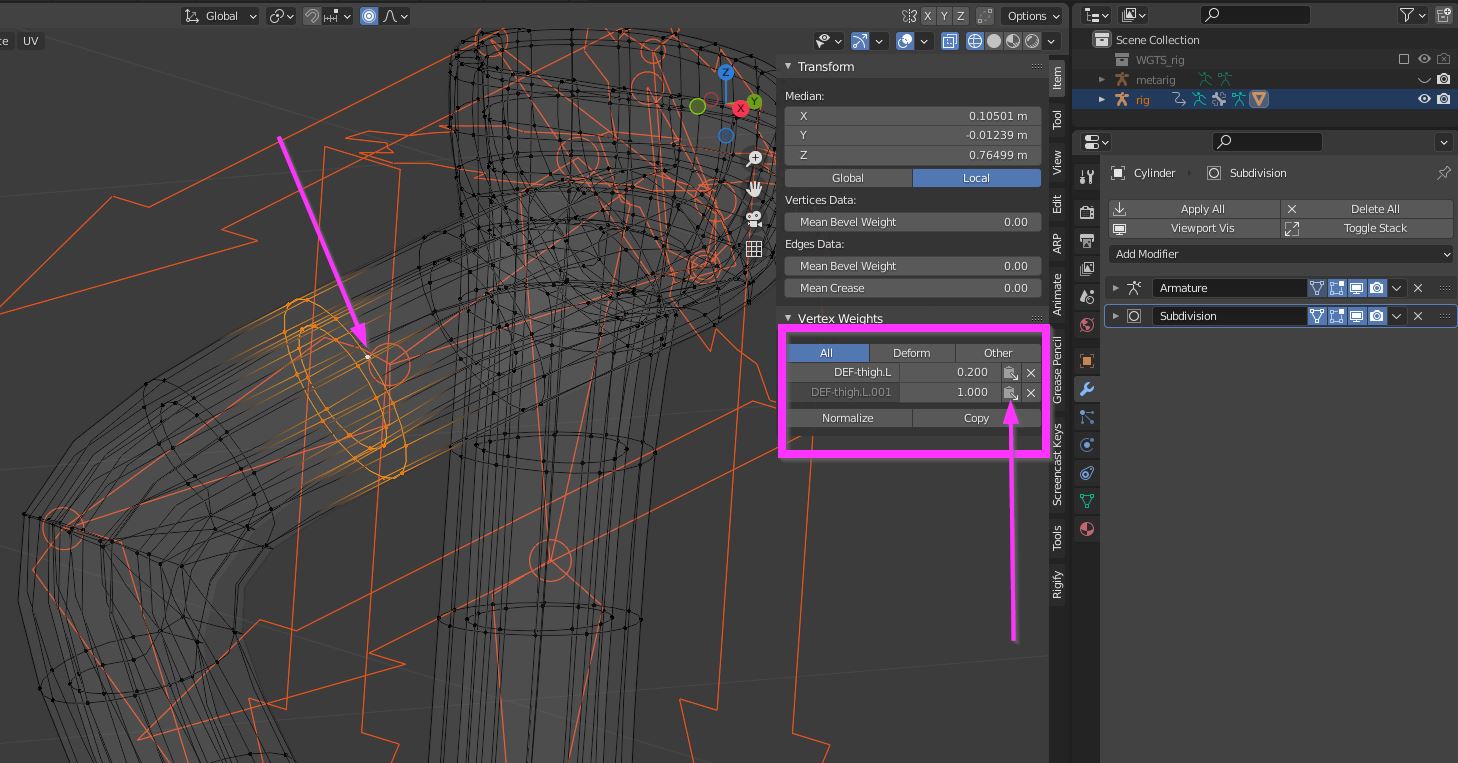
This can be achieved with two useful blender tools: in edit mode you can select a group of vertices, last selected is active, in the "N" properties panel you can read the weight values and copy them from active to all selected vertices using the folder-arrow button.

enter image description here

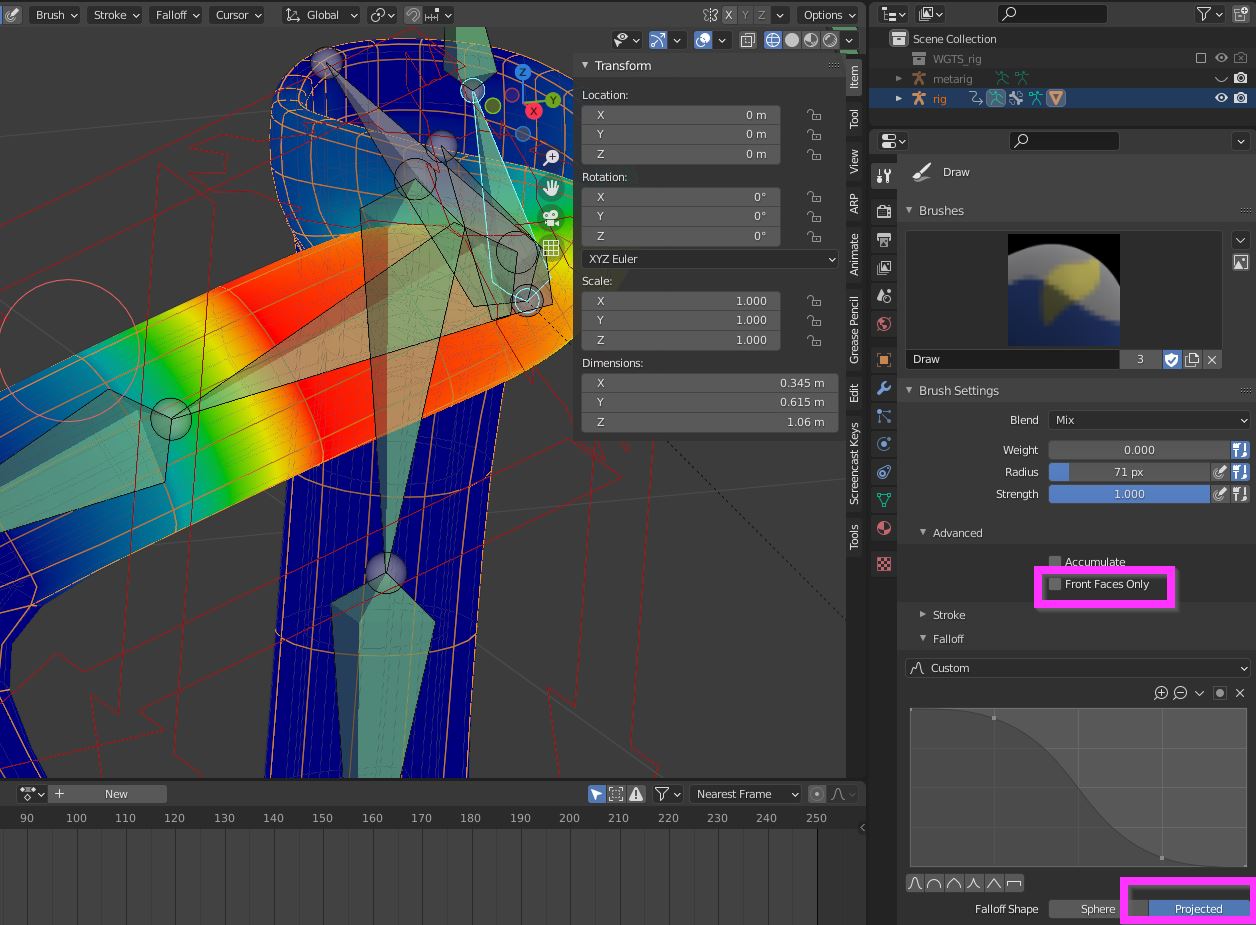
In weight paint mode you can turn off the "front faces only" option and choose "projected" instead of "sphere" falloff, so that every vertex under the 2D projection of the brush will be affected in the same amount (hide all geometry you don't want to affect, to avoid unintentional painting).

enter image description here

$\endgroup$

You must log in to answer this question.

Not the answer you're looking for? Browse other questions tagged .