You did a great job with the separate rigs. All you need to do is to merge them, with exception of the cape and the knife. Then fix the weights, and give the knife a Child Of constraint so Truffle can pick it up.
Body Rig
Armature objects can be joined like mesh objects with Ctrl+J. Then you can parent the bones to get the bone mechanics working.
- in Object mode, select the tail and the body armature. Make the body armature the parent by selecting it last (=active object). Then join them Ctrl+J.
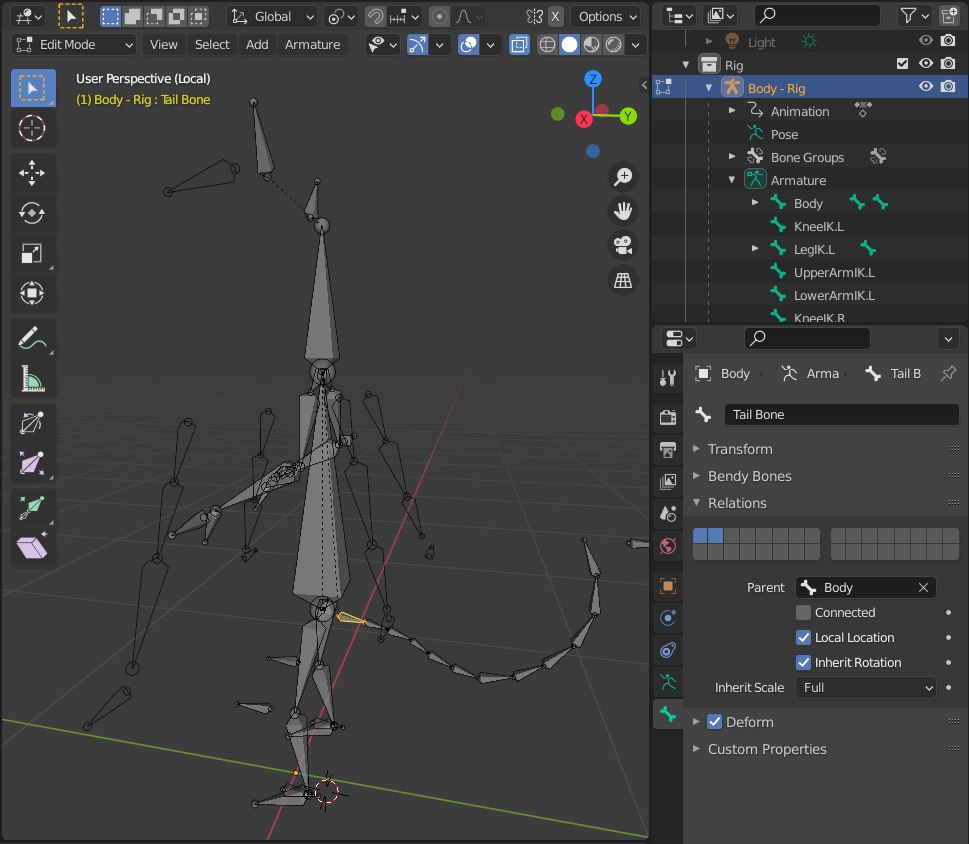
- switch to Edit mode, select the very first tail bone, then the body bone, and parent them Ctrl+P, with Keep Offset (note: Connected would pin it to the neck)

attaching the tail
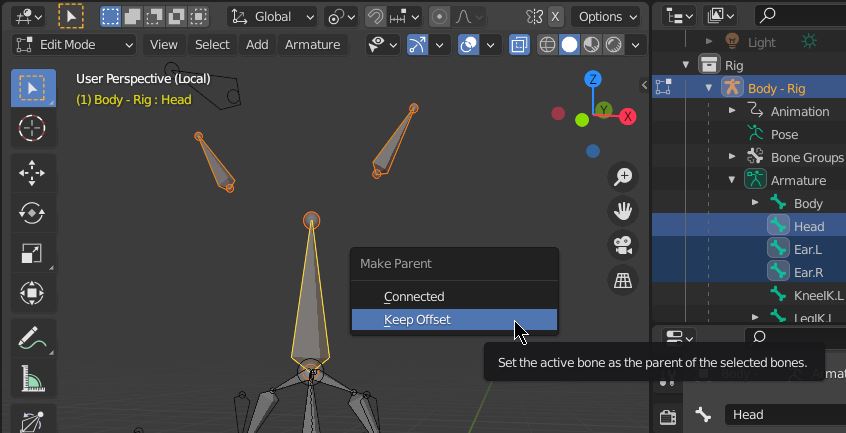
- do the same with both ears and the head bone:

attaching the ears
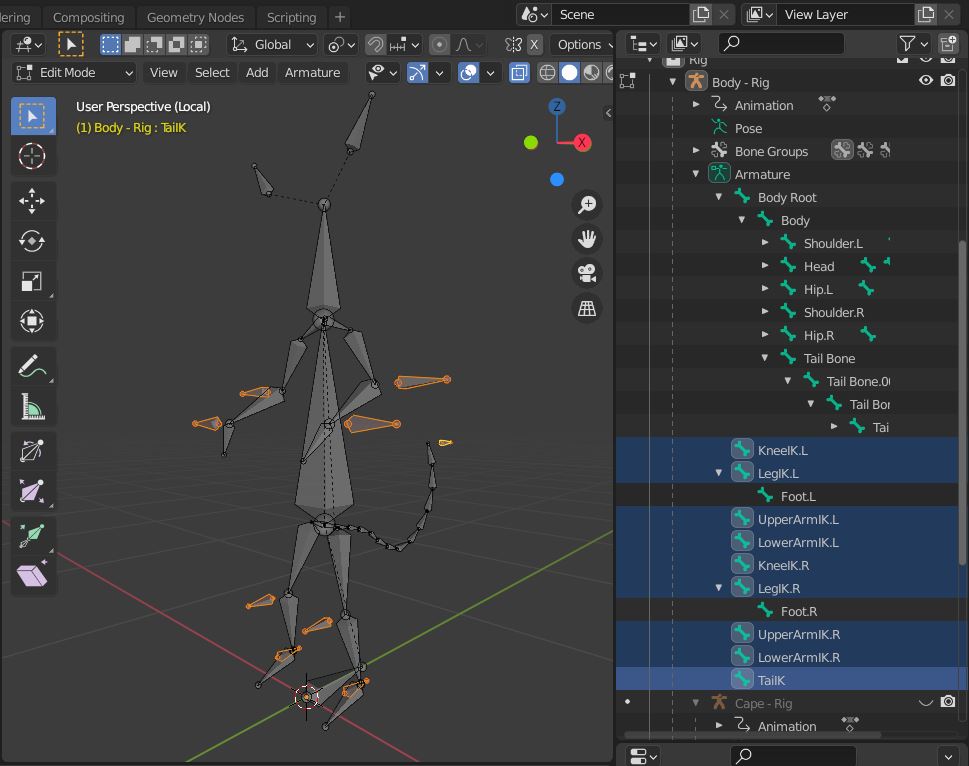
- consider adding a root bone for the body rig and parent all deformation bones to it (but not the IK bones which cause flickering during animation). This allows you to move around the character in Pose mode without the IK effect. If you (ab)use the body bone as root bone and move the character then it looks like he is being dragged away. The arms and legs try to stay in place and are dragged behind the body if the distance gets bigger.
- don't forget to uncheck the
[_] Deform checkbox for the root bone!
- The final bone hierarchy looks like this:

- check the ears, belt, and potions. They need to be parented to the Body Rig. This can be done With Empty Group and you can create and assign the vertices of the mesh to the specific bone groups. Ears need to be assigned to the Head vertex group, belt, and potions to the Body group. Create the group if it's not present. Check if all items have the Armature modifier on the stack.
Cape Rig
My first idea was to merge the cape, too. But on second thought it might be better to keep it separated. This makes it possible to take off the cape or give it to another character.
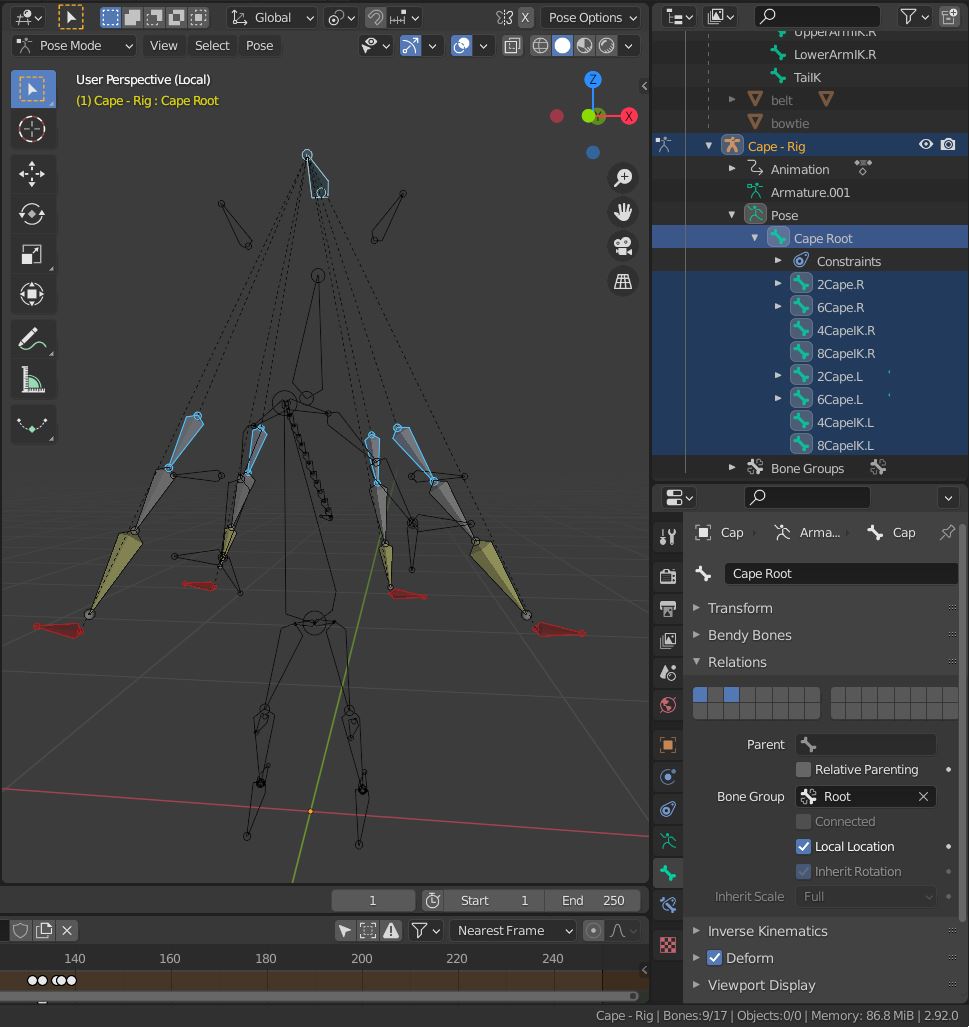
in Edit mode, add a root bone to the cape
decrease the IK Chain Length from 4 to 3
then make the root a parent for the IK bones and the 4 deformation bones:

the root bone is a deformation bone, you might want to add more deformation bones to control the front of the hood and the sides of the hood because the back of the head can stick through the hood sometimes.
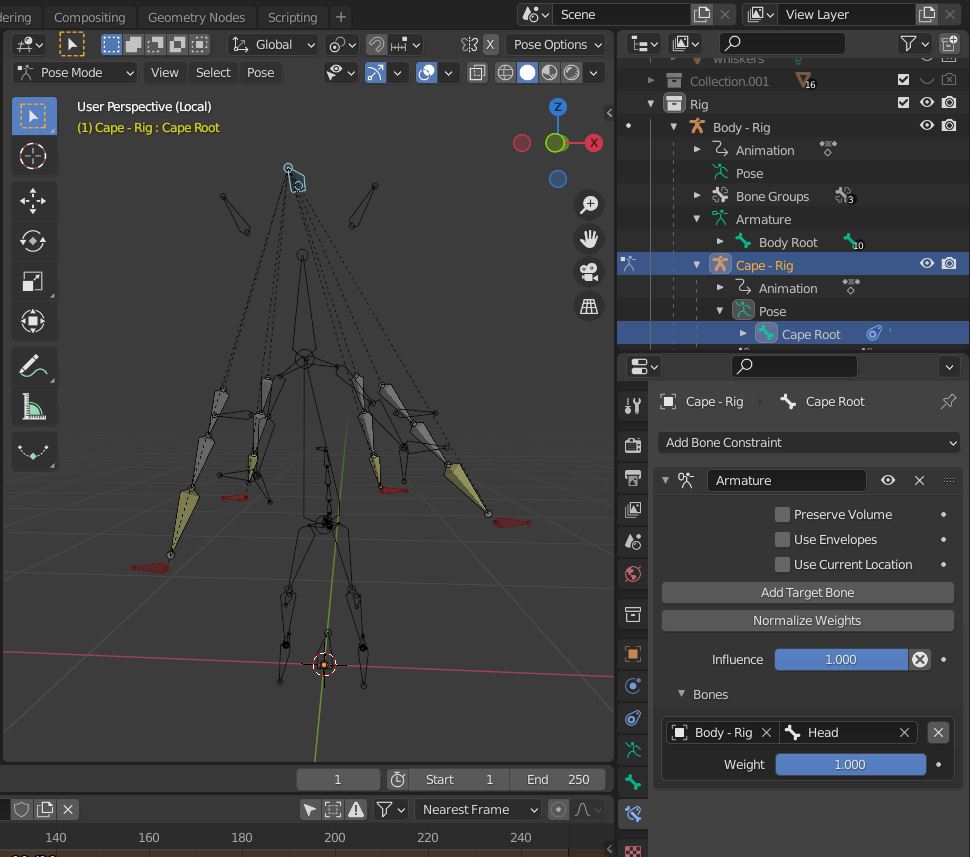
to connect the cape with the character you need to add a Bone Contraint in Pose mode to the cape's root bone, with the body bone of the body rig as a target. Make sure it's a Bone Contraint, not the Object Contraint. You can keyframe the Influence to 0 to simulate a take off the cape.

to make the cape armature move with the body armature in Object mode it must be a child of the body armature like you did. Disclaimer: I am not sure if this is 100% correct in relation to the Bone Contraint: Armature.
Weight Paint
You've done already the arms and legs. You just need to assign the body and head to their bones. In Edit mode is the Vertex Group Weights overlay. If you enable it you can see the weight paint.
use the Assign and Remove buttons to assign in Edit mode the head to the head vertex group and remove it from all other groups.
do the same for the body and the ears.
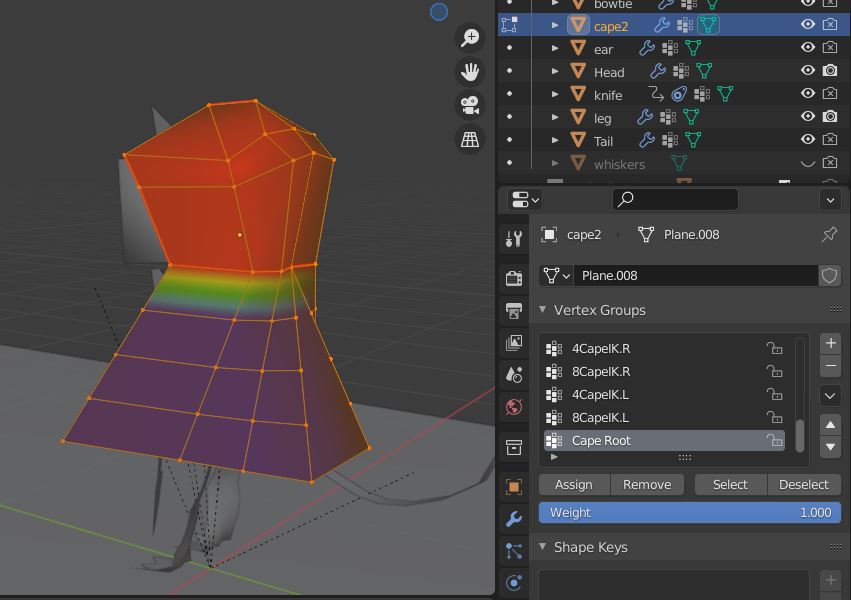
for the cape use Parent, With Automatic Weights and then assign the hood to the Cape Root bone:

check if the Armature modifier of these objects is present
make sure they are parented to the armature (Object Properties > Relationship)
Picking Up the Knife
if you want to make the character interact with other objects like the knife make it an independent object.
- clear the parent
- remove the armature modifier if it's still there
- add an Object Contraint of type Child Of, set it to body rig & the Hand.R bone, and press the Set Inverse. With the Influence you can attach/detach it.
That's it. Happy animating!
Blend file: https://pasteall.org/blend/df35aa1718e44e6b8f79e00d84619120
(I've forgotten to add the root bone for the body rig in the example file).
