I'm trying to get this soft light reflections like in this  reference photo on my 3D model, and I don't know how. How can I achieve this. By this I mean, for example look at bowling ball it's has this like reflections of lights in a very soft mannerand also the reflection of a pin . It's soft but very clear and it's still looks like a bowling ball. Pics of node setup would be very much appreciated and any other pointers on making my model look exactly or close to my reference photo. I only have my models already arranged. And I played around with some nodes not getting what I want.
-
1$\begingroup$ This "effect" is meant to mimic motion blur rather than soft shadows. $\endgroup$– brockmannCommented Mar 28, 2021 at 18:35
-
$\begingroup$ Does this answer your question? How to manually achieve a motion blur effect on a object in the compositor? $\endgroup$– brockmannCommented Mar 28, 2021 at 18:35
-
$\begingroup$ @brockmann I don't believe they are looking for motion blur, as it is used rather mostly for animations and secondly definitely doesn't look like what they want to achieve. I think what they need is Bloom for Cycles. I have written an answer on how to add bloom in cycles. Please check it out. $\endgroup$– Tsar Asterov XVIICommented Mar 29, 2021 at 6:54
-
$\begingroup$ Have a closer look, you clearly can see that the blur has a direction and even some stepping: i.sstatic.net/AOsIb.jpg (shutter artefacts). Bloom would just brighten up and soften the entire image rather then just introduce some fakey motion to top parts of the pins. @Aster17 $\endgroup$– brockmannCommented Mar 29, 2021 at 7:57
-
1$\begingroup$ Hi and welcome @DBOSS.blend. It is still unclear what you are asking. Is your question about how to setup this entire scene? Or is question about the blur on top of the pins? Please use the edit link at the bottom of your question (i.sstatic.net/lXFuK.png) and add more information on how you set up your project. Consider sharing your .blend file so that others can inspect it. You can upload it at blend-exchange.giantcowfilms.com and then paste the resulting link as part of your question. $\endgroup$– brockmannCommented Mar 29, 2021 at 8:02
2 Answers
Light Setup and Shaders
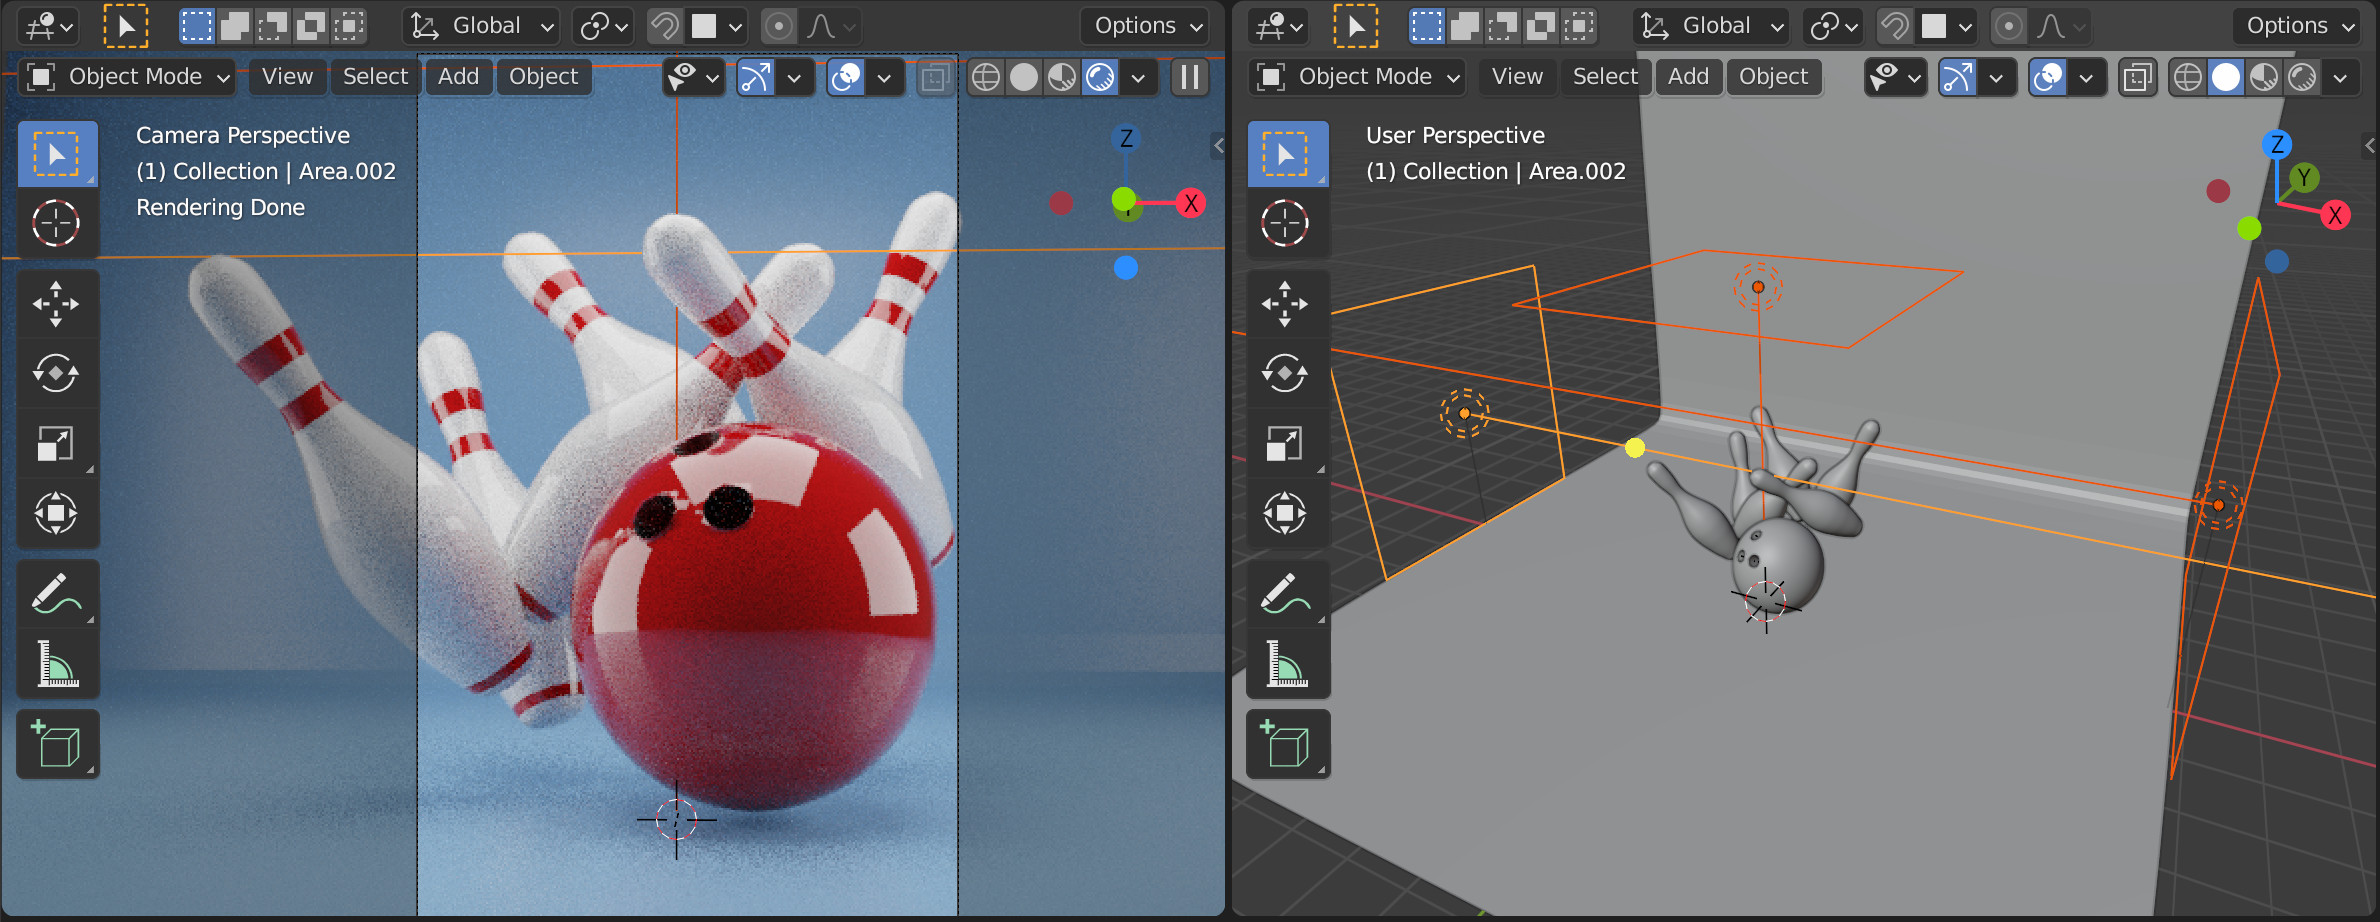
In order to achieve a similar look, the most crucial part is setting up the lights (as always). Add 3 large Area Lights along with a soft rounded backdrop (typically used for classic studio photography) to the scene in order to get similar reflections as well as soft shadows:
The larger the area lights, the softer the resulting shadow on the ground
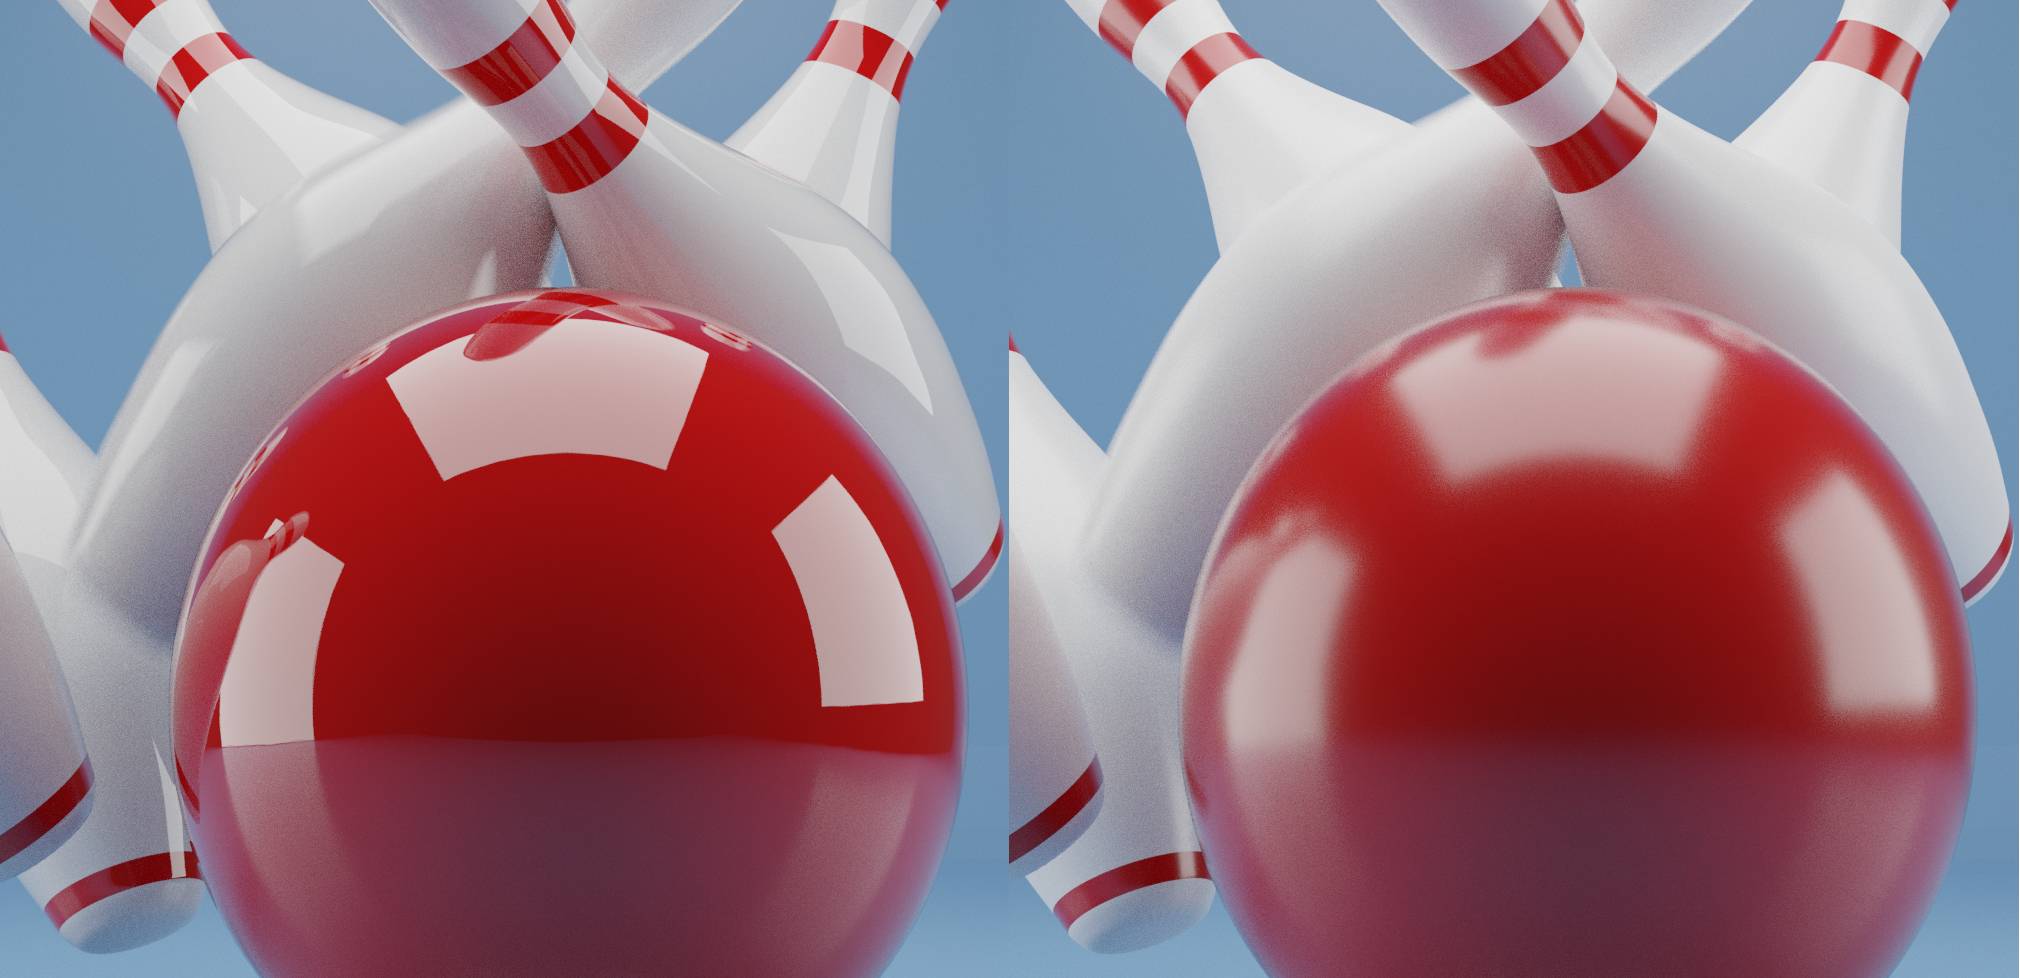
To replicate the shader(s), all you have to do is figuring out a proper rougness value and set the reflection (specular) to 1. Tipp: The roughness value for plastic is about 0.2 - 0.3 according to the manual:
Roughness set to 0.01 (left) vs. Roughness set to 0.3 (right)
Fake Motion Blur
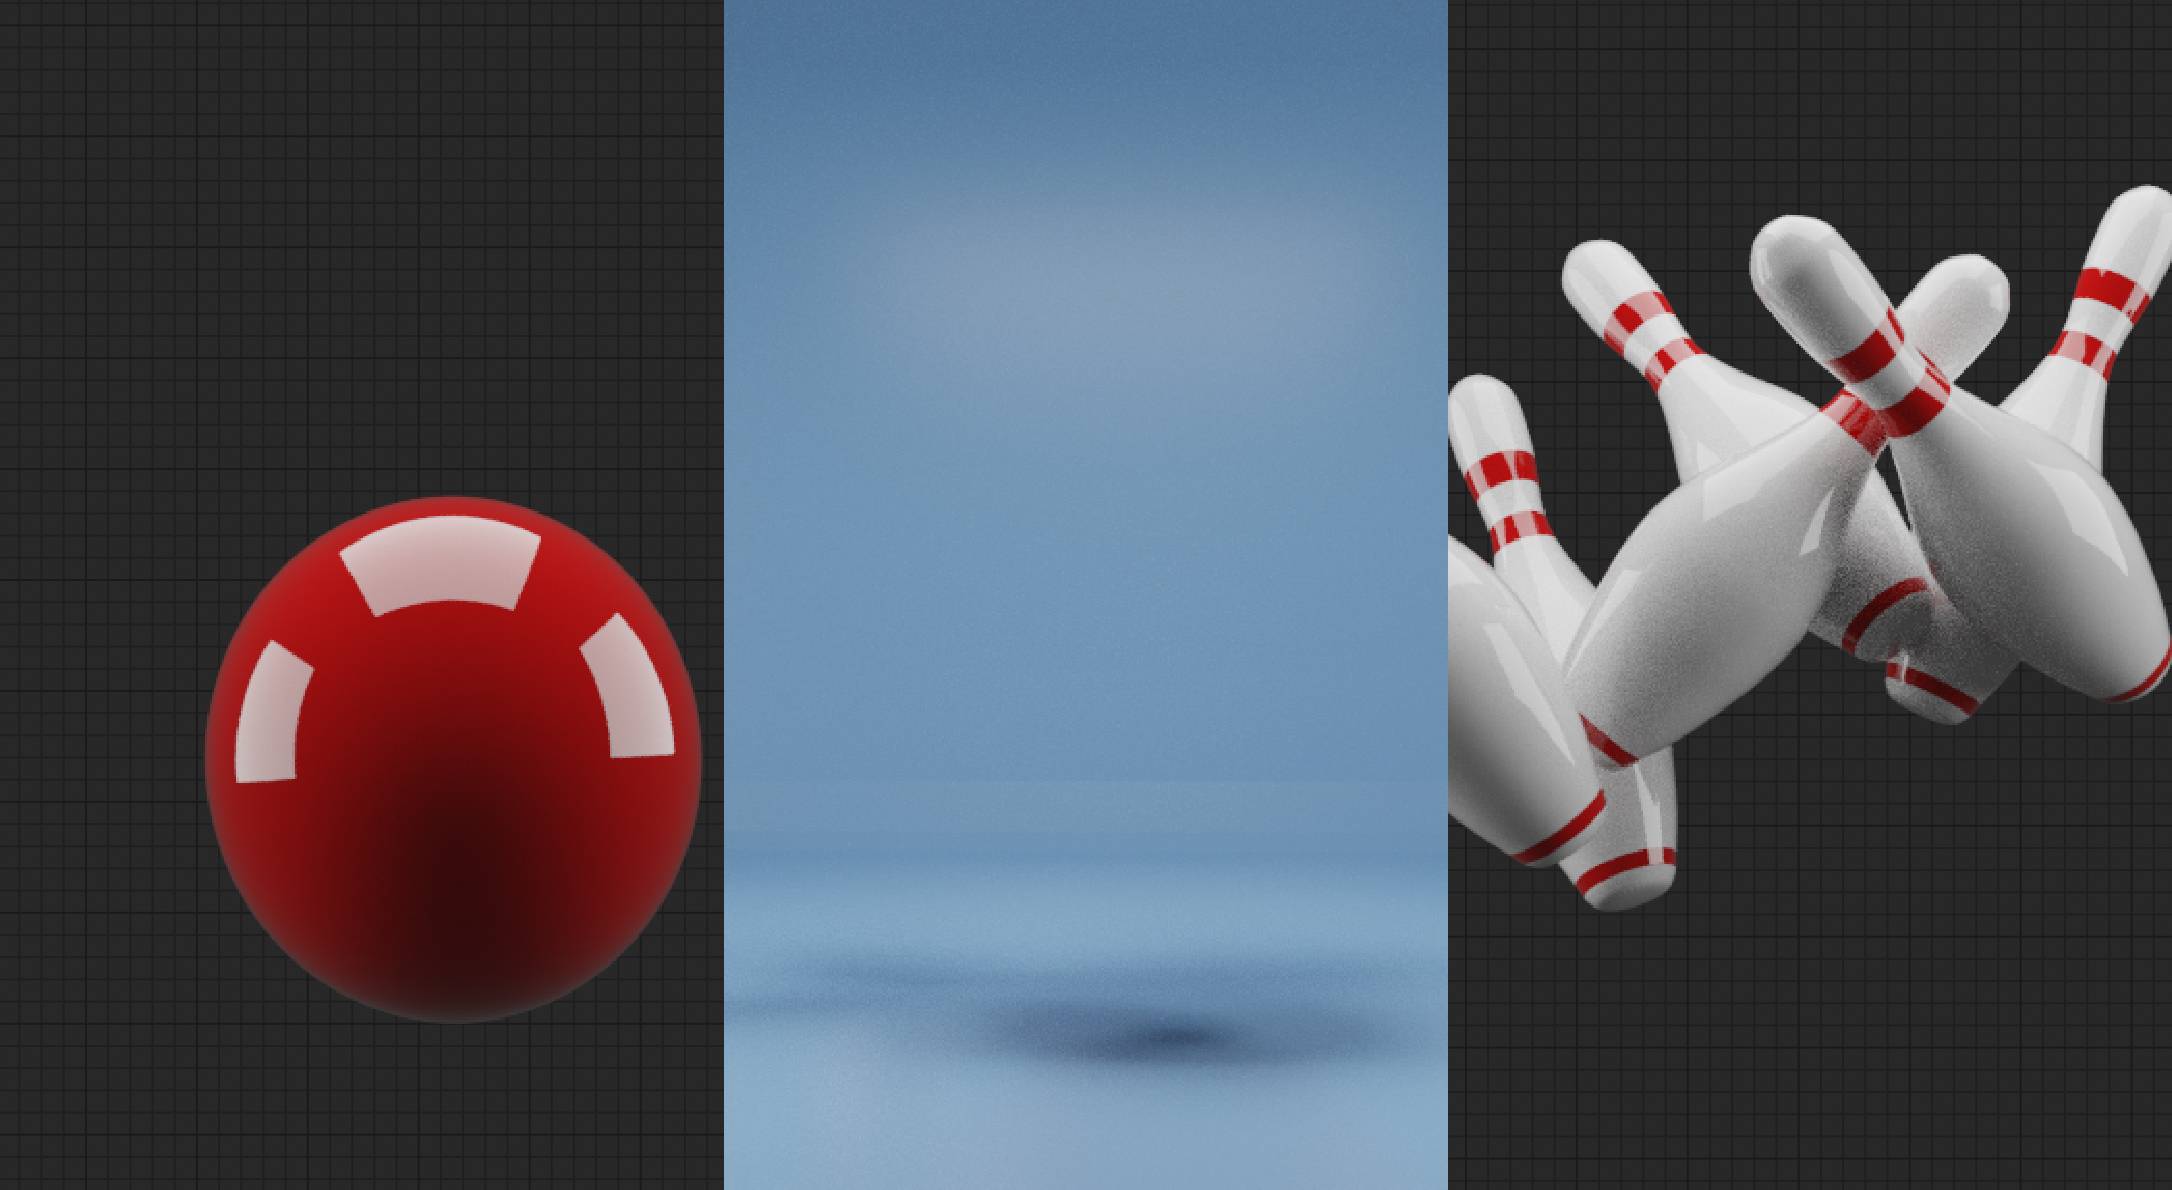
You can fake the Motion Blur on top of the pins, by splitting up the scene into View Layers (backdrop, pins and bowling ball in this case) which allows to add the blur only to the pins in your favorite raster graphics editor of choice or even in Blender's Compositor:
Overview of potential view layers - All objects are set to 'Indirect only' for the 'backdrop layer' per collection and the background is set to 'transparent' for both object layers
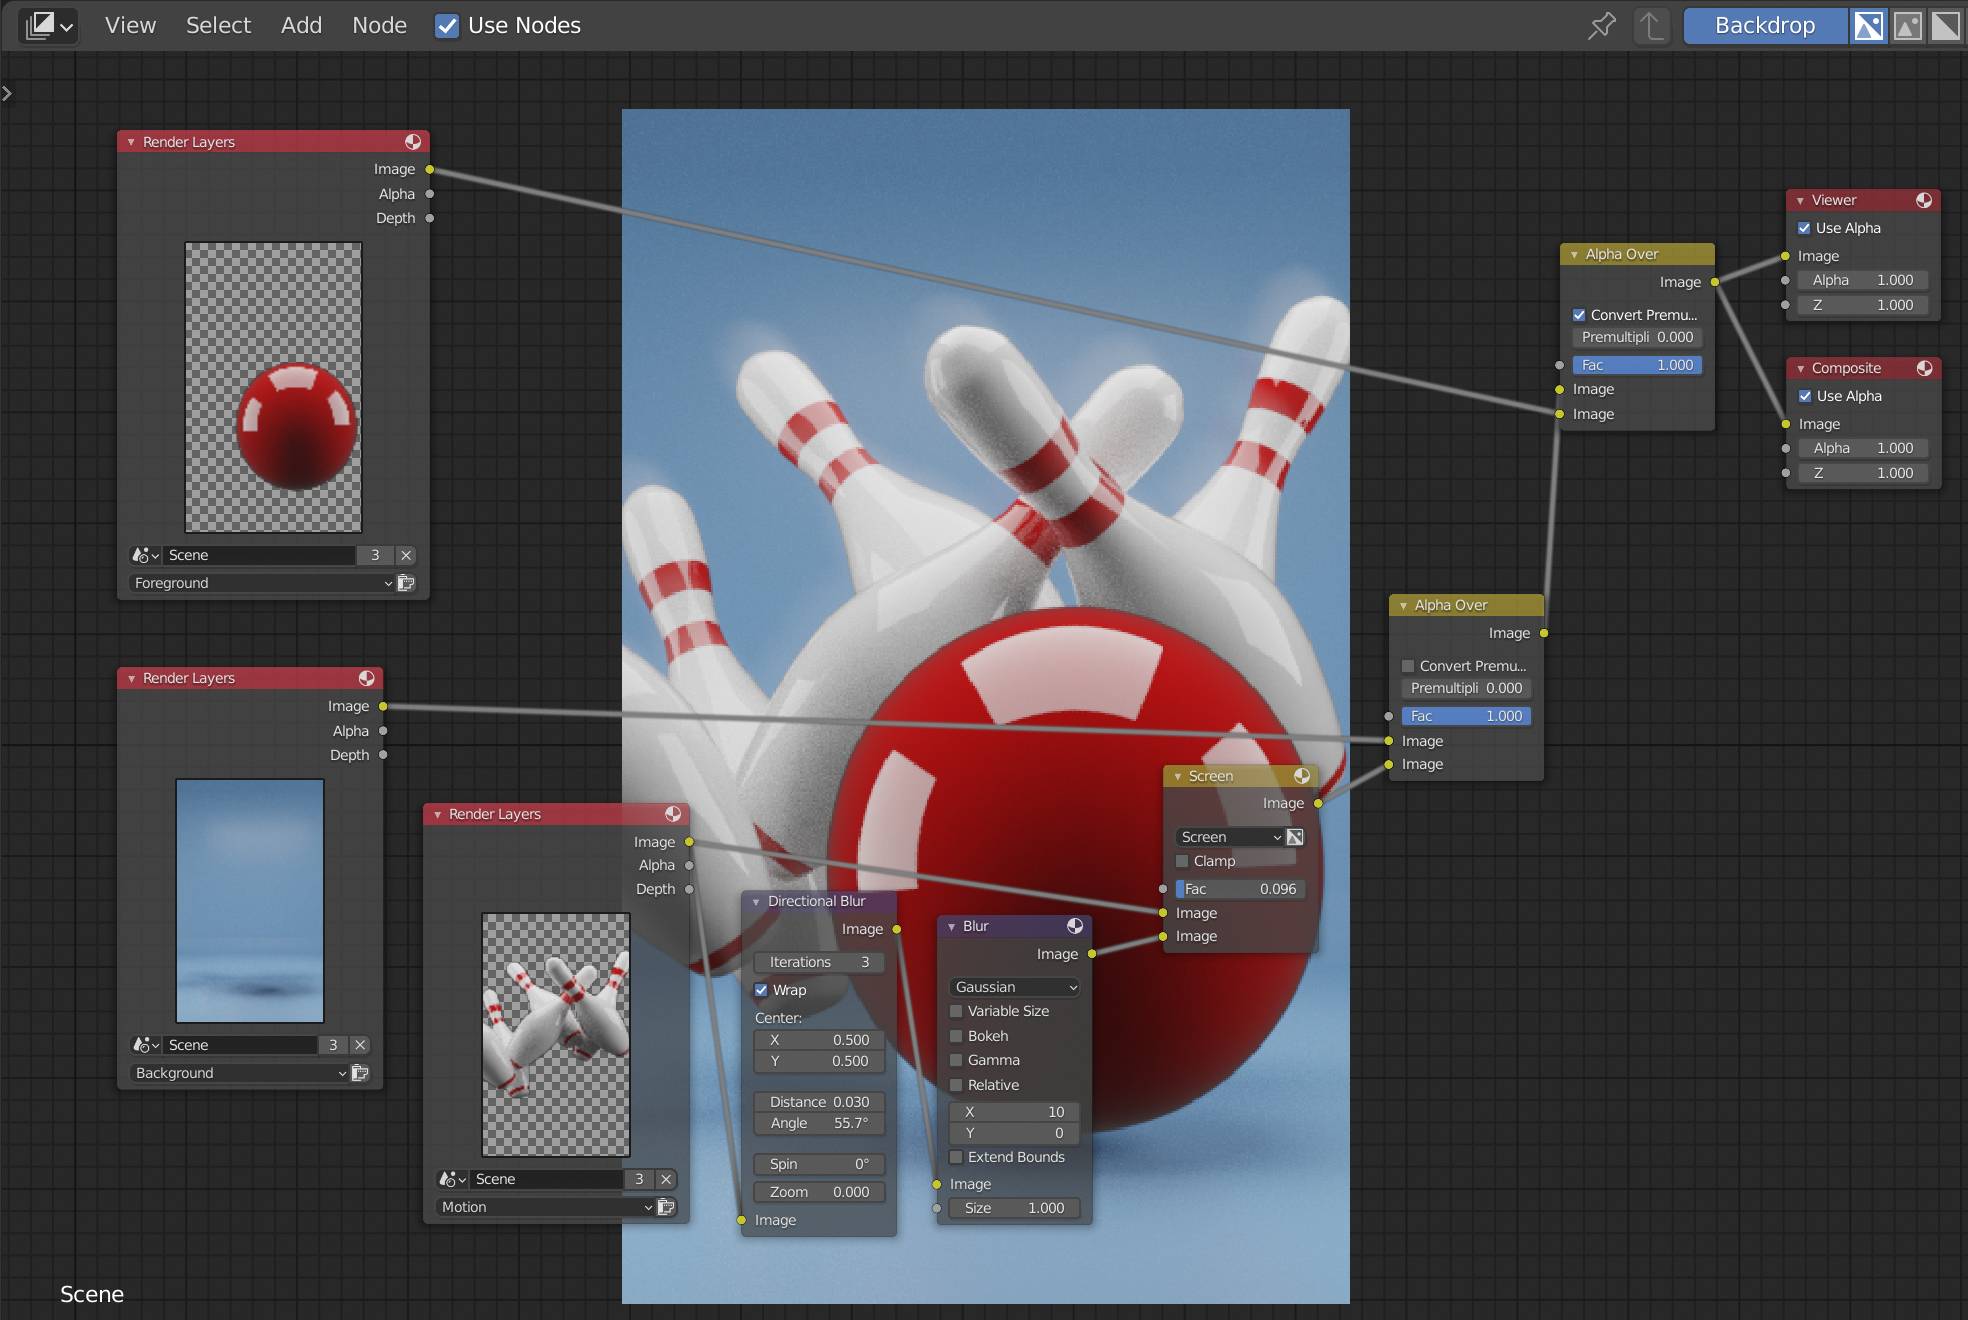
If the later is an option, I'd suggest use a Directional Blur node on the Pin Layer also and also blur the result slightly, see: How to manually achieve a motion blur effect on a object in the compositor?
Real Motion Blur
In order to get realistic Motion Blur you would have to move/animate the pins in the scene and enable Motion Blur under Render Properties > Motion Blur and play with the shutter setting, which gets you a more realistic and especially photographic result:
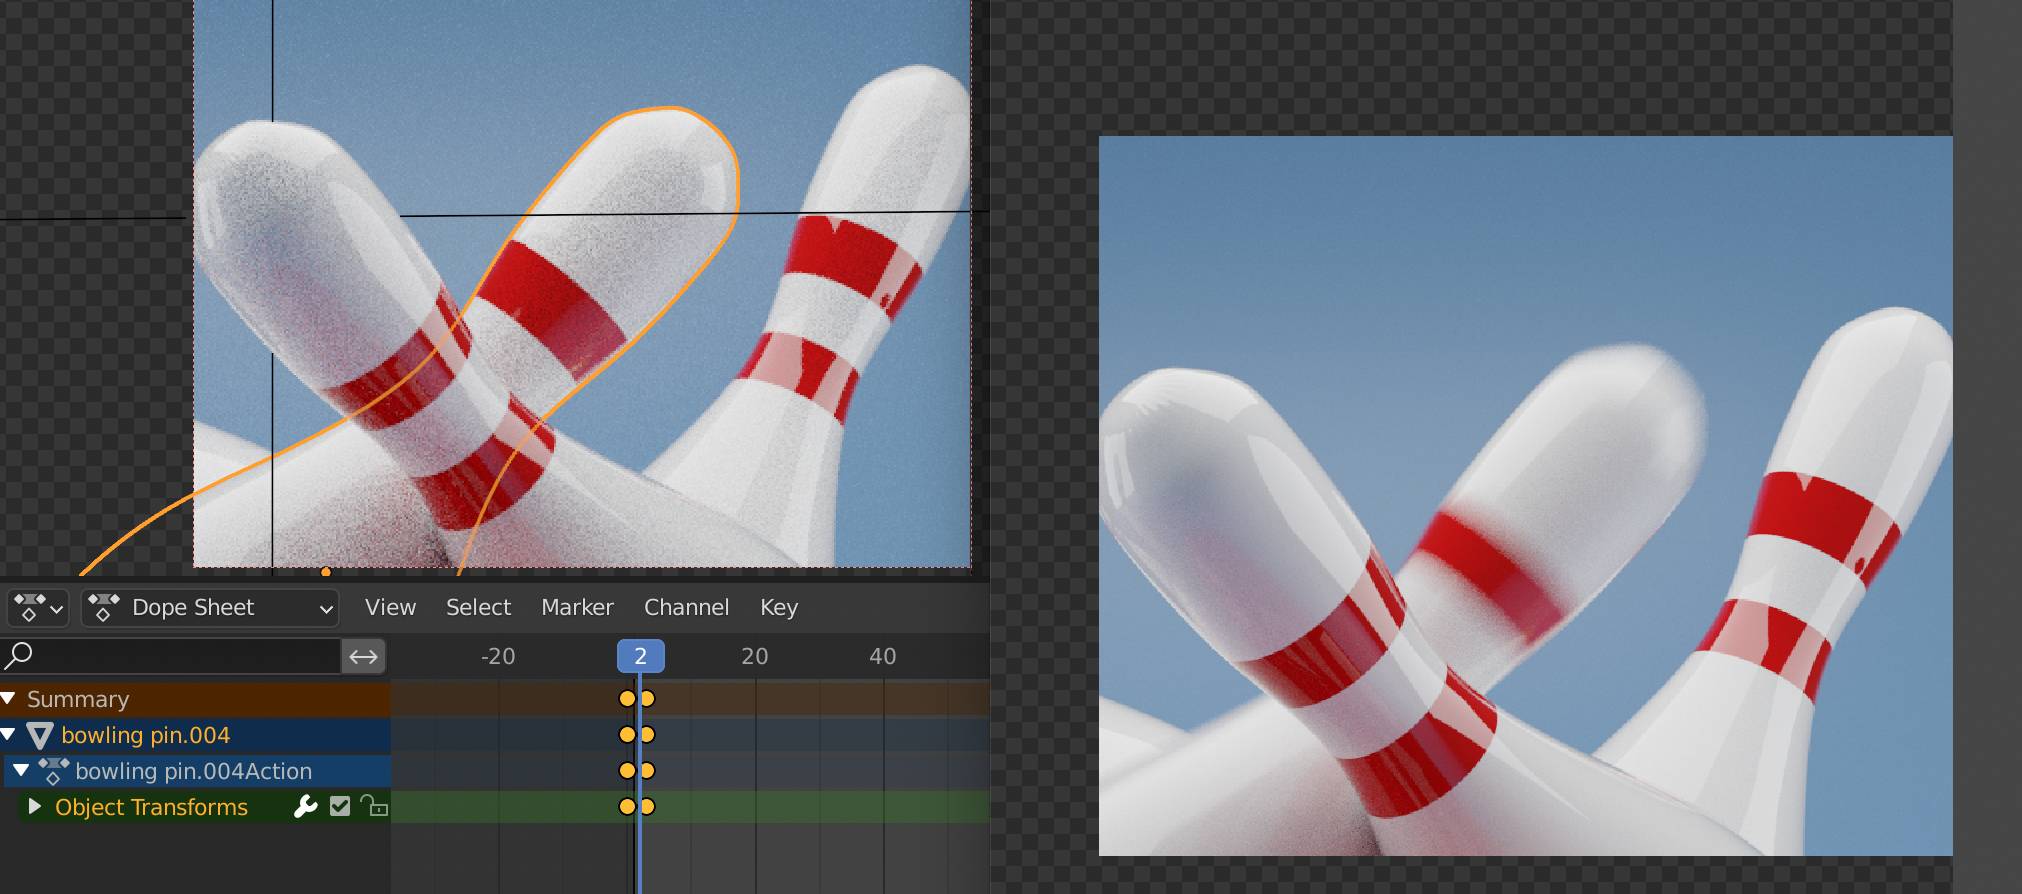 Object animated in Z-Normal direction, 2 location keyframes added, Rendering of the second frame.
Further reading:
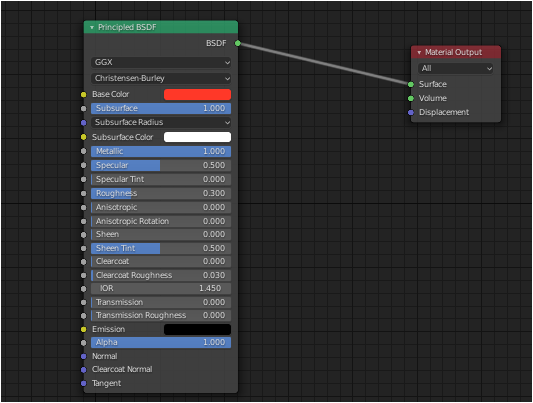
To achieve this effect, Set metallicness to 1 and roughness to anything between 0.3 and 0.45, as anything greater than that would have no reflections. and there you have it, soft reflections on the surface. Here are the nodes:
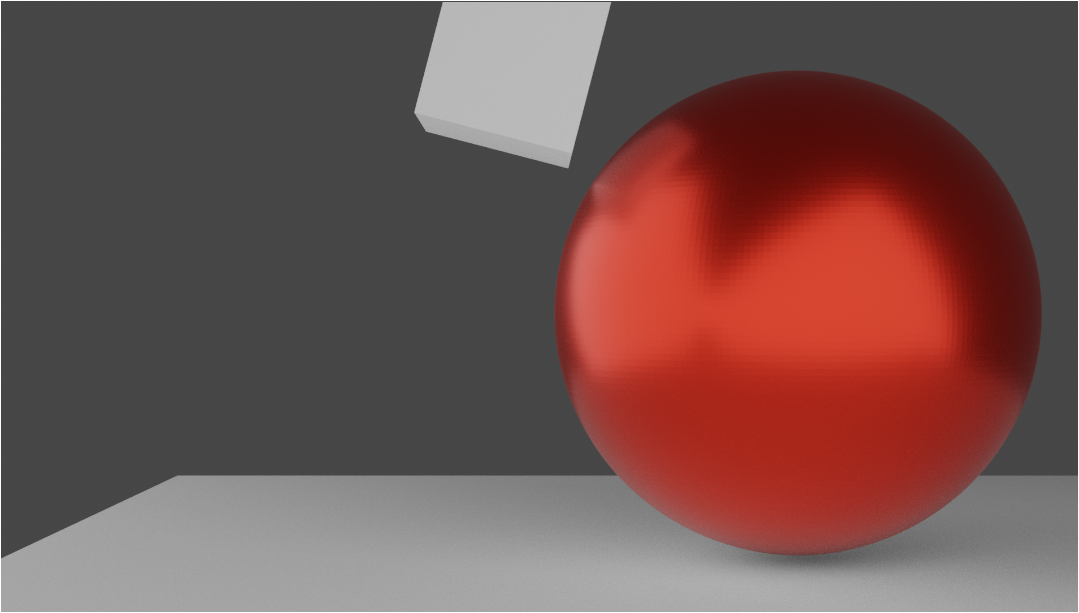
And here is the render result. (Sorry it isn't perfect as my computer literally burned while rendering this.)
Please note that you can change the roughness value to whatever you like, But I would recommend going with something between 0.3 and 0.45.
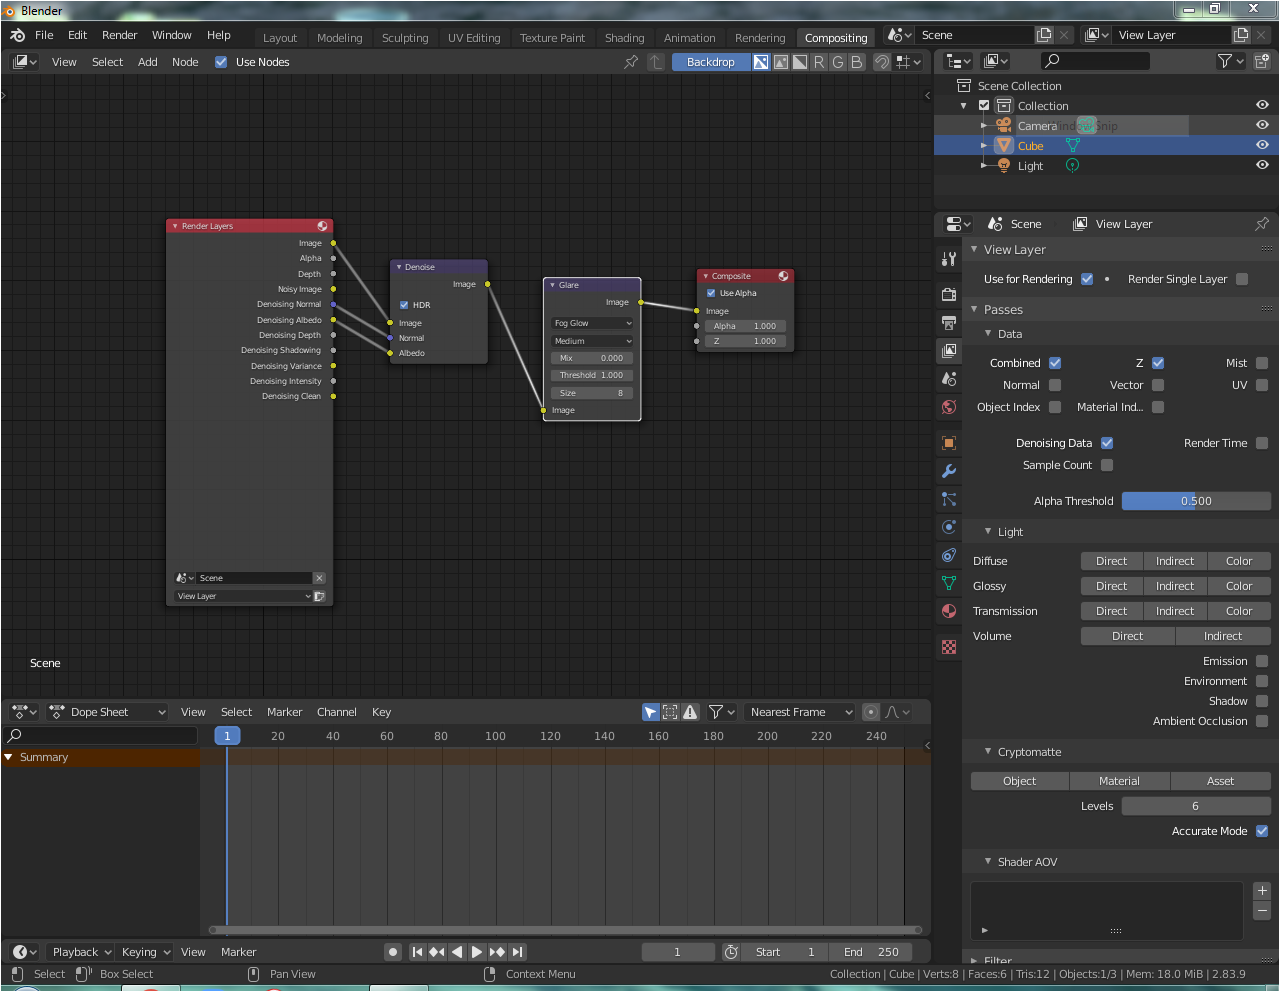
As for the lighting effect, you would probably have to do it in photoshop. If you like, you can use the compositor nodes, here are the nodes:
Hope it helps.
-
$\begingroup$ I'm using cycles can I achieve it using cycles $\endgroup$ Commented Mar 28, 2021 at 14:41
-
$\begingroup$ This is the settings for cycles. $\endgroup$ Commented Mar 29, 2021 at 6:51
-
$\begingroup$ Seems not to be what the OP is looking for. Even if, such basics like this have been answered over here already, no need to repeat that IMHO. Please help us keeping the site organized, search for duplicates and ideally (if unclear) ask the OP what the actual goal is, before you're going to answer, thanks. $\endgroup$ Commented Mar 29, 2021 at 8:13
-
$\begingroup$ @brockmann but when I watched a tutorial, it gave a similar result to what he asked for. Motion blur would give the image a blurry effect, but glare would actually help. $\endgroup$ Commented Mar 30, 2021 at 2:57
-
$\begingroup$ Have a closer look, you clearly can see that the blur has a direction and even some stepping: i.sstatic.net/AOsIb.jpg (shutter artefacts). Bloom would just brighten up and soften the entire image rather then just introduce some fakey motion to top parts of the pins. Also suggest read about the principled shader: "...as anything greater than that would have no reflections" is not true in this case: docs.blender.org/manual/en/latest/render/shader_nodes/shader/… $\endgroup$ Commented Mar 30, 2021 at 6:49

