3
$\begingroup$

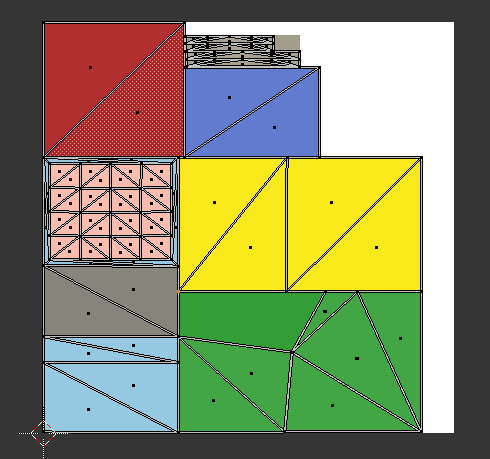
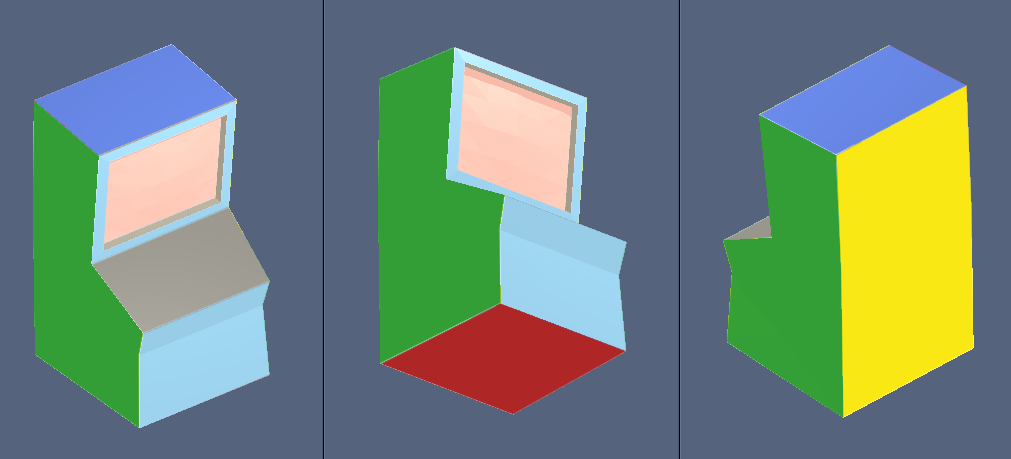
Here and here, you can see examples of what I'm trying to do in terms of texturing. The UV maps shown for these models appear to be very clean and uniform, pixel-friendly and keep distortion/artifacts to a minimum on the pixel art textures.

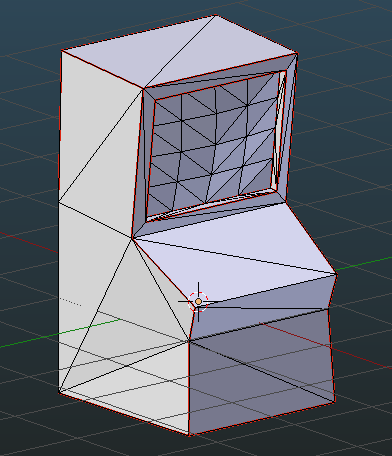
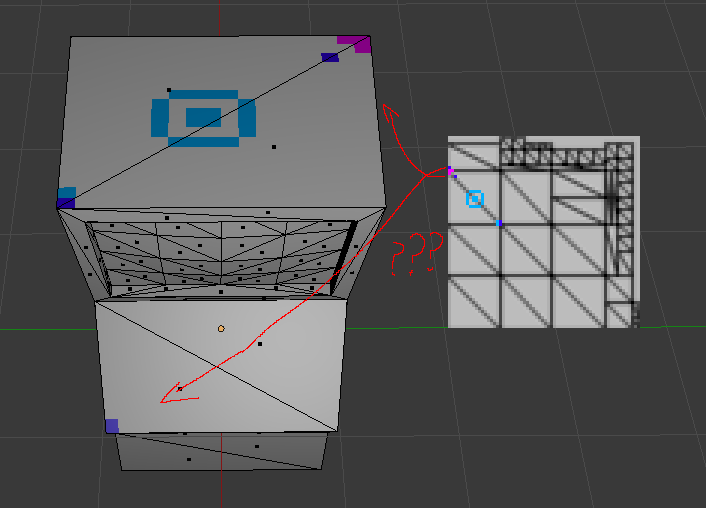
How can I do this myself? This is my model. Lightmap unpack looks like my best bet, but it is not pixel-aligned (I set 64 for image size). This results in "Export UV Layout" producing a very blurry image since the UV edges are in-between pixels in the 64x64 image it outputs, making it effectively impossible to create a proper pixel art texture for.

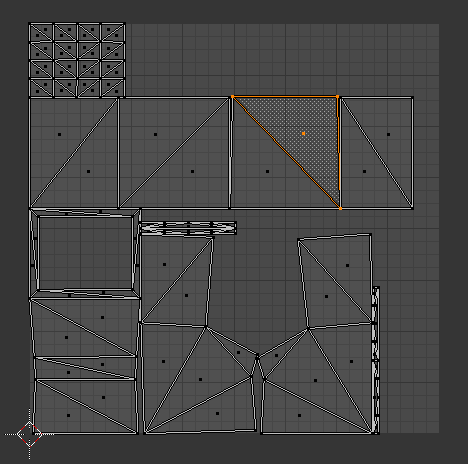
I've tried checking "Snap to Pixels," then pressing G to grab and release, hoping it would snap properly. Instead I simply get a noticeably distorted version of the original UV, which for some reason still outputs a blurry image (but slightly less so) on export.

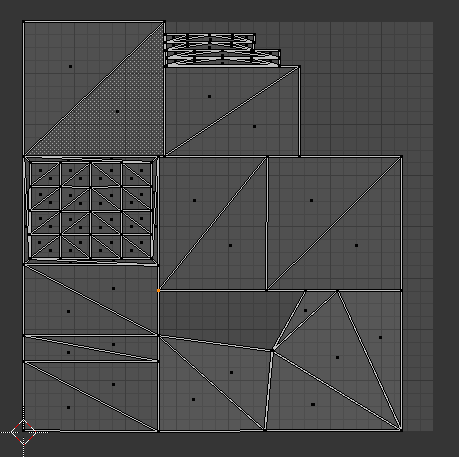
When snapped to grid, the UV initially seems at least somewhat usable if still a little blurry. But the problem then is it's very misshapen-- what used to be squares now become rectangles, resulting in messed up face sizes on the UV and therefore inconsistent texture stretching (compare the first UV to the second and you should see the distortion).

I attempted to use the "pixel aligned" but distorted UV map and got this poor result, very stretched due to bad unpacking:

textured

What's the most pixel-art friendly way to generate/export UVs and get results comparable to my two examples?

BEFORE YOU MARK THIS QUESTION AS A DUPLICATE OF THIS ONE, PLEASE READ:

Quote from the above question's answer:

As for distorted (as in stretched or compressed) textures it all as to do with the way you UVMap your textures.

If possible use the UV Map > Cube Projection which will cause minimal distortion, or UV Map > Project From view

This does not help me at all. Cube projection and project from view are not solutions and both result in a disaster of a UV map. Lightmap unpack is close but not all the way there, hence why I'm asking this question.

Blend:

$\endgroup$
3
  • 1
    $\begingroup$ Maybe you could share a blend? I am wondering whether you really want your UV export to be "pixel aligned." I suspect you want the export to show the boundaries between faces, so it really should be a thin lattice overlay that tells you "pixels to one side of this line will be on this face, pixels on the other side will be on this other face". My suggestion is to export the UV layout as an SVG file, assuming your pixel editor can import SVG (GIMP can). Blender can also export .EPS. Then you can have a precise vector boundary layout on top of your pixel image texture as you paint. $\endgroup$
    – risingfall
    Commented Oct 11, 2018 at 2:11
  • $\begingroup$ Following up on the SVG/vector idea, you could also (for example) use GIMP's path stroking function to stroke in precise pixel boundaries if that's helpful for your UV painting. Naturally the precision of the line placement will be a function of your texture's resolution, but if you turn off antialiasing you will get precise lines of exactly 1 (or exactly n) pixels. When it comes to unwrapping the "lightmap pack" you've used may help avoid distortion and fill the texture space, turn up the pack quality and set the margin to zero. Again a blend file may help with a more precise answer. $\endgroup$
    – risingfall
    Commented Oct 11, 2018 at 12:23
  • $\begingroup$ Here is the blend file: blend-exchange.giantcowfilms.com/b/5383 $\endgroup$ Commented Oct 12, 2018 at 5:17

2 Answers 2

11
+50
$\begingroup$

Well I cannot promise this is the ideal technique, take it for what it's worth.

Edit: here's a more pixel art like render:

enter image description here

I decided to unwrap the model in the traditional way by marking seams. This allows contiguous regions to be kept together on the UV map which makes the pixel editing more intuitive.

enter image description here

Unwrap with U-->Unwrap.

enter image description here

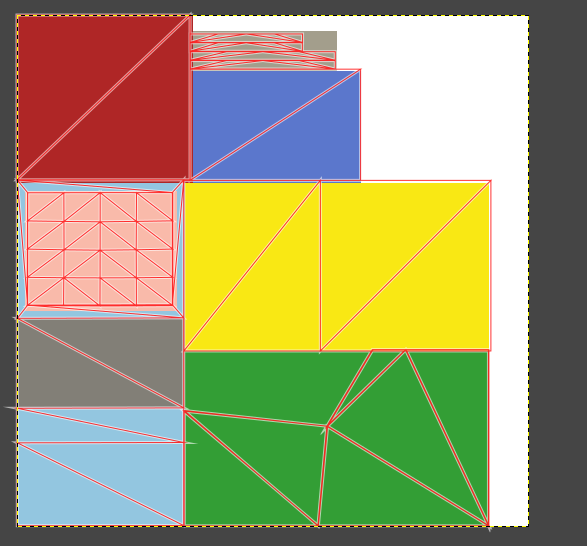
Next you will need to organize your texture space. Your model has some non-straight edges, so I straightened them in the UV layout by selecting the points to be aligned and typing S-->X (or Y, as appropriate)-->0 (zero). I moved the islands around to pack the texture into more or less a square, but I didn't scale any islands individually. I decided to move the two side panels on top of one another to save texture space. When everything was reasonably packed, I scaled the entire UV (i.e., all islands selected together) so it came to the edges of the UV space as much as possible.

enter image description here

I then exported this UV layout in SVG format. Then, in GIMP, I created a new 64x64 bitmap, and imported the SVG as a path. I chose "Merge imported paths" and "Scale imported paths to fit image" so I had a nice vector overlay for my texture editing.

enter image description here

I then painted my texture under the overlay. I tried to fit the pixel boundaries of my texture to the UV grid overlay as well as reasonably possible, but exact alignment is not possible at this stage. We'll fix the boundaries in the next step.

enter image description here

I exported the GIMP texture to a PNG. Back in Blender, I imported the image to the model. Then, in the UV/Image editor, I turned on "Snap to Pixels" (UVs-->Snap to Pixels) and moved individual vertices of the UV (corners, generally) manually to snap exactly to the pixels of my texture. I did not attempt to snap the triangles of the "screen" area to exact pixels, the texture space isn't big enough; I just made sure the "screen" island as a whole fit over the appropriate area of the texture.

enter image description here

This is how the model looks with the texture:

enter image description here

Anyway, I hope at least some of those techniques meet your needs!

Edit: I thought you might like to see some pixel detail like in the image in your question. Note that you should turn off "Interpolation" under "Image Sampling" in the Texture tab of the Properties window in order to see relatively sharp pixel edges. Also I have found that changing the Filter to "Box" instead of "EWA" in the same tab/area also makes the edges crisper.

enter image description here

Another edit: it's not a fancy job, but I created a more arcade cabinet like pixel texture, the source for the animation at the top of this answer:

enter image description here

$\endgroup$
2
  • 2
    $\begingroup$ Nice, thorough answer! I was going to suggest something like this as well. Expecting an "auto" UV layout to work for a complex object shape is overly optimistic. :) $\endgroup$ Commented Oct 12, 2018 at 20:44
  • $\begingroup$ I second @DaleCieslak.. would it be interesting to render this at, say, 80x80, and blow it back up to 400x400, or is there a better way of undersampling? $\endgroup$
    – Robin Betts
    Commented Oct 12, 2018 at 20:48
1
$\begingroup$

For an alternative method, if you keep getting blurry images, you can always ramp the end result in the compositor.

Take your final art/animation and desaturate it (this is temporary and only to find out what your grayscale colors are). Now on a color ramp set to constant (don't attach it to anything yet) make stops of the different grayscales you have in the nonblurry parts of your images. Now you can hook up the original image to the ramp and it should remove all the blurry (it's still grayscale, but we'll change that shortly). You may need to adjust the positions of the stops to make sure none of your separate color sections vanish. Once you've got that sorted, either mix the original result with the color ramp result on color or change the grayscale stops into the pure colors you wanted in the first place.

$\endgroup$

You must log in to answer this question.

Not the answer you're looking for? Browse other questions tagged .