0
$\begingroup$

I'm currently working on an animation consisting of 200 objects (spheres) for a drone show. I was wondering what is the correct way to naturally animate all the objects when transitioning from a formation - or "shape" - to another, as I'm still struggling to understand if I'm following the correct way.

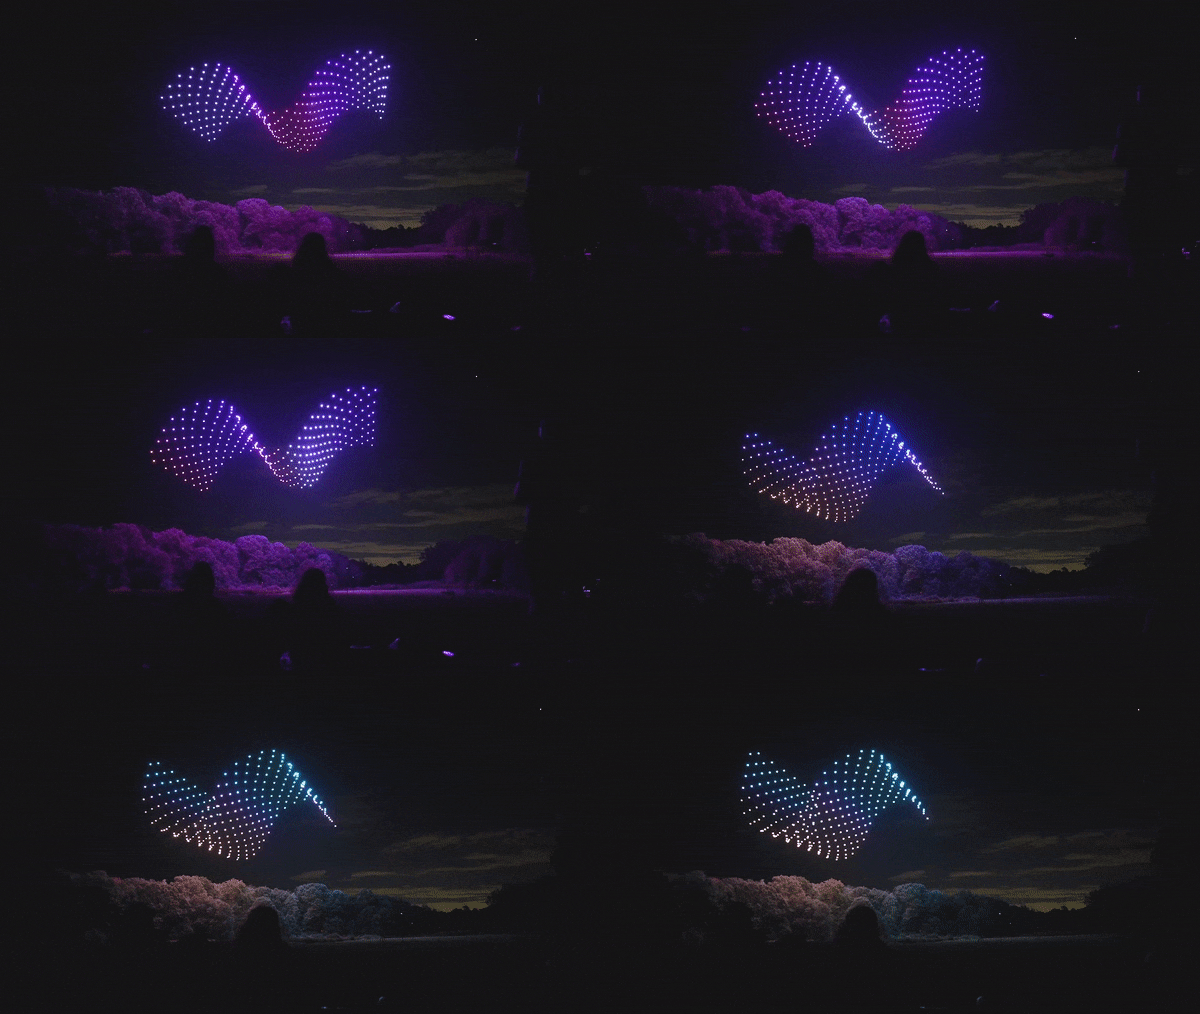
animation exemple

I've achieved a similar result by either manually keyframing and animating each row individually, thus manually simulating the "natural" movement - or by making each horizontal row follow an individual path. Unfortunately, as you can imagine, both methods are quite time consuming as I have to work on 200 or more objects one by one.

I've thought about the possibility of simulating and animating a cloth in 0 gravity and then snapping and constraining each object to the vertices of the cloth to follow its movement, but I'm not sure how to achieve this or if it is actually possible.

For similar "natural" effects, snapping and "pinning" the spheres to animated particles could also do the work, but again I don't have enough experience on Blender to know if this is possible to achieve.

If attached a simple .blender animation with 200 objects if you wanna check how it works or if you wanna try messing with it.

$\endgroup$
2
  • $\begingroup$ Instead of constraining a drone on each vertice, probably it would be easier to just instance the drones on the vertices. Maybe geo nodes can be used for that, or animation nodes. And dother could also help for animating the base mesh. $\endgroup$
    – Lauloque
    Commented Sep 14, 2022 at 6:39
  • $\begingroup$ You're talking about "when transitioning from a formation - or "shape" - to another" but this is not what you're showing in your image, we see a sort of wave, is it the effect you're looking for? $\endgroup$
    – moonboots
    Commented Sep 14, 2022 at 7:09

1 Answer 1

0
$\begingroup$

What I think you're asking is to have the spheres (drones) "morph" from one shape to another. For this you can use Shape Keys.
The basic premise here is to use a mesh as a particle emitter, emitting particles from it's vertices. Then morph the shape of the vertices using shape keys.

A simple example is as follows:

Add a cube, give it a subdivision surface modifier set to simple and apply it, this creates a bunch of vertices to use.
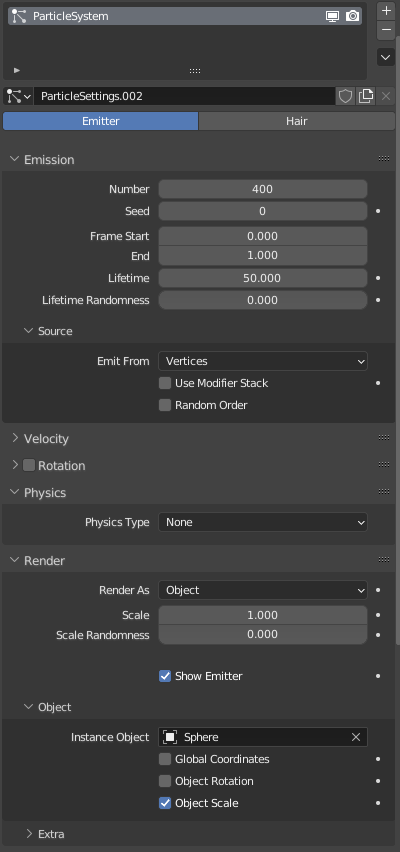
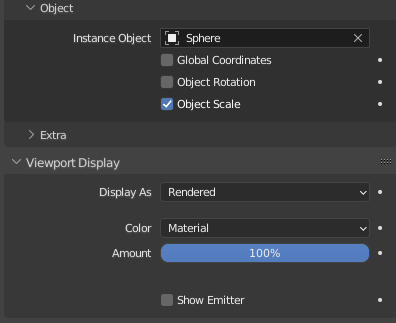
Add a particle system to the cube, set like so:
enter image description here

enter image description here

Having a slightly more number of particles than the objects number of vertices.

Add a sphere and move it out of the way/hide it, this will be what the particles will be shown as. Set the instance object in the particle system to the sphere and scale it to suit.

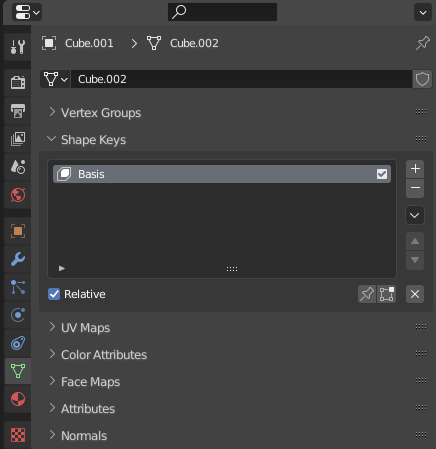
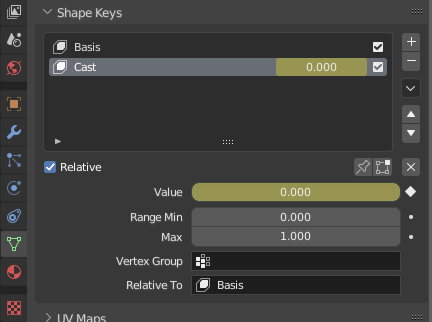
Next, add a shape key, this will create the base key that all the next keys will be based on.
enter image description here

Now you have a starting point.

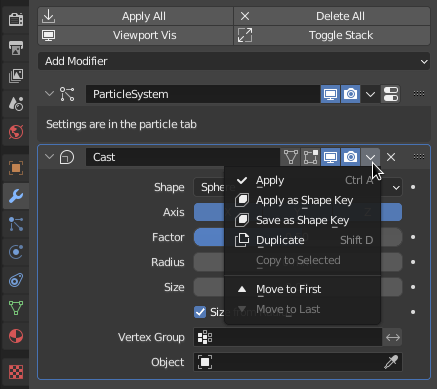
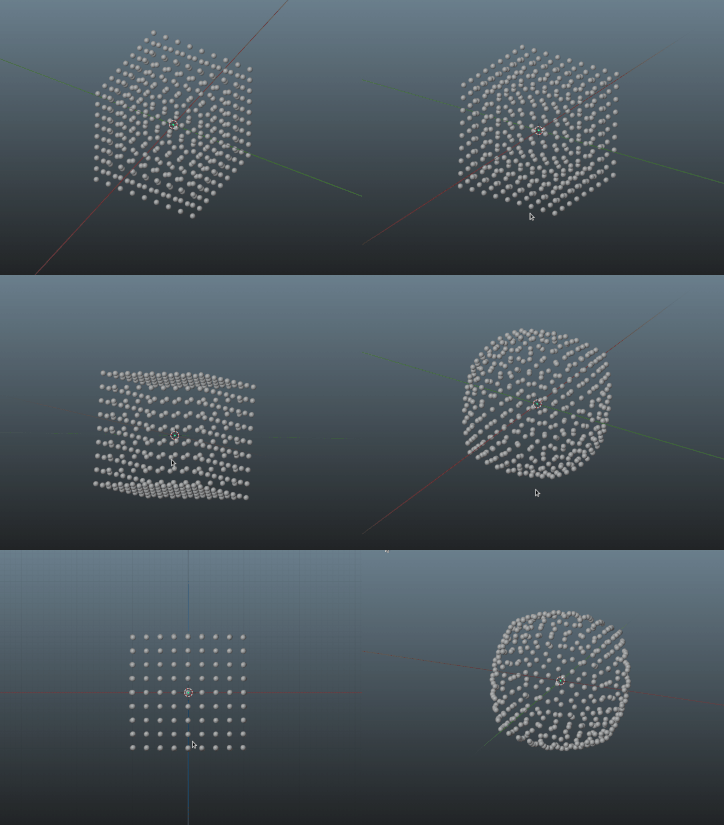
Next, in my case I've simply added a cast modifier to the cube to change it to a sphere, but you can move any vertex to any location at any frame to get the same result. After adding the modifier, apply it as a shape key
enter image description here

Now in the shape keys tab, with your timeline set to frame 1 set a keyframe on the value of the new shape key
enter image description here
Then move to a new frame, say frame 50 and set the value to 1.000 and add another keyframe.

Now your cube should morph into a sphere taking the particles with it.

You could even use a shrinkwrap modifier to wrap one model to another and apply that as a shape key, being drones though this might cause all manner of crashes, but that's a problem for a different day 😁

For a bit of a simple crash course on Shape Keys I found this a good starting point all3dp.com/2/blender-shape-keys-simply-explained/

Happy Blendering!

enter image description here

$\endgroup$
3
  • $\begingroup$ Appreciate your reply. Although it provides useful information, I'm afraid I did not properly explain my question (perhaps I didn't use the correct terms) - my bad - but I've looked around some tutorials and I think I achieved what I wanted. I created a plane mesh with 200 vertices and added a Wave and Simple Deform modifiers to it, then animated it. Now I'm looking on how to parent each of the 200 spheres to each vertex on the Plane mesh so they copy the wavy motion on the plane, like the example I provided in my post. $\endgroup$
    – Johnny R.
    Commented Sep 14, 2022 at 21:38
  • $\begingroup$ Ah, I was looking at your .blend file thinking you wanted a way to do any type of transition. No probs, hope you get the result you are looking for ☺️ $\endgroup$
    – Psyonic
    Commented Sep 15, 2022 at 8:13
  • $\begingroup$ You can use the same particle setup with an animated wave modifier, if that helps $\endgroup$
    – Psyonic
    Commented Sep 15, 2022 at 9:14

You must log in to answer this question.

Not the answer you're looking for? Browse other questions tagged .