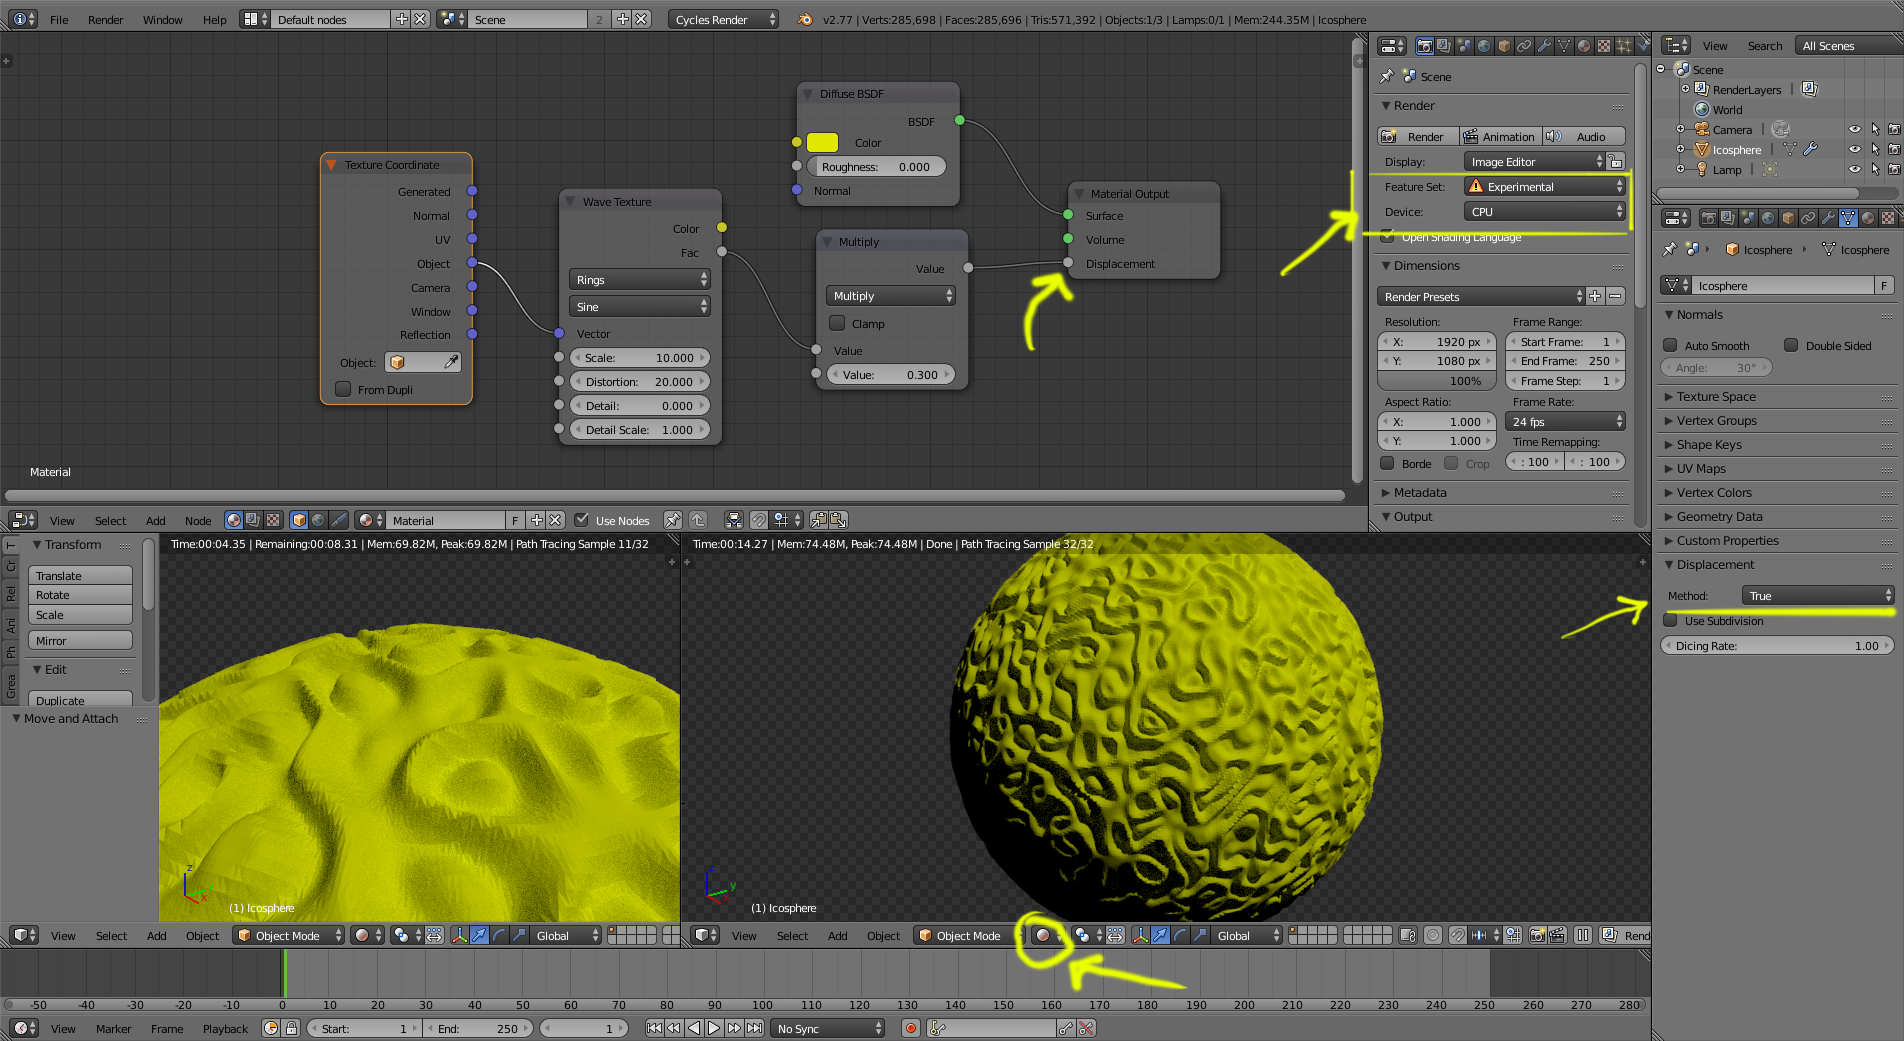
A UV Sphere is a better mesh to try this feature on (is made out of quads, and not triangles like the Ico Sphere and should subdivide better).
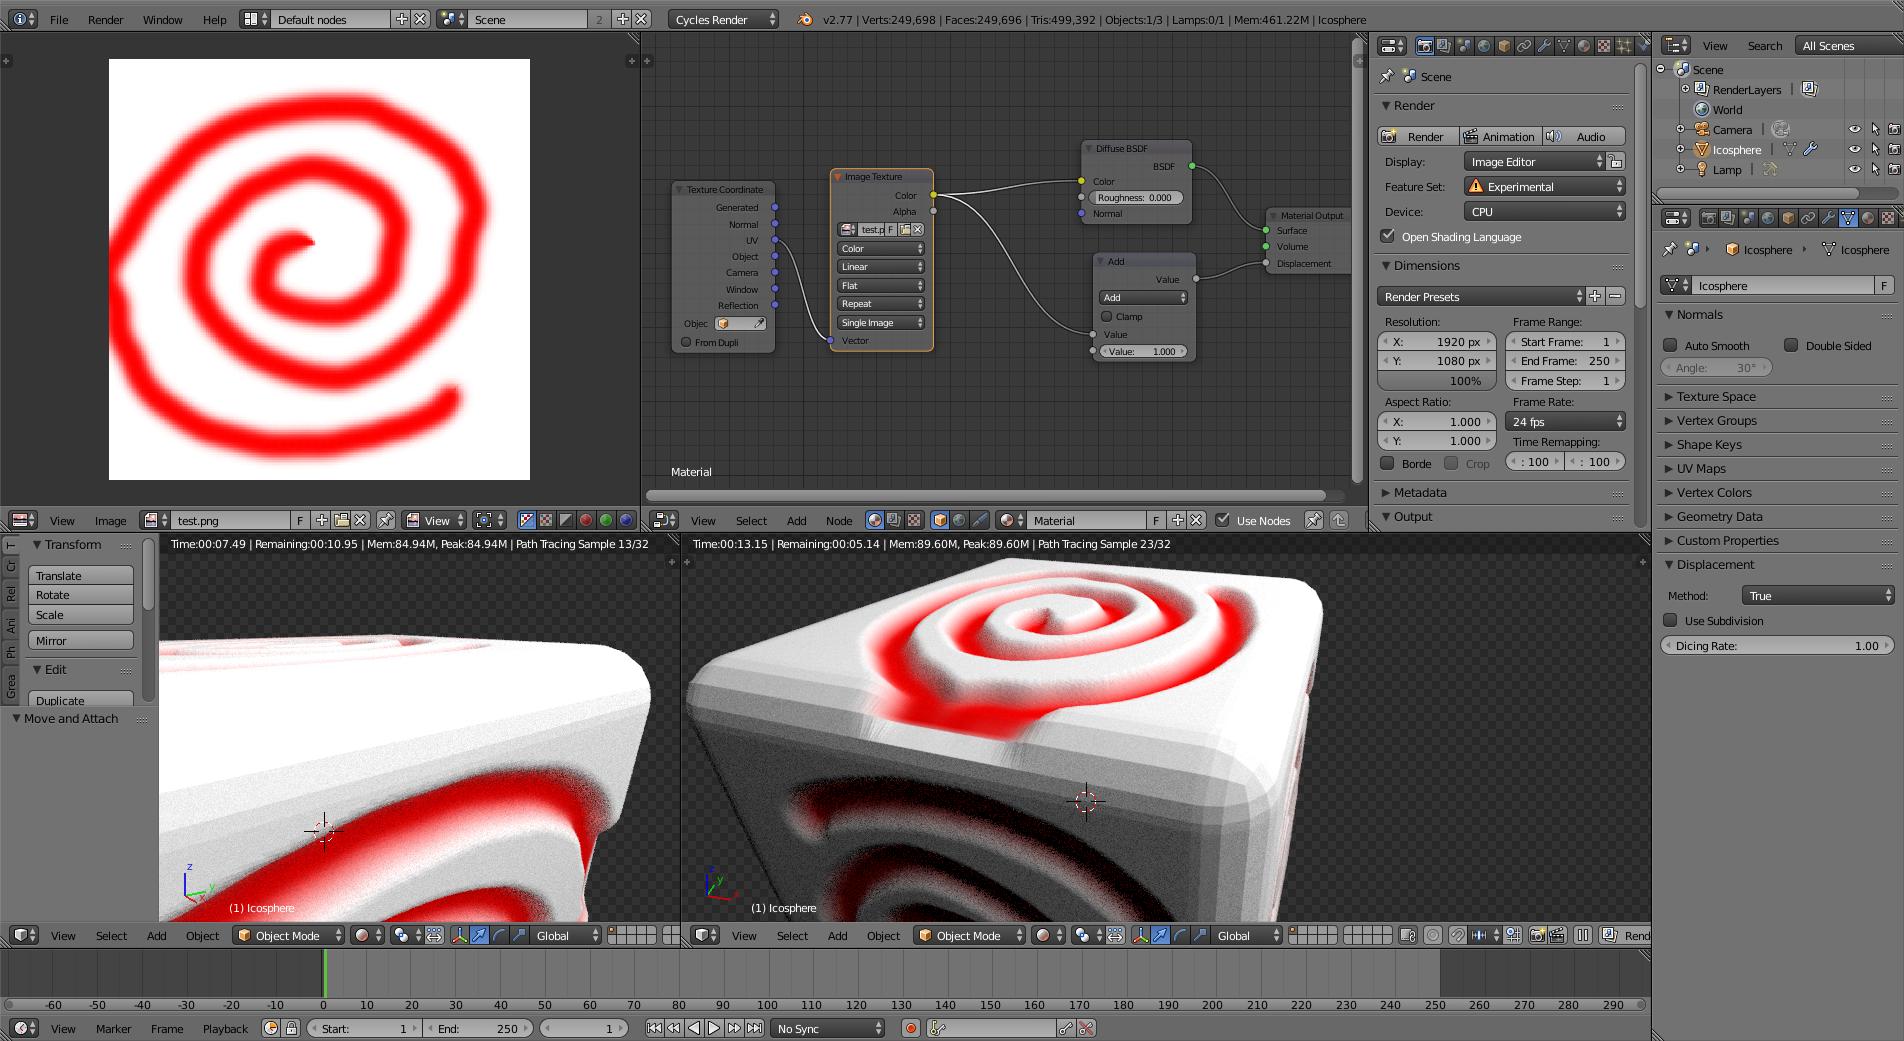
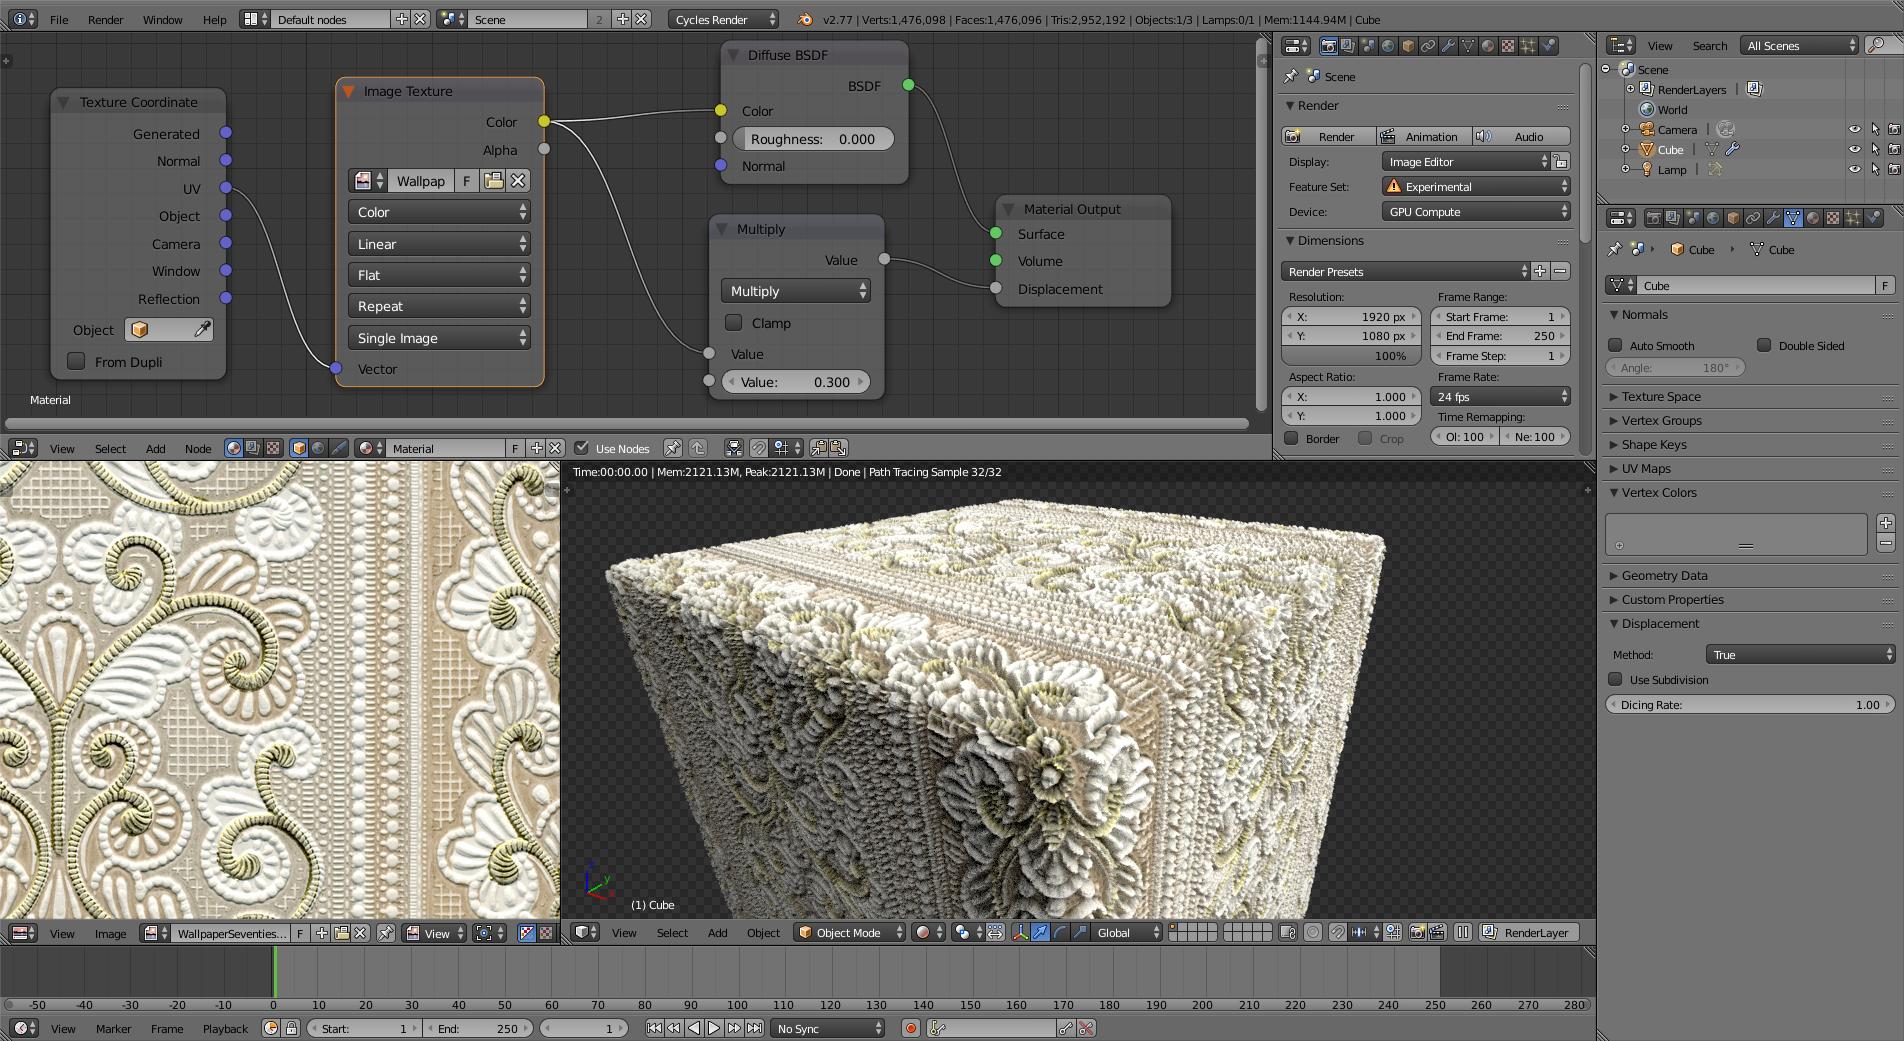
You need to plug the displacement texture to the displacement socket on the material output.
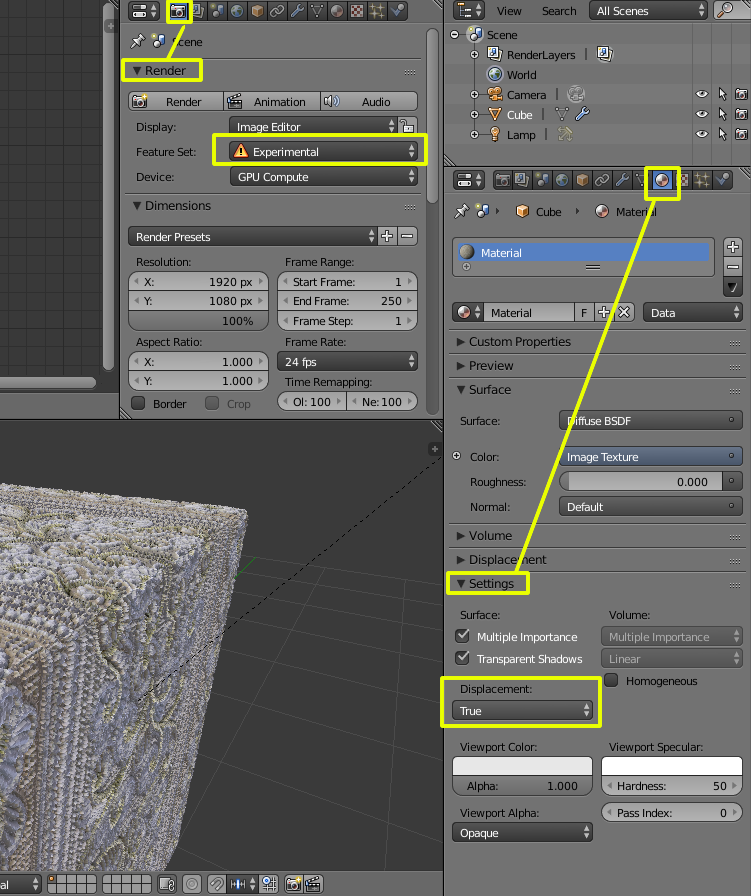
Render Feature set has to be in Experimental.
Displacement in the mesh section has to be set to True or Both.
To preview, you have to be in Rendered Mode in the 3D viewport. Other Shading modes will not reflect the displacement. Any changes made on the settings will not refresh in real time, you have to exit Rendered Mode (go to Solid or Wireframe Mode) and re-enter Rendered Mode to update (alternatively you can press the Tab key twice).
The more subdivisions you have on your mesh, the more detailed the displacement, but it will also have an impact on the performance of your computer.
Remember that this is still an "experimental" feature, so expect some unexpected results...
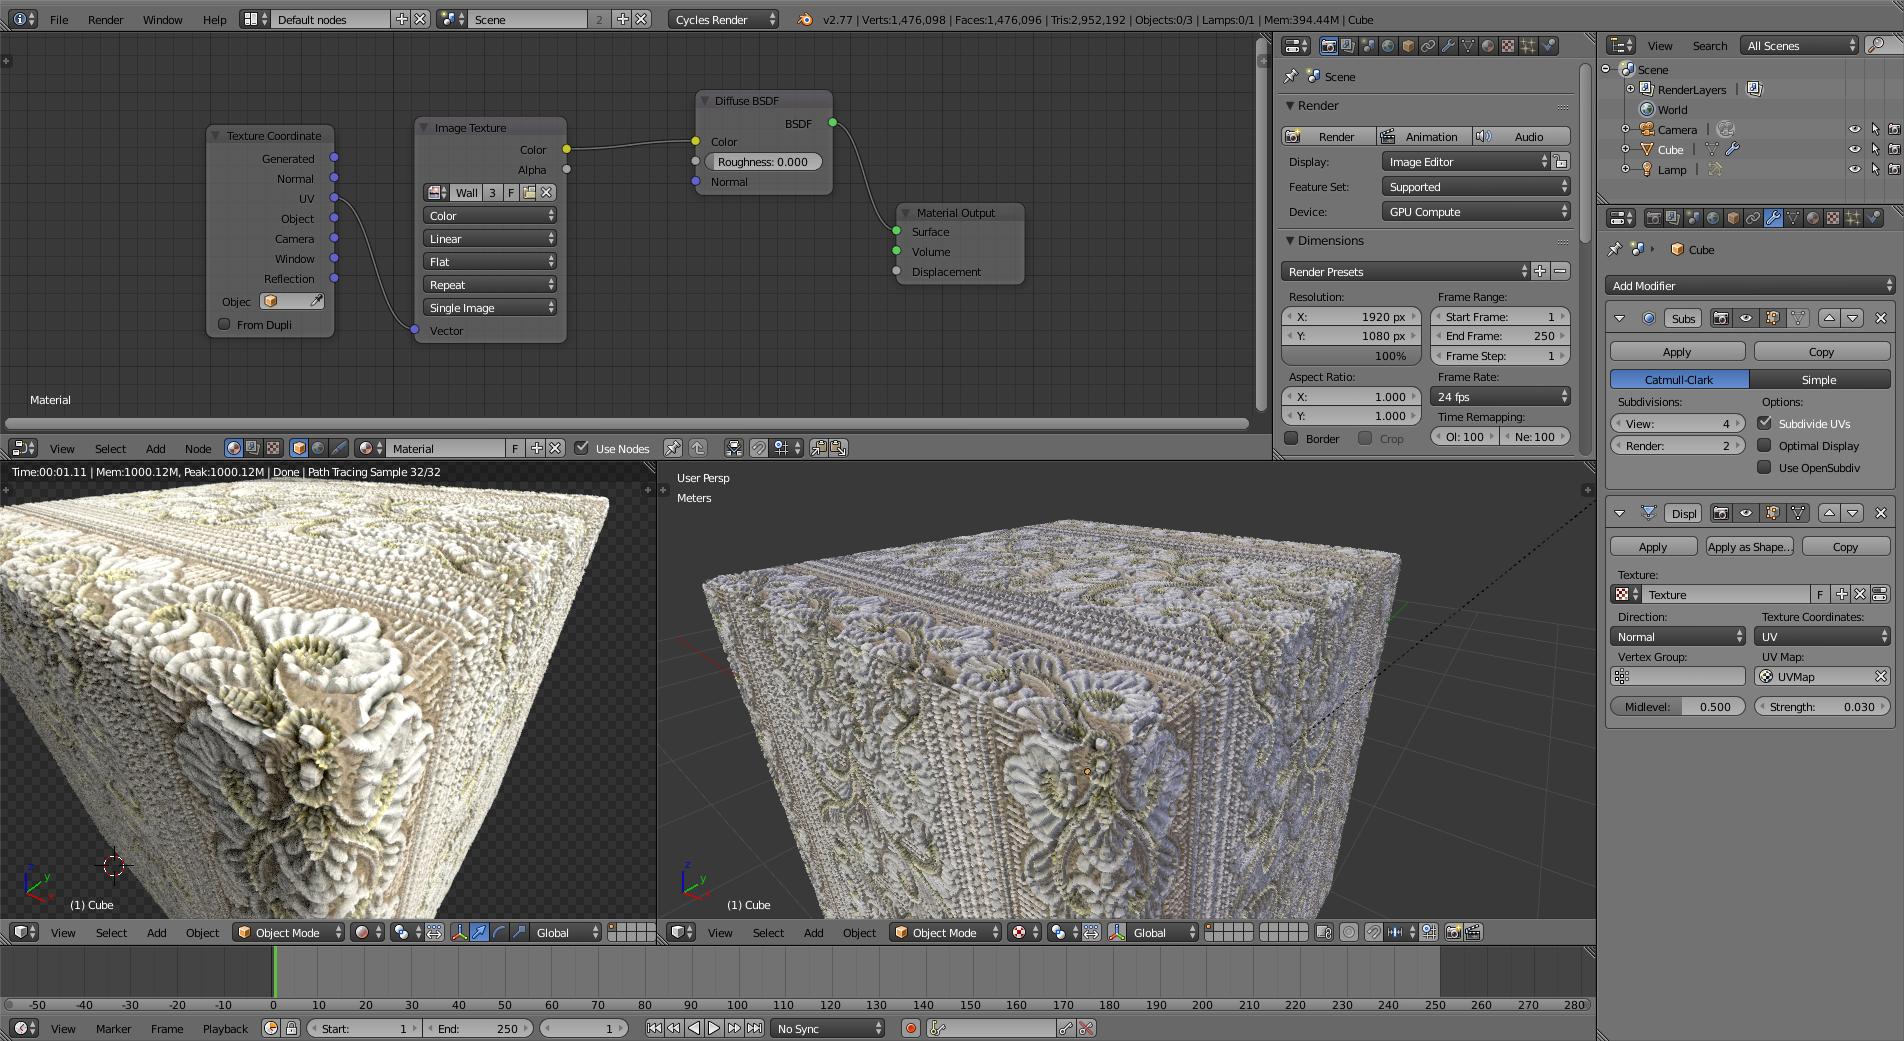
In my opinion, given that this feature is largely experimental, I'd still use a displace modifier. Is more predictable, responsive and easier to control. The results can be previewed in real time in solid and texture mode as well. Also, setting some subsurf modifiers in the right order can make things a lot nicer looking, and with a lot more control on the number of subdivisions. You can always apply the modifiers to make the displacement permanent, which you couldn't do using the displacement node.
Here's the same displacement, but with a displace modifier instead:
click on the image to enlarge
UPDATE: The option was under the Mesh properties at Blender version 2.76 but in more recent versions it has been moved to Material Properties > Settings > Displacement.

