How can I make a Bézier curve into a 3D-noodle-like structure (like a tube)? When I try, it keeps turning out like a rectangle with corners.
-
$\begingroup$ Did you see there is a way to make a tree with a built-in addon in Blender? See here: blender.stackexchange.com/questions/8688/… $\endgroup$– Thom Blair IIICommented Apr 18, 2014 at 2:27
-
1$\begingroup$ Great article! Also wrote a similar one that included using this same method but with tapering tubes as well: http://benchung.com/making-tubes-blender/ $\endgroup$– user13442Commented Mar 27, 2015 at 18:56
-
$\begingroup$ You can do simple tapers by adjusting the Radius of control points: Select any control point of the curve in Edit mode, then press Alt+S (Option+S on macOS). See docs.blender.org/manual/en/latest/modeling/curves/editing/… $\endgroup$– ArdaCommented Nov 11, 2021 at 20:17
2 Answers
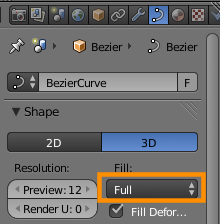
To make a tube, set the Fill to full in Curve > Shape:
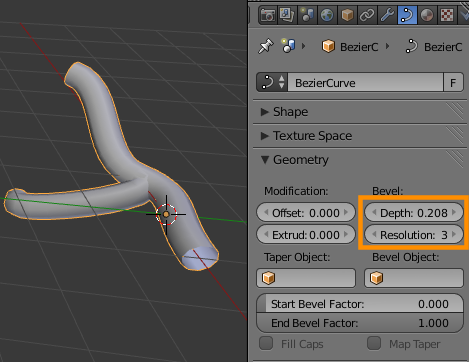
Then increase the bevel Depth and Resolution in Curve > Geometry:
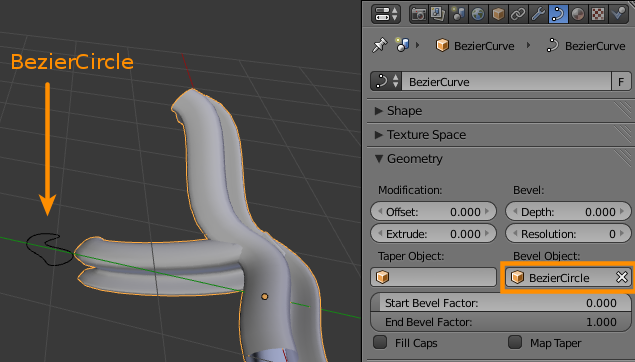
If you want a more complex/custom shape, you can use a bevel object:
-
$\begingroup$ Thanks so much!!! I had everything right except the resolution lol. Also how do I make it branch off? $\endgroup$– zallCommented Apr 18, 2014 at 1:32
-
$\begingroup$ I just duplicated a segment and then extruded it in another direction. This will work as long as you don't mind the branches not actually being connected to each other, but if you do want them connected, you might want to try using a mesh object with a skin modifier. $\endgroup$– gandalf3Commented Apr 18, 2014 at 1:34
-
1$\begingroup$ It would be better if you asked this as a separate question, asking multiple questions per post is discouraged. $\endgroup$– gandalf3Commented Apr 18, 2014 at 1:45
Make a Curve into a Tube
Add a Curve: SHIFTA -> Curve -> Bezier
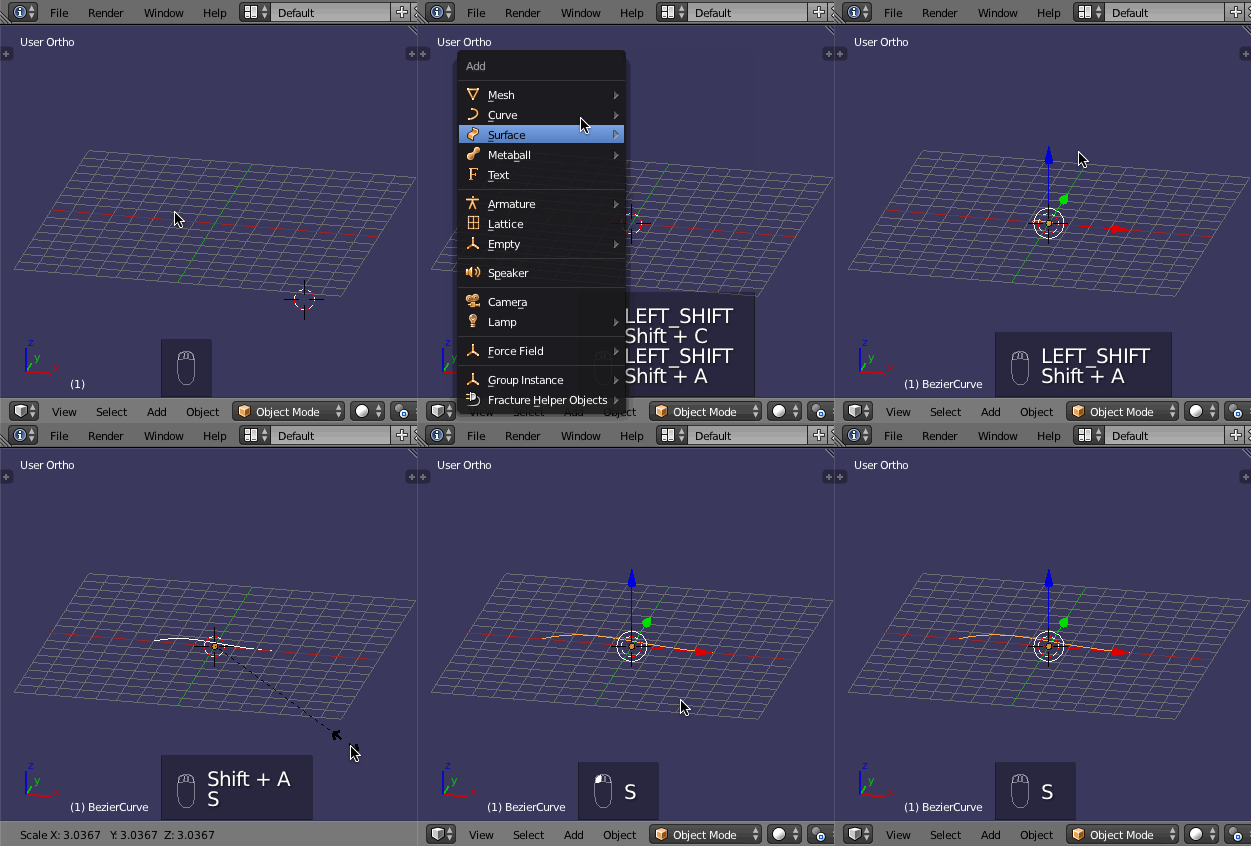
Now add a Circle Curve: SHIFTA -> Curve -> Circle
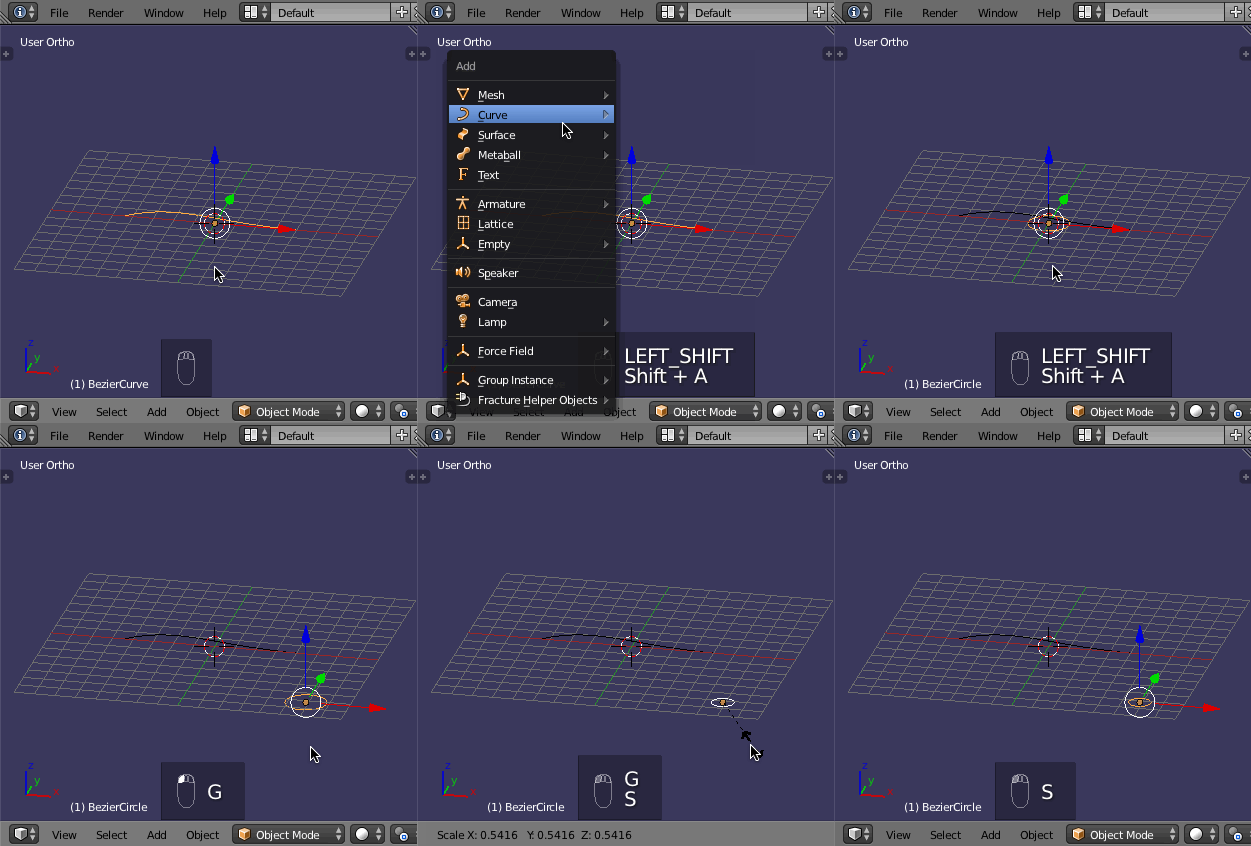
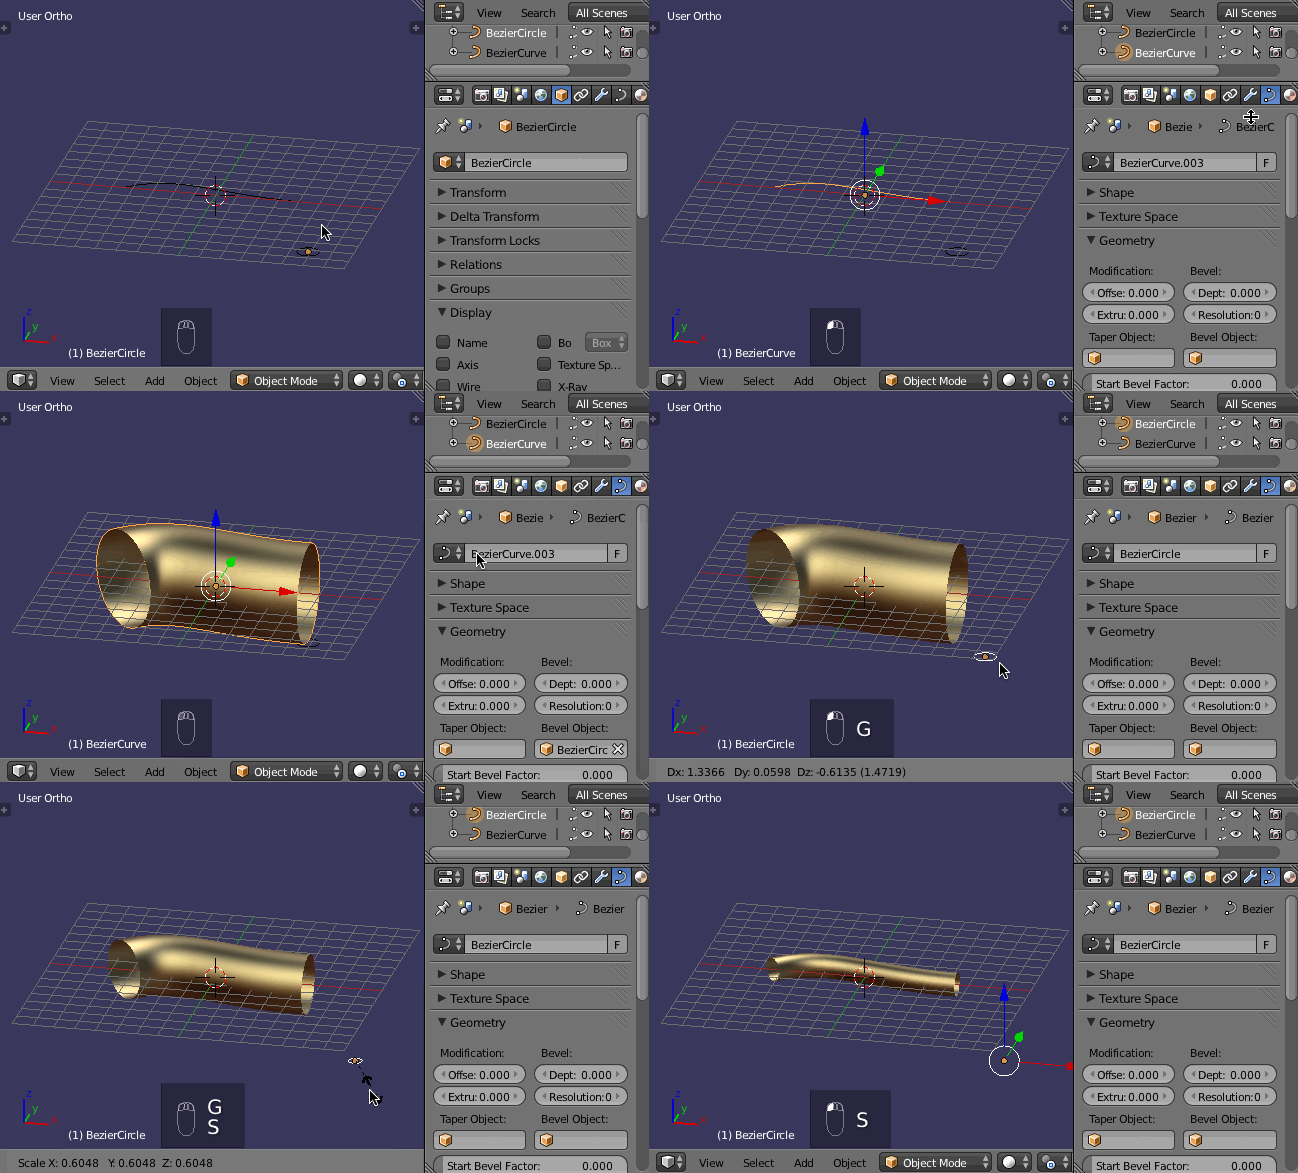
Now use the circle as the bevel object for the bezier curve:
Select the bezier curve
Object Properties window -> Curve tab -> set Bevel Object to the circle
Scale the circle until the tube is the size you want
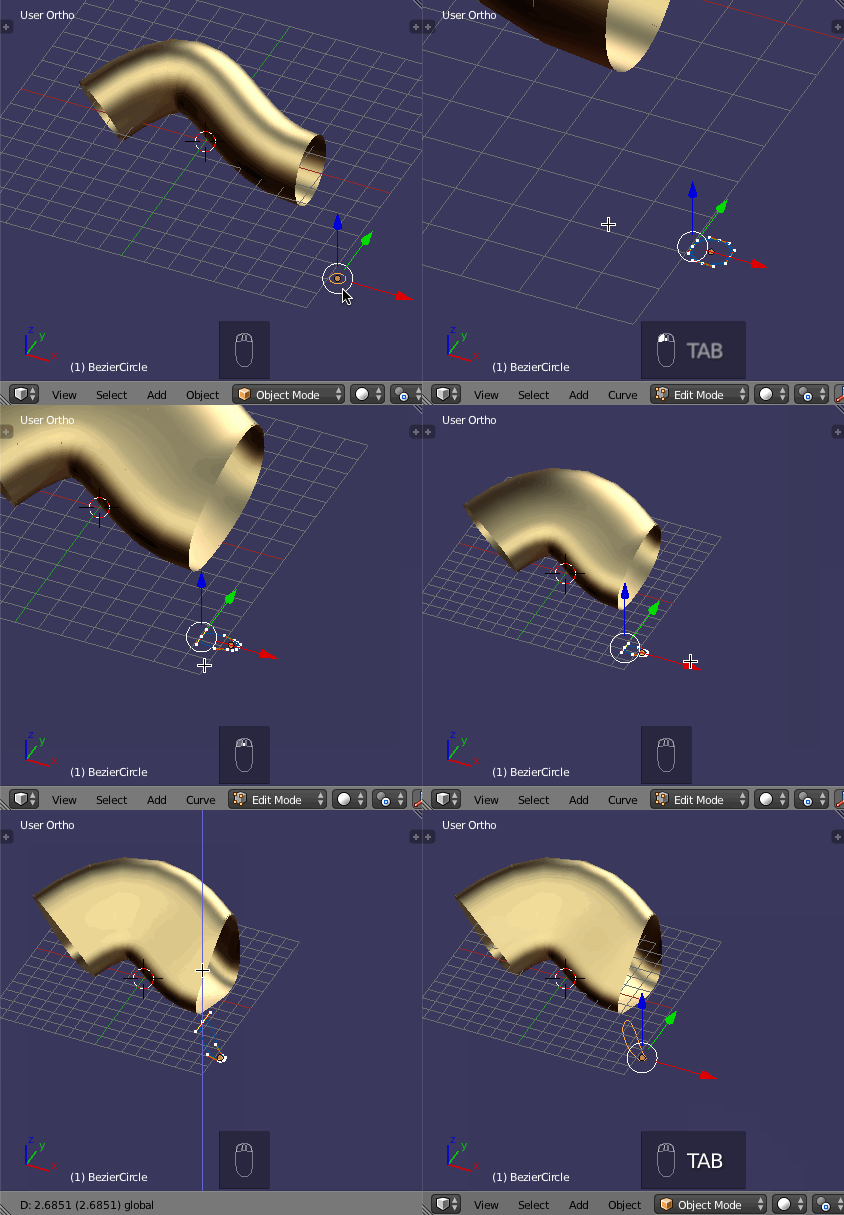
If you would then like to edit the shape of your tube, just edit the Bevel Object, which here is the circle:
-
$\begingroup$ I really like this tutorial! I just wonder, why is there such a big size difference between the "tube" and the bevel object? $\endgroup$– drmariodCommented Mar 9, 2016 at 6:34
-
$\begingroup$ Update Blender 4.0: after selecting the Bezier curve, in the Object Properties panel, expand the "Geometry" section, then expand the "Bevel" section, select "Object" button and, then, select the Bezier circle. Then, proceed like the rest of this answer. $\endgroup$ Commented Aug 8 at 17:14
