13
$\begingroup$

There's a blog post going around about a plugin that uses ImageMagick to stack Cycles renders together.

Why can't we do this in the compositor, and with a still frame?

  1. Is there a way to "get ahold of" the image that's in the buffer before it gets refreshed?

  2. Is there a way to average that image with the next refresh IN the compositor?

I've tried separating RGB, adding the components and dividing by two, and re-combining the RGB, but I think there's some clipping going on because that makes a very dark image.

It's relatively easy to animate the seed value, render a bunch of the same image, and average them together in GIMP, and that looks nice, but can we do this in the compositor and/or as we're rendering? I.e. average one sample with the previous one.

$\endgroup$
6
  • 1
    $\begingroup$ Focus Stacking refers to a different thing entirely - stacking multiple images with a shallow DoF in order to create a more deep DoF in a particular area. This is not the same as Image Stacking to combine noisy images in Cycles. $\endgroup$
    – Greg Zaal
    Commented Nov 21, 2013 at 8:46
  • $\begingroup$ I guess focus stacking is a lot easier to do ;-) Just don't use any DoF... $\endgroup$
    – Matt
    Commented Nov 21, 2013 at 15:59
  • $\begingroup$ @Matt AFAIK focus stacking is only used in photography, to use it in cycles (or any CG application) is pointless when you can just disable DOF. $\endgroup$
    – gandalf3
    Commented Nov 21, 2013 at 19:09
  • $\begingroup$ Yes, that's what I meant by saying it was "easier" ;-) It was a bad joke. $\endgroup$
    – Matt
    Commented Nov 21, 2013 at 22:01
  • 1
    $\begingroup$ @Matt ah, now I get it :) I edited your question and removed the mention of focus stacking to avoid confusing anyone. $\endgroup$
    – gandalf3
    Commented Nov 21, 2013 at 23:20

2 Answers 2

12
$\begingroup$

You can use the File Output node to do this, however there are some issues.

Node setup: (click for full size)

enter image description here

The pink highlighted value in the Math node is a Driver that returns the current frame number. You can quickly create this driver by typing #frame in the value field:

enter image description here

You can also do this for the Seed value in Render settings > Sampling as a quicker way to get a different seed each frame than animating.

Creating:

  1. Add the composite nodes and #frame drivers.

  2. Set the file output node Base Path to a directory that is not the main output location set in Render settings > Output.

  3. Optional. Change the subpath (i.e. the name, though you if you have / or, in case of Windows, \ characters in the subpath field, blender will create new sub-directories accordingly.) of the output image slot by selecting the file output node and pressing N> Properties region > Properties > File path in the Node editor:

    enter image description here

  4. Render the first frame. All that is actually necessary is that a file called image0001.png (where image is the subpath of the output image slot in the File output node, 0001 is the scene Start frame, and .png is the file extension for the output format selected in the File output node) is created in the location specified in the file output node.

  5. Click Open on the Image node and navigate to the placeholder file in the File output node output location, and click open.

  6. Change the image source to Image sequence, set Frames to the number of frames in the scene and set Offset to -1.

  7. Render the animation (CtrlF12)

  8. The last frame in the output location specified in the File output node will be the finished image.

How it works:

This node setup uses this solution for averaging the images:

If you render 5 images with 10 samples each, the second image should be mixed with the first with a factor of .5 (or an alpha of 50%). This will effectively result in a 20 sample image (as you pointed out, it's not quite the same as 20 rendered samples, but it's reasonably close), so the second image should be mixed with a factor of .33 (alpha of 33%) and so on.

The node setup uses the File Output node to output the averaged result of the previous frame and the next frame to a separate directory.

The images written to that directory are read by the Image sequence node on the next frame and used for averaging with the now current frame. The result is again written to that location with the file output node, read again, averaged with the current frame, written again, and so on.

Problems:

On the first frame there is no image for the image sequence node to read, this should not be a problem since on frame one the mix factor is 1/1 = 1 so only the raw render will be used.

However, there is a bug/limitation that causes the file output node to output a completely transparent (or black if you are only saving RGB channels) image for frame one, due to the lack of an image for the image sequence node to read. The image sequence node then gives a transparent result, which sets the transparency of the mixed result to 0.

Also see this related post.

This causes a problem next frame when the image is mixed with the false black/transparent image, which causes darkening/decrease in opacity. This darkening will be quickly mixed out to be unnoticeable in subsequent frames, but it does mean that the image is not 100% accurate.

As a workaround, you can either:

  • Add a Mask node and an Alpha Over node to to ensure the top input of the Mix node is always filled and always 100% opaque: (click for full size)

    node setup

  • Or render the first frame by itself and replace the incorrect black image with the raw render of the first frame manually. Then render the animation starting from frame 2.

Result:

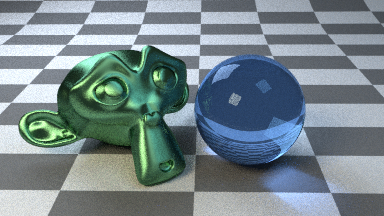
Rendering 15 frames at 10 samples gives this result:

A single 10 sample frame:

enter image description here

The final combined result:

enter image description here

A 150 sample render:

enter image description here

$\endgroup$
9
  • $\begingroup$ Would be nice to show a render using 150 (15x10) to prove that your method is indeed the same. $\endgroup$
    – Greg Zaal
    Commented Nov 21, 2013 at 8:47
  • $\begingroup$ Awesome!! This is exactly what I was hoping to discover! I'm going to do some experimentation and see what I can do with it. Ultimately, Cycles does something really similar already, so there's not much point to it, but I have noticed that the outliers seem to be much less extreme than what Cycles produces, i.e. the image will still be just as noisy, but it will suppress radical pixels (fireflies of all colors ;-) ) resulting in a pre-render that's a little easier to judge. $\endgroup$
    – Matt
    Commented Nov 21, 2013 at 15:42
  • $\begingroup$ @gandalf3 IMHO, the bug you mentioned seems not strictly a bug. That's because the offset value you set is -1, and the relevant frame# to that is 0000, which doesn't exist in the sequence folder, I'm afraid, which causes the Mix node cannot receive a valid data for the first image input. So, I think a better way is to render an image0000.png in step 4, which will solve the black issue, and no need to render from Frame 2, too. FYI. $\endgroup$ Commented Nov 21, 2013 at 19:13
  • $\begingroup$ @LeonCheung I think it is a bug, as the viewer node gives the correct result. The mix node should not need to receive any data for the first frame, because it only uses the renderlayer input (mix factor of 1) $\endgroup$
    – gandalf3
    Commented Nov 21, 2013 at 19:37
  • $\begingroup$ @gandalf3 try toggling "Use Alpha" on Viewer node, to see if you still get it. And, Unless you get it from the preview area right ON the View node, then somewhere in the node tree is still problematic. I'm certain that you cannot really get it from Viewer node. However, it could be possible that what you saw is not from the File Output folder, but the pre-rendered output in the real render (or temp) folder. $\endgroup$ Commented Nov 21, 2013 at 19:59
6
$\begingroup$

gandalf3's answer is great, however when you already have a sequence of images rendered out the setup is very simple:

Node Overview

Nodes

The red Value node is where you enter the number of images you're stacking. The end result will be the average of all the images.

To quickly create those Add nodes, I recommend the Node Efficiency Tools addon (which can be enabled in the User Preferences) - just select the images and press Ctrl+Plus(+)

$\endgroup$
3
  • 1
    $\begingroup$ Interesting. How does adding compare to mixing? How does it compare to a straight render? Care to add some examples? $\endgroup$
    – gandalf3
    Commented Nov 22, 2013 at 8:01
  • 2
    $\begingroup$ It's exactly the same as mixing - it's just basic math: my method is like (5+5+5+5)/4=5, where the mix method is like (0.25*5)+(0.25*5)+(0.25*5)+(0.25*5)=5.There are enough examples I think $\endgroup$
    – Greg Zaal
    Commented Nov 22, 2013 at 11:21
  • 1
    $\begingroup$ I could be mistaken, but the plugin blog post mentioned in the question is my Progressive Animation Render addon: adaptivesamples.com/2013/07/22/… - I've been meaning to take out the requirement for ImageMagick and use the compositor instead, but I haven't had the time to look into it properly yet. $\endgroup$
    – Greg Zaal
    Commented Nov 22, 2013 at 11:22

You must log in to answer this question.

Not the answer you're looking for? Browse other questions tagged .